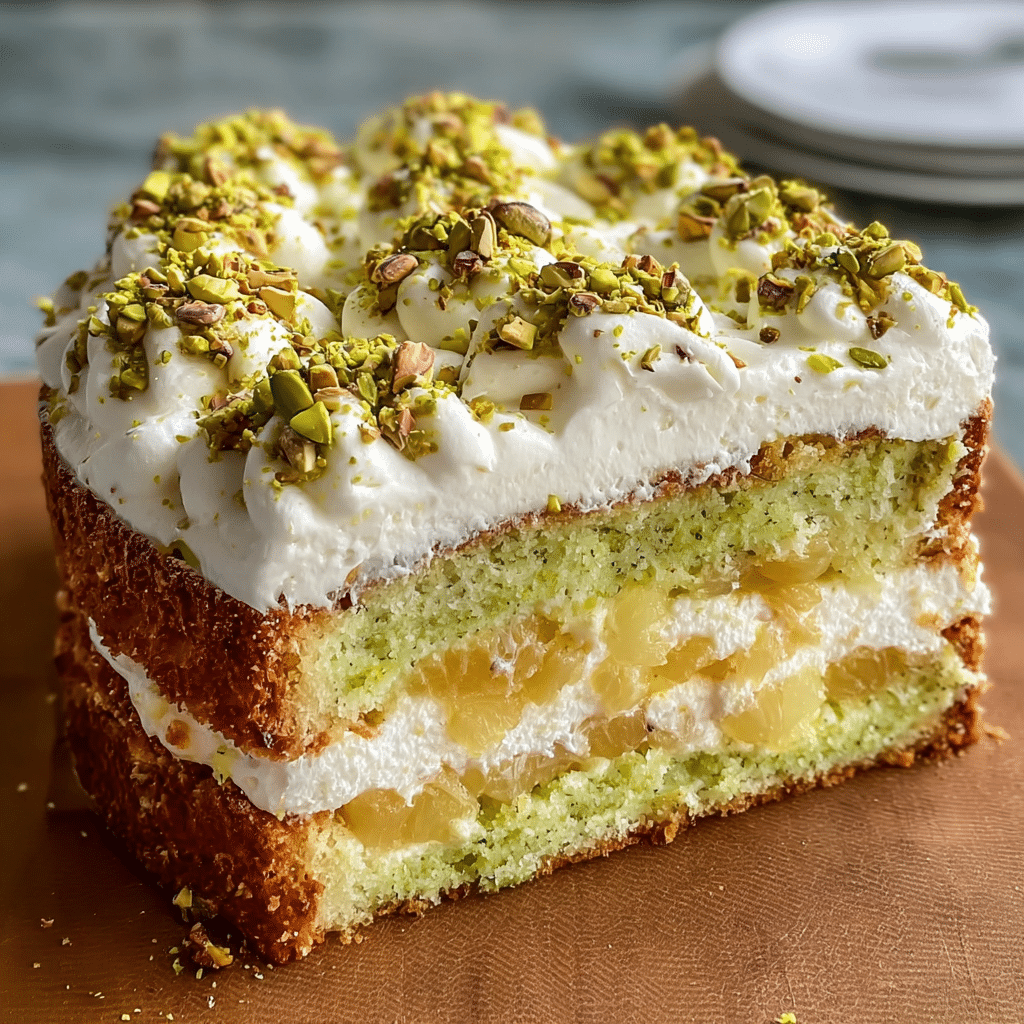
A cool, creamy, no-fuss dessert layered with pistachio pudding, pineapple, and fluffy whipped topping — every bite is pure bliss!
Yield: 12 servings
Temp: No-bake (refrigerator dessert)
Time: 20 minutes prep + at least 2 hours chill
Sometimes you want dessert to feel like a little vacation on a plate—something light, creamy, and refreshing, but still rich and satisfying. That’s exactly what Pistachio Pineapple Dream Cake delivers. With tropical pineapple sweetness, nutty pistachio flavor, and a cloud of whipped topping on a buttery graham cracker crust, this no-bake dessert is the kind of treat that disappears quickly at potlucks, parties, and family dinners.
Unlike traditional baked cakes, this “dream cake” is all about layers rather than sponges or crumb structures. You start with a simple press-in crust, then add a silky cream cheese layer, a pistachio-pineapple pudding layer, and finally a fluffy whipped topping with crunchy pistachios on top. There’s no oven involved—just a mixing bowl, a whisk, and a little chilling time.
Every forkful gives you a bit of everything: the buttery crunch of the crust, the soft tang of the cream cheese, the sweet-tart pops of pineapple, and the smooth pistachio pudding. It’s cool, creamy, and light enough to enjoy after a big meal, yet indulgent enough to feel like a celebration.
Whether you’re hosting a summer barbecue, planning a holiday dessert table, or simply craving something special that doesn’t require turning on the oven, Pistachio Pineapple Dream Cake is a recipe you’ll come back to again and again.
Key Ingredients First
At the heart of this recipe are three simple, powerful ingredients that create its signature flavor and texture:
- Pistachio instant pudding mix (1 box, 3.4 oz)
This is where the “dreamy” flavor begins. Pistachio pudding is lightly nutty, slightly sweet, and beautifully green. It brings both flavor and structure to the creamy middle layer, helping it set up into a smooth sliceable filling. - Crushed pineapple (1 can, 20 oz, drained)
Pineapple adds brightness, juiciness, and a tropical twist. The gentle acidity balances the sweetness of the pudding and whipped topping, while the tiny pineapple bits create pockets of fruity freshness in every bite. - Whipped topping (1 container, 8 oz)
Light, airy, and stable, whipped topping is the “cloud” that holds everything together. It lightens the cream cheese layer, forms the final top layer, and gives the dessert that fluffy, mousse-like texture that makes each slice feel luxurious yet not heavy.
These three ingredients work together to create a no-bake dessert that tastes like a cross between a pistachio icebox cake and a pineapple cream pie—cool, refreshing, and incredibly easy.
Core Ingredients for Making the Recipe
To prepare this Pistachio Pineapple Dream Cake, you’ll need simple, easy-to-find ingredients. Here’s everything broken down by layer:
For the Crust
- 2 1/2 cups graham cracker crumbs
- 1/2 cup unsalted butter, melted
- 1/4 cup granulated sugar
This combination creates a buttery, slightly sweet base that holds the creamy layers and gives the dessert structure and crunch.
For the Creamy Base Layer
- 1 package (8 oz) cream cheese, softened to room temperature
- 1/2 cup powdered sugar
- 1 cup whipped topping (from the 8 oz container)
This layer adds a gentle tang and richness that balances the sweetness of the pudding and pineapple.
For the Pistachio Pineapple Dream Layer
- 1 box pistachio instant pudding mix (3.4 oz)
- 1 1/2 cups cold milk (whole or 2% works best)
- 1 can crushed pineapple (20 oz), well drained
- 1/4–1/2 cup chopped shelled pistachios (optional, for extra crunch and flavor)
This is the star layer, where the pistachio and pineapple come together to create a colorful, creamy filling.
For the Topping and Garnish
- Remaining whipped topping from the 8 oz container (about 2 cups)
- 2–3 tablespoons chopped pistachios, for garnish
- Optional: maraschino cherries, toasted coconut flakes, or a sprinkle of crushed graham crackers for decoration
Step-by-Step

This recipe is wonderfully simple, and each layer builds on the last. Follow these steps for a perfect, sliceable, dreamy dessert.
1. Prepare the Pan
Lightly grease a 9×13 inch baking dish or line it with parchment paper, leaving some overhang for easy lifting. This helps the slices come out cleanly and keeps the crust from sticking.
2. Make the Graham Cracker Crust
- In a medium bowl, combine the graham cracker crumbs, granulated sugar, and melted butter.
- Stir until the crumbs are evenly moistened and resemble wet sand.
- Pour the mixture into the prepared baking dish.
- Using the back of a spoon or the bottom of a flat glass, press the crumbs firmly and evenly into the bottom of the pan to form a compact crust.
Try to get the crust even all the way to the corners and edges so every slice has a solid base.
- Place the crust in the refrigerator to chill while you prepare the next layer. This helps it firm up.
3. Prepare the Creamy Base Layer
- In a large mixing bowl, beat the softened cream cheese until smooth and lump-free.
- Add the powdered sugar and continue beating until fully combined and creamy.
- Gently fold in about 1 cup of whipped topping using a spatula. This lightens the cream cheese mixture, making it fluffy and easy to spread.
You should end up with a silky, pale cream mixture that holds soft peaks.
- Remove the chilled crust from the fridge.
- Spread the cream cheese mixture evenly over the crust, using a spatula to reach all the edges.
Try to keep this layer smooth and even—this helps the next layer sit nicely and gives each slice clean, distinct layers.
- Return the pan to the refrigerator while you prepare the next layer.
4. Make the Pistachio Pineapple Dream Layer
- In a clean bowl, whisk together the pistachio instant pudding mix and cold milk.
- Whisk for 1–2 minutes until the mixture starts to thicken. It should be creamy but not fully set yet.
- Gently fold in the well-drained crushed pineapple. Make sure to press out or drain excess juice so the layer doesn’t become watery.
- If you’re using chopped pistachios, fold them in as well for extra crunch and flavor.
The mixture will be a beautiful soft green with little golden pineapple bits and pistachio flecks throughout.
- Take the pan from the refrigerator and carefully spoon the pistachio pineapple filling over the cream cheese layer.
- Spread it out evenly, being gentle so you don’t disturb the layer underneath.
At this point, your dessert already looks like a dreamy, layered treat.
5. Add the Whipped Topping Layer
- Spoon the remaining whipped topping over the pistachio pineapple layer.
- Spread it out in an even layer using a spatula or the back of a spoon. You can make swirl patterns or keep it smooth, depending on your preferred look.
The whipped topping acts like a soft, fluffy “frosting” that seals everything in and keeps the dessert moist and creamy.
6. Garnish the Top
Now for the fun part—decorating!
- Sprinkle chopped pistachios over the top for color and crunch.
- Add a border of crushed graham crackers or toasted coconut for extra texture.
- Place maraschino cherries or small pineapple tidbits in neat rows or a scattered pattern for a retro dessert vibe.
These little touches make the cake look as good as it tastes, especially if you’re serving it at a gathering.
7. Chill Until Set
Cover the pan loosely with plastic wrap or foil and refrigerate for at least 2 hours, or up to overnight.
Chilling allows:
- The pudding to fully set,
- The layers to firm up, and
- The flavors to meld together into that dreamy, spoon-soft yet slice-ready texture.
8. Slice and Serve
When you’re ready to serve:
- Run a sharp knife along the edges of the pan if needed.
- If you used parchment paper, lift the dessert out onto a cutting board.
- Cut into 12 squares (or smaller pieces if you’re serving a crowd).
Use a clean, sharp knife and wipe it between cuts for the neatest slices. Serve chilled and enjoy the creamy, nutty, tropical flavors in every bite.
Flavor Variations and Creative Twists
One of the best things about Pistachio Pineapple Dream Cake is how easily you can customize it. Here are some fun variations:
1. Coconut Dream Version
- Mix 1/2 cup toasted coconut flakes into the pistachio pineapple layer.
- Sprinkle extra toasted coconut over the top along with the pistachios.
This version leans into the tropical profile and gives the dessert a subtle chewy texture that pairs perfectly with the creamy layers.
2. Extra Nutty Pistachio Crunch
- Increase the chopped pistachios in the filling to 3/4 cup.
- Add an additional sprinkle of pistachios on top for a more pronounced nutty bite.
This is great for pistachio lovers who want a stronger nut flavor and a bit more crunch in every forkful.
3. Oreo or Vanilla Wafer Crust
Swap out the graham crackers for crushed vanilla wafers or crushed Golden Oreos for a sweeter, softer crust with a slightly different flavor profile. It adds a fun twist and pairs beautifully with both pistachio and pineapple.
4. Lime Zest Brightness
Add 1–2 teaspoons of finely grated lime zest to the pistachio pudding or pineapple layer for a zesty lift. It won’t make the dessert sour, but it will bring a fragrant, citrusy brightness that cuts through the richness.
5. Different Pudding Flavors
While pistachio gives this dessert its signature character, you can experiment with other flavors:
- Vanilla pudding for a more classic pineapple cream dessert.
- Coconut pudding for a stronger tropical theme.
- Lemon pudding for a tangy, refreshing twist.
Keep the pineapple and whipped topping the same, but let the pudding flavor shift the overall personality of the dessert.
How to Serve Pistachio Pineapple Dream Cake
This dessert is incredibly versatile and suits many occasions:
- After a big meal: Its cool, creamy texture and light feel make it perfect after a hearty dinner or barbecue.
- On a dessert table: Cut into smaller squares and serve as part of a dessert buffet. The pretty green color and garnishes make it stand out among other sweets.
- For parties or potlucks: It travels well in the pan, and you can slice it on-site. It’s easy for guests to pick up a piece and enjoy without needing complicated plating.
- As a make-ahead treat: Because it needs chilling time, it’s ideal when you want dessert ready before guests arrive.
You can serve each slice as-is or dress it up with:
- A drizzle of chocolate or caramel sauce on the plate,
- A small dollop of extra whipped topping on the side,
- A slice of fresh pineapple or a cherry on top for color,
- A sprinkling of finely chopped pistachios at the last moment for extra crunch.
Serve it cold straight from the refrigerator—the temperature makes the flavors pop and keeps the layers firm and satisfying.
Tips & Variations for Best Results
A few simple tips can take your Pistachio Pineapple Dream Cake from good to unforgettable:
1. Drain the Pineapple Very Well
Excess pineapple juice can make the pistachio layer too loose. Press the crushed pineapple gently in a sieve or use the back of a spoon to remove extra liquid. You want moist fruit, not watery.
2. Use Cold Milk for the Pudding
Cold milk helps the instant pudding set properly and quickly. If the milk is warm, the pudding might remain too thin and not firm up as nicely in the fridge.
3. Soften the Cream Cheese Completely
If the cream cheese is too cold, it will be lumpy and difficult to mix smoothly. Let it sit at room temperature for 20–30 minutes before starting, or soften it gently in the microwave in very short bursts.
4. Don’t Skip the Chill Time
The dessert may look set after 30–60 minutes, but the full 2 hours (or more) in the fridge really makes a difference. The layers become sliceable, the flavors marry, and the texture becomes perfectly creamy and cohesive.
5. Cut with a Sharp Knife
For the cleanest slices, use a sharp knife and wipe it with a damp cloth between cuts. This keeps the layers defined and the top looking neat.
6. Adjust Sweetness If Needed
If you prefer a less sweet dessert:
- Reduce the powdered sugar in the cream cheese layer slightly.
- Use unsweetened coconut if adding coconut.
On the other hand, if you love sweeter desserts, you could add a tablespoon or two of sugar to the crust or a light drizzle of sweet sauce when serving.
Storage, Make-Ahead, and Freezing
Storing in the Refrigerator
- Cover the pan tightly with plastic wrap or foil.
- Store in the refrigerator for up to 3–4 days.
The crust may soften a bit over time but will still be delicious, and the flavors will continue to meld and deepen.
Make-Ahead Option
This dessert is perfect for making ahead:
- Prepare it the night before an event.
- Let it chill overnight for a fully set, incredibly flavorful cake.
The longer chill time improves the texture and makes serving even easier.
Freezing the Cake
Yes, you can freeze Pistachio Pineapple Dream Cake:
- Chill the dessert first so it sets.
- Cut into individual squares.
- Wrap each square tightly in plastic wrap.
- Place the wrapped pieces in an airtight freezer-safe container or freezer bag.
Freeze for up to 2–3 months. Thaw in the refrigerator before serving. The texture remains pleasant, though the whipped topping may be slightly softer after thawing.
Final Thoughts
Pistachio Pineapple Dream Cake is the kind of dessert that feels nostalgic even if you’re tasting it for the first time. It has that classic potluck charm, the creamy ease of an icebox dessert, and the playful mix of pistachio and pineapple that keeps each bite interesting.
There’s no need for mixers and complicated techniques; it’s mostly stirring, layering, and chilling. Yet the final result looks impressive and tastes like something you worked on much longer than 20 minutes. The layers of buttery crust, tangy cream cheese, pistachio pudding, and juicy pineapple, all crowned with a cloud of whipped topping and a sprinkle of crunchy pistachios, create a dessert that’s equal parts comforting and refreshing.
Whether you’re serving it for a family dinner, a festive holiday, or a simple weekday treat, this no-bake cake proves that dessert doesn’t have to be fussy to be unforgettable. It’s the kind of recipe you’ll save, share, and remake whenever you need a cool, creamy, crowd-pleasing sweet.
FAQ
Can I use fresh pineapple instead of canned?
Yes, you can use fresh pineapple, but there’s one important rule: it must be cooked or canned for the pudding to set correctly. Fresh raw pineapple contains enzymes that can interfere with the pudding thickening properly. If you want to use fresh pineapple, lightly cook it first or use canned crushed pineapple for the most reliable results.
Can I use a different flavor of pudding?
Absolutely. While pistachio is the star and gives this dessert its signature look and flavor, you can experiment with:
- Vanilla pudding for a more neutral, creamy flavor.
- Coconut pudding for a strongly tropical vibe.
- Lemon pudding for a bright, tangy dessert.
Just keep the method the same and still combine the pudding with the drained pineapple for the fruity layer.
Do I have to use whipped topping, or can I use real whipped cream?
You can use real whipped cream, but whipped topping is more stable and holds up better for several days in the fridge. If using fresh whipped cream, whip it to firm peaks with a bit of powdered sugar for stability and be aware that the dessert is best enjoyed within 1–2 days.
Can I reduce the sweetness in this recipe?
Yes. You can:
- Use less powdered sugar in the cream cheese layer.
- Use a slightly less sweet crust by reducing the sugar.
- Avoid adding extra sweet sauces on top when serving.
The pineapple and pudding already bring natural sweetness, so even with a few reductions, the dessert will still taste indulgent.
What if my pistachio pineapple layer seems too soft?
If the layer feels too loose or runny:
- Make sure the pineapple was drained very well.
- Check that you used instant pudding mix, not cook-and-serve.
- Give the dessert more time in the refrigerator—sometimes an extra hour or two makes a big difference.
If your kitchen was warm when you prepared it, the pudding may simply need more time to firm up in the cold.
Can I make this in a smaller pan for fewer people?
Yes. You can halve the recipe and use an 8×8 inch or 9×9 inch pan. The layers will be slightly thicker, but the dessert will still be delicious. Just stick to the same chilling time and cut smaller portions if needed.