Black Forest cake is already a show-stopping dessert—layers of chocolate sponge, cherries, and whipped cream that feel festive with every bite. But when you take those same indulgent flavors and swirl them into a rich, creamy cheesecake, you get something even more irresistible: Black Forest Cheesecake.
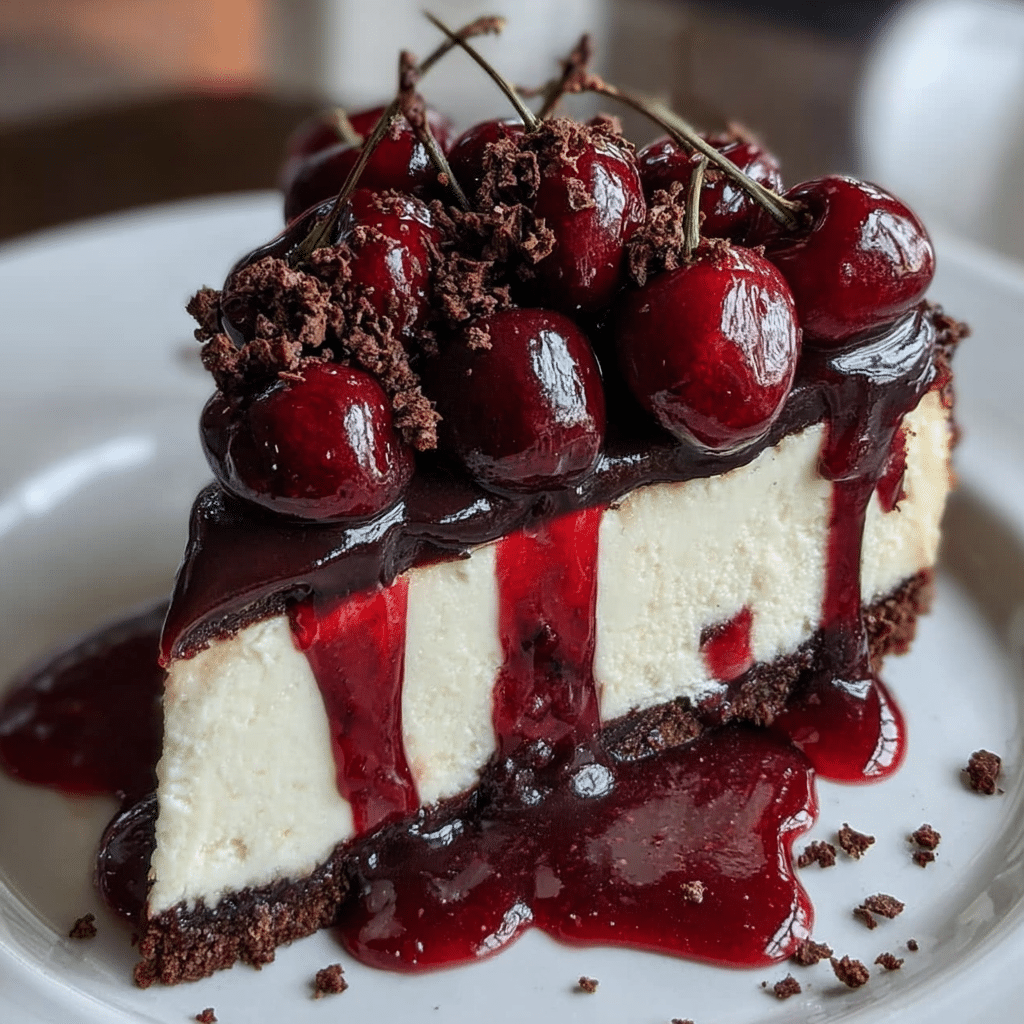
Imagine a velvety vanilla-chocolate cheesecake baked on a chocolate cookie crust, topped with glossy cherry sauce and a crown of fresh cherries and chocolate shavings. Every slice gives you a bit of crunch from the crust, silky cheesecake, and a bright cherry burst that cuts through the richness. It’s elegant enough for holidays and birthdays, but still cozy enough to enjoy with a cup of coffee on a quiet evening.
What makes this cheesecake special is the balance of flavors and textures. The chocolate crust adds depth, the creamy filling melts on your tongue, and the cherries bring a sweet-tart juiciness that keeps each bite from feeling too heavy. You get all the nostalgia of a classic Black Forest dessert, but in a smooth, luxurious cheesecake form that slices beautifully and serves a crowd.
Whether you’re looking for a centerpiece for a celebration, a romantic dessert, or just a treat to impress friends and family, this Black Forest Cheesecake will easily become one of your signature recipes. Once you make it, you’ll find yourself dreaming up excuses to bake it again.
Core Ingredients for Making the Recipe
To create this decadent Black Forest Cheesecake, you’ll need simple, reliable ingredients divided into a few components: the crust, the creamy cheesecake filling, the cherry topping, and the chocolate finishing touches.
For the Chocolate Crust
- 1½ cups (about 150 g) chocolate cookie crumbs (such as Oreos without the filling or chocolate tea biscuits, finely crushed)
- ¼ cup (30 g) unsweetened cocoa powder
- ¼ cup (50 g) granulated sugar
- 6 tablespoons (85 g) unsalted butter, melted
- Pinch of salt
For the Cheesecake Filling
- 24 oz (680 g) cream cheese, softened
- ½ cup (100 g) granulated sugar
- ½ cup (100 g) packed light brown sugar
- 3 large eggs
- ½ cup (120 ml) sour cream, at room temperature
- ½ cup (120 ml) heavy cream or whipping cream, at room temperature
- 2 teaspoons vanilla extract
- 2 tablespoons unsweetened cocoa powder (for a subtle chocolate note)
- 2 ounces (60 g) dark chocolate, melted and slightly cooled (optional but recommended for extra richness)
- Pinch of salt
For the Cherry Topping
- 3 cups (about 450–500 g) fresh or frozen pitted cherries
- ½ cup (100 g) granulated sugar
- 2 tablespoons cornstarch
- ¼ cup (60 ml) water
- 1 tablespoon lemon juice
- 1–2 tablespoons kirsch (cherry liqueur), optional but very traditional
- Pinch of salt
For the Chocolate Ganache & Decorations
- 4 oz (115 g) dark or semi-sweet chocolate, finely chopped
- ½ cup (120 ml) heavy cream
- 1 tablespoon butter (for shine), optional
- Fresh cherries with stems, for garnish
- Chocolate shavings or curls, for topping
These ingredients come together to form a cheesecake that’s smooth, rich, and layered with flavor. The quantities are designed for a standard 9-inch (23 cm) springform pan.
Step-by-Step

Black Forest Cheesecake takes a few stages—crust, filling, baking, topping, and decorating—but each step is straightforward. Take your time, follow the process, and you’ll end up with a dessert that looks like it came from a bakery.
1. Prepare the Pan and Oven
- Preheat your oven to 325°F (160°C).
- Lightly grease the bottom and sides of a 9-inch (23 cm) springform pan with butter or nonstick spray.
- Wrap the outside of the pan with two layers of aluminum foil, covering the bottom and sides. This helps prevent water from a water bath (bain-marie) from seeping in and ensures gentle, even baking.
- Set a large roasting pan or deep baking tray on your counter. This will hold the springform pan later for the water bath.
2. Make the Chocolate Cookie Crust
- In a medium bowl, combine the chocolate cookie crumbs, cocoa powder, sugar, and a pinch of salt. Stir until evenly mixed.
- Pour in the melted butter and mix with a fork until all the crumbs are moistened and resemble wet sand.
- Transfer the mixture into the prepared springform pan. Using the bottom of a glass or measuring cup, press the crumbs firmly and evenly into the bottom of the pan and slightly up the sides.
- Bake the crust in the preheated oven for about 8–10 minutes to set it. Remove and let it cool slightly while you prepare the filling.
Baking the crust first helps it stay crisp and provides a sturdy base for the creamy filling.
3. Prepare the Cheesecake Filling
For the smoothest cheesecake, make sure all your dairy ingredients—especially the cream cheese, sour cream, and heavy cream—are at room temperature.
- In a large mixing bowl (or the bowl of a stand mixer), add the softened cream cheese. Beat on medium speed for 2–3 minutes until completely smooth, scraping down the sides as needed.
- Add the granulated sugar and brown sugar. Continue beating until the mixture is creamy and no sugar grains are visible, about 2 minutes.
- Add the sour cream, heavy cream, vanilla extract, cocoa powder, and a pinch of salt. Beat on low–medium speed until everything is well combined and silky.
- With the mixer on low, add the eggs one at a time, beating just until each egg is incorporated. Over-mixing at this stage can incorporate too much air, which may lead to cracks, so keep the mixing gentle.
- If using, fold in the melted and slightly cooled dark chocolate with a spatula, swirling it through the batter until evenly distributed.
You should have a thick, smooth, velvety batter with a subtle chocolate aroma.
4. Fill the Pan and Set Up the Water Bath
- Pour the cheesecake batter over the baked crust in the springform pan. Smooth the top with a spatula so it’s even.
- Place the foil-wrapped springform pan into the large roasting pan.
- Pour hot water into the roasting pan until it reaches about halfway up the sides of the springform pan. This water bath helps bake the cheesecake gently and evenly, reducing the risk of cracks and keeping the texture creamy.
5. Bake the Cheesecake
- Carefully transfer the roasting pan with the cheesecake to the oven.
- Bake at 325°F (160°C) for 55–70 minutes. Baking times can vary depending on your oven. The cheesecake is done when:
- The edges are set and slightly puffed.
- The center still jiggles slightly like soft gelatin when you gently shake the pan.
- Once baked, turn the oven off. Open the oven door just a crack and leave the cheesecake inside for about 45–60 minutes. This slow cooling helps prevent cracking.
6. Cool Completely and Chill
- After the resting time in the oven, remove the roasting pan and carefully take the cheesecake out of the water bath.
- Remove the foil and place the cheesecake on a wire rack to cool completely to room temperature.
- Run a thin knife around the edge of the cheesecake to loosen it from the sides of the pan—this also helps resist cracking as it shrinks slightly while cooling.
- Once cooled, cover the pan and refrigerate for at least 4 hours, preferably overnight. The chilling time allows the cheesecake to firm up and the flavors to deepen.
7. Make the Cherry Topping
You can prepare the cherry topping while the cheesecake chills or a bit ahead of time.
- In a medium saucepan, combine the cherries, granulated sugar, and a pinch of salt.
- In a small bowl, whisk together the cornstarch and water until smooth, then pour this mixture into the saucepan.
- Add the lemon juice and kirsch, if using.
- Cook over medium heat, stirring gently, until the mixture begins to bubble and thicken. The cherries should soften but still hold their shape, and the sauce will become glossy and syrupy. This usually takes 5–8 minutes.
- Remove from heat and let the cherry topping cool to room temperature. It will thicken more as it cools.
8. Make the Chocolate Ganache
- Place the finely chopped chocolate in a heat-proof bowl.
- In a small saucepan, heat the heavy cream until it just begins to simmer around the edges (do not let it boil rapidly).
- Pour the hot cream over the chocolate and let it sit undisturbed for 2–3 minutes.
- Gently whisk from the center outward until the chocolate is fully melted and the ganache is smooth and shiny. If you’d like extra gloss, stir in the tablespoon of butter.
- Allow the ganache to cool slightly until it thickens enough to pour but not so thin that it runs off completely.
9. Assemble the Black Forest Cheesecake
- Once the cheesecake is fully chilled and set, release the springform pan and carefully transfer the cheesecake to a serving plate or cake stand.
- Pour the chocolate ganache over the top, gently nudging it toward the edges so it slowly drips down the sides in luscious waves.
- Spoon the cooled cherry topping onto the center of the cheesecake, spreading it almost to the edges or leaving a small border of ganache visible.
- Decorate with fresh cherries and a generous sprinkle of chocolate shavings or curls.
Your Black Forest Cheesecake is now ready to steal the spotlight.
Flavor Variations and Creative Twists
One of the best things about this cheesecake is how flexible it is. Once you’ve mastered the base recipe, you can tweak flavors and textures to suit the occasion or your personal taste.
1. Extra-Chocolate Cheesecake
If you’re a serious chocolate lover, deepen the chocolate flavor by:
- Increasing the cocoa powder in the filling from 2 tablespoons to 3–4 tablespoons.
- Using a full 4 oz (115 g) of melted dark chocolate in the batter instead of 2 oz.
- Choosing extra dark chocolate (70% cocoa or higher) for both the crust and ganache.
This version leans more toward a chocolate truffle cheesecake with cherry accents.
2. Swirled Cherry Cheesecake
For a beautiful visual effect and more cherry flavor inside the cheesecake:
- Reserve ½–¾ cup of the cooked cherry topping (without too much liquid).
- Spoon small dollops over the cheesecake batter before baking and gently swirl with a knife or skewer.
- Bake as usual.
This creates gorgeous cherry streaks through every slice.
3. Kirsch-Forward Black Forest Cheesecake
If you want a more traditional Black Forest flavor with a noticeable note of cherry liqueur:
- Add 1–2 tablespoons of kirsch to the cheesecake filling along with the vanilla.
- Brush a little kirsch over the cooled crust before adding the filling.
- Add an extra tablespoon of kirsch to the cherry topping.
The result is fragrant, slightly boozy, and perfect for adult gatherings.
4. Lighter Version with Greek Yogurt
To lighten the texture and flavor just a bit:
- Replace half of the sour cream with full-fat Greek yogurt.
- Use slightly less sugar (for example, ⅓ cup granulated instead of ½ cup).
You’ll still get a creamy dessert, but with a tangier profile and a touch less richness.
5. White Chocolate Black Forest Cheesecake
For a twist that looks elegant and tastes luxurious:
- Omit the cocoa powder from the filling and use 4 oz (115 g) melted white chocolate instead of dark chocolate.
- Keep the cherry topping and dark chocolate shavings on top to contrast the sweetness of the white chocolate.
This version is milder, creamier, and visually striking with the contrast of pale cheesecake and bold red cherries.
How to Serve
Black Forest Cheesecake is a dessert that rewards a bit of patience and attention to detail when serving.
- Chill Before Slicing: For clean slices, make sure the cheesecake is well chilled—at least 4 hours in the fridge, ideally overnight.
- Warm Knife Trick: Dip a sharp knife in hot water, wipe it dry, and slice through the cheesecake in one smooth motion. Wipe and re-warm the knife between each cut for neat, restaurant-worthy slices.
- Portion Size: Because this dessert is quite rich, thinner slices often satisfy. A 9-inch cheesecake can easily serve 12–14 people.
- Serving Temperature: You can serve it well chilled for a firmer texture, or let the slices sit at room temperature for 10–15 minutes for a creamier, softer bite. Both are delicious—try both ways and see which you prefer.
Pair each slice with:
- A dollop of lightly sweetened whipped cream.
- A few extra fresh cherries on the side.
- A drizzle of leftover cherry sauce for added color and flavor.
For beverages, coffee, espresso, or a small glass of dessert wine or kirsch all pair beautifully with the dark chocolate and cherry flavors.
Additional Tips & Helpful Advice
Small details can make the difference between an okay cheesecake and a phenomenal one. Here are some tips to guarantee success:
- Use Room-Temperature Ingredients
Cold cream cheese can create lumps in your filling. Let the cream cheese, eggs, sour cream, and heavy cream sit at room temperature for about 30–45 minutes before mixing. - Avoid Over-mixing
Over-beating the batter, especially after adding the eggs, introduces extra air. Air bubbles can expand and collapse during baking, causing cracks. Beat on low to medium and stop as soon as everything is combined. - Don’t Skip the Water Bath
It may seem like an extra step, but the water bath ensures gentle, even heat. This keeps the texture creamy and reduces the risk of over-baking and cracking. - Check for Doneness Correctly
Don’t wait for the center to be completely firm. A slight wobble is exactly what you want; the cheesecake continues to set as it cools. - Cool Slowly
Rapid temperature changes are the enemy of a smooth cheesecake. Let it rest in the turned-off oven, then cool fully at room temperature, and finally chill in the fridge. This gradual cooling process keeps the surface smooth. - Plan Ahead
Cheesecakes are best when made a day in advance. This makes Black Forest Cheesecake a great option for entertaining—bake the day before, then simply add the topping and decorations before serving.
Final Thoughts
Black Forest Cheesecake is one of those desserts that feels like an occasion all on its own. It brings together everything we love about classic Black Forest cake—deep chocolate, juicy cherries, and a hint of kirsch—and wraps it in the velvety luxury of cheesecake. The contrast of dark crust, creamy center, ruby-red topping, and glistening cherries on top makes it as stunning to look at as it is satisfying to eat.
Yet despite its dramatic appearance, this cheesecake is very achievable at home. With thoughtful steps and a bit of patience, you can create a dessert that looks bakery-level special without needing professional equipment or complicated techniques. It’s perfect for holidays like Christmas or Valentine’s Day, for birthdays, or for any time you want to spoil the people you love (including yourself).
Once you’ve tried this recipe, you may find that it becomes your go-to showstopper. And with all the variations—extra chocolatey, kirsch-forward, white chocolate, or cherry-swirled—you can keep reinventing it so it never gets old.
FAQ
Can I use frozen cherries instead of fresh?
Yes, frozen cherries work wonderfully. There’s no need to thaw them completely first; just cook them a little longer when making the topping. They release more juice than fresh cherries, so you may need an extra teaspoon of cornstarch if the sauce seems too thin.
What if I don’t have a springform pan?
A springform pan is ideal for cheesecakes because it releases easily without damaging the sides. If you don’t have one, you can use a deep 9-inch cake pan lined with parchment that overhangs the sides, but removing the cheesecake will be trickier. For best results, invest in a springform pan—it’s worth it if you love cheesecakes.
Can I make this cheesecake ahead of time?
Absolutely. Cheesecake actually improves in flavor and texture after resting. You can bake the cheesecake up to 2 days in advance and keep it covered in the refrigerator. Add the ganache, cherry topping, and decorations on the day you plan to serve for the freshest look and texture.
How should I store leftovers?
Store leftover slices in an airtight container in the refrigerator for up to 4–5 days. If the cherry topping is very juicy, you may want to store it separately and spoon it over each slice just before serving to keep the crust from softening too much.
Can I freeze Black Forest Cheesecake?
Yes, this cheesecake freezes very well. For best results, freeze the cheesecake without the cherry topping and ganache. Once completely cooled and chilled, wrap the whole cheesecake (or individual slices) tightly in plastic wrap and then in foil. Freeze for up to 2–3 months. Thaw in the refrigerator overnight, then add the ganache and cherry topping before serving.
Why did my cheesecake crack?
Even with care, cheesecakes can sometimes crack—don’t worry, it’s fixable and still tastes amazing. Common causes include over-baking, over-mixing the batter, or cooling too quickly. The good news? With this recipe, the chocolate ganache and cherry topping cover any imperfections, so no one will notice.
With its layers of chocolate, cherry, and creamy cheesecake, this Black Forest Cheesecake offers everything you’d want in a dessert: rich, indulgent, visually stunning, and unforgettable in every bite.