Introduction
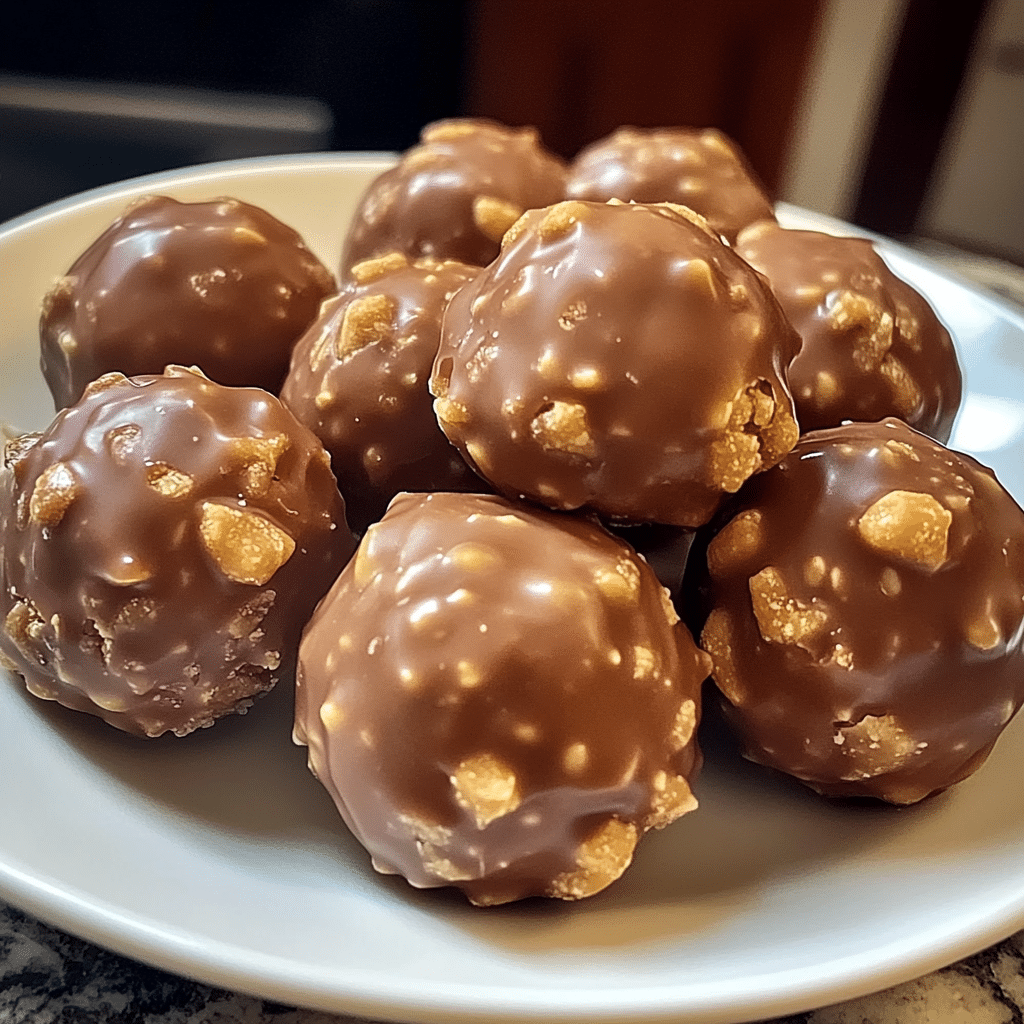
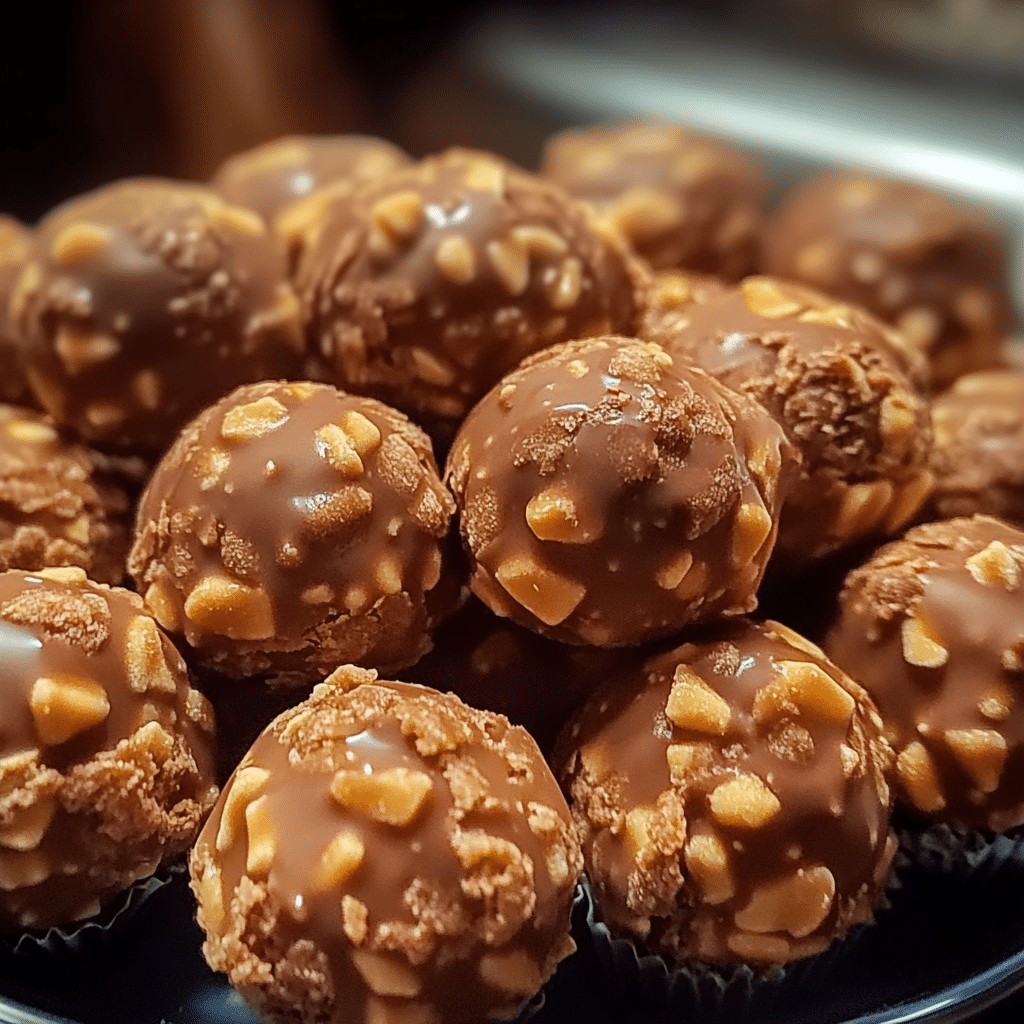
Butterfinger Balls are the ultimate indulgent treat that combines the irresistible crunch of Butterfingers with the creamy sweetness of a homemade candy ball. These no-bake, bite-sized delights are perfect for any occasion—from holiday gatherings to casual snacking. With their rich chocolate coating and the signature peanut butter and crispy texture that makes Butterfingers so special, each bite is pure bliss.
I first made these little gems for a family get-together, and they were an instant hit. Everyone loved how easy they were to make, and I was amazed at how quickly they disappeared! The combination of chocolate and the familiar Butterfinger crunch is so satisfying that you can’t help but reach for just one more. It’s the kind of treat that brings people together, sparking happy chatter and shared moments of sweetness.
What I love most about Butterfinger Balls is how versatile they are. They’re quick to make, no-bake, and perfect for holiday parties, after-dinner snacks, or even just a little indulgence on a cozy evening. Plus, you can make a big batch in no time, and they keep well in the fridge, so you always have a delicious treat on hand. Trust me, once you try these, they’ll become a go-to dessert for every occasion!
Perfect for:
- Holiday gatherings
- Snack time cravings
- Dessert platters
- Sweet tooth indulgence
- Kid-friendly treats
Why You’ll Love This Recipe
Here’s why Butterfinger Balls will become your new go-to candy:
- No-Bake Convenience: With no baking required, these easy-to-make candy balls come together in just a few simple steps, making them perfect for when you’re short on time but craving something sweet.
- Crispy and Crunchy: The combination of crushed Butterfingers and creamy peanut butter creates a satisfying crunch that makes each bite irresistible.
- Chocolate Coating: These candy balls are coated in a smooth layer of chocolate, enhancing the flavor and giving them a rich, indulgent finish.
- Customizable: You can adjust the sweetness and chocolate coating to suit your personal taste or get creative with additional toppings like sprinkles or nuts.
- Perfect for Sharing: Make a big batch to share with friends and family. They’re easy to transport and always a hit at parties, potlucks, or holiday celebrations.
Preparation and Cooking Time
- Total Time: 1 hour
- Preparation Time: 20 minutes
- Chilling Time: 40 minutes
- Servings: 20-24 balls
- Calories per serving: Approximately 200 calories
- Key Nutrients: Protein: 3g, Carbs: 18g, Fat: 14g
Ingredients
You’ll need these ingredients to make your Butterfinger Balls:
- 1 ½ cups crushed Butterfinger candy bars (about 4-5 bars)
- 1 cup creamy peanut butter
- 2 cups powdered sugar
- 2 cups milk chocolate chips (or your preferred chocolate)
- 2 tablespoons vegetable oil (for melting chocolate)
Ingredient Highlights
- Butterfinger Candy Bars: These crunchy, peanut-buttery candy bars provide the perfect texture and flavor base for the dessert.
- Creamy Peanut Butter: The creamy peanut butter helps bind the candy and gives the balls their signature smooth texture inside.
- Powdered Sugar: Powdered sugar adds the right amount of sweetness and helps the dough come together to form a smooth, workable mixture.
- Milk Chocolate Chips: The milk chocolate coating gives the candy balls a rich, smooth finish that contrasts beautifully with the crunchy peanut butter center.
Step-by-Step Instructions
Here’s how to make Butterfinger Balls:
Prepare the Butterfinger Mixture:
- Crush the Butterfingers: Unwrap the Butterfinger bars and crush them into small pieces using a food processor or by placing them in a zip-top bag and crushing them with a rolling pin.
- Mix Peanut Butter and Powdered Sugar: In a large mixing bowl, combine the creamy peanut butter and powdered sugar. Mix until smooth and fully incorporated.
- Add Crushed Butterfingers: Stir the crushed Butterfingers into the peanut butter mixture until the candy is evenly distributed throughout.
Form the Balls:
- Shape the Balls: Using your hands, roll the mixture into small balls, about 1 inch in diameter, and place them on a parchment-lined baking sheet or tray.
- Chill the Balls: Refrigerate the balls for about 30 minutes to allow them to firm up.
Coat with Chocolate:
- Melt the Chocolate: In a microwave-safe bowl, combine the milk chocolate chips and vegetable oil. Microwave in 30-second intervals, stirring between each, until the chocolate is fully melted and smooth.
- Dip the Balls: Using a fork or dipping tool, dip each chilled Butterfinger ball into the melted chocolate, covering it completely. Tap off any excess chocolate and return the ball to the parchment paper.
- Chill Again: Place the coated balls back in the fridge for an additional 10 minutes to let the chocolate set.
How to Serve
Butterfinger Balls are simple yet delicious, making them a great addition to any occasion. Here are some fun ways to serve them:
- As Party Favors: Wrap individual balls in festive cellophane bags for a cute party favor that guests can take home.
- On a Dessert Platter: Serve these bite-sized treats as part of a dessert spread, alongside cookies, brownies, and other candies.
- With a Cup of Coffee: These sweet and salty treats pair perfectly with a hot cup of coffee, creating the perfect dessert to unwind with.
- Holiday Dessert: Make them for Christmas, Halloween, or Easter, decorating them with festive sprinkles or colored chocolate drizzles for extra fun.
- In Gift Boxes: Package them in pretty gift boxes for an easy and thoughtful homemade gift for friends and family.
Additional Tips
Here are some tips to make your Butterfinger Balls even better:
- Ensure the Balls Are Firm: If the mixture feels too soft to roll into balls, refrigerate it for 10-15 minutes to make it easier to shape.
- Experiment with Different Chocolates: You can use dark chocolate, white chocolate, or even peanut butter chips for the coating, depending on your taste.
- Add Texture: For added crunch, sprinkle chopped nuts (like peanuts or almonds) on top of the chocolate before it sets.
- Keep Them Chilled: Butterfinger balls are best served chilled, so keep them in the fridge until you’re ready to serve them to ensure they hold their shape and stay fresh.
- Double the Recipe: This is a crowd-pleasing treat, so doubling the recipe is always a good idea if you’re hosting a larger group.
Recipe Variations
Here are 10 variations you can try for Butterfinger Balls:
- Peanut Butter Cup Balls: Use chopped mini peanut butter cups instead of Butterfingers for a different flavor.
- Coconut Butterfinger Balls: Add shredded coconut to the peanut butter mixture for a tropical twist.
- Caramel Butterfinger Balls: Drizzle caramel over the chocolate coating for an extra layer of sweetness.
- Oreo Butterfinger Balls: Mix crushed Oreos into the filling for a cookies and cream twist.
- White Chocolate Butterfinger Balls: Use white chocolate chips for a creamy, sweet coating instead of milk chocolate.
- Nutty Butterfinger Balls: Roll the chocolate-coated balls in chopped peanuts or other nuts for added crunch.
- Mint Butterfinger Balls: Add a few drops of mint extract to the peanut butter mixture for a refreshing minty flavor.
- Cherry Butterfinger Balls: Add chopped maraschino cherries to the peanut butter mixture for a fruity contrast to the chocolate.
- S’mores Butterfinger Balls: Add mini marshmallows and graham cracker crumbs to the filling for a s’mores-inspired flavor.
- Pumpkin Spice Butterfinger Balls: Add pumpkin spice to the peanut butter mixture for a fall-inspired twist.
Freezing and Storage
- Freezing: Butterfinger Balls can be frozen for up to 3 months. Place them in a single layer on a baking sheet and freeze until solid, then transfer them to an airtight container or freezer bag.
- Storage: Store Butterfinger Balls in an airtight container in the refrigerator for up to 1 week. Make sure to separate the layers with parchment paper to prevent them from sticking together.
Special Equipment
Here are some special equipment items to make preparing your Butterfinger Balls easier:
- Food Processor: A food processor makes crushing the Butterfingers quick and easy, creating a fine texture.
- Microwave-Safe Bowl: For melting the chocolate, a microwave-safe bowl is necessary to avoid overheating.
- Parchment Paper: Use parchment paper to line the baking sheet, preventing the balls from sticking.
- Fork or Dipping Tool: Use a fork or a candy dipping tool for easy and clean dipping into the melted chocolate.
- Airtight Container: To store your candy balls and keep them fresh, an airtight container is essential.
FAQ Section
- Can I use crunchy peanut butter instead of creamy?
Yes, crunchy peanut butter will work, but it may result in a less smooth texture for the balls. - Do I need to chill the balls before dipping in chocolate?
Yes, chilling the balls helps them hold their shape and makes dipping in the chocolate easier. - Can I use a different type of candy for this recipe?
Absolutely! You can substitute Butterfingers with other candy bars like Snickers, Milky Way, or Reese’s Pieces. - How long do Butterfinger Balls last?
They can be stored in the fridge for up to 1 week or frozen for up to 3 months. - Can I make these ahead of time?
Yes, Butterfinger Balls can be made ahead and stored in the fridge for a few days or frozen for later.

Butterfinger Balls
- Total Time: 1 hour
- Yield: 20–24 balls 1x
Description
Butterfinger Balls are a deliciously indulgent treat that brings together the irresistible crunch of Butterfingers and the creamy sweetness of a homemade candy ball. These no-bake bite-sized desserts are perfect for any occasion, from holiday gatherings to casual snacking. Coated in chocolate and packed with the peanut butter and crispy texture that makes Butterfingers so unique, these balls are sure to become a favorite at your dessert table. Quick to make and impossible to resist, Butterfinger Balls are a treat that everyone will love.
Ingredients
ou’ll need these ingredients to make your Butterfinger Balls:
- 1 ½ cups crushed Butterfinger candy bars (about 4–5 bars)
- 1 cup creamy peanut butter
- 2 cups powdered sugar
- 2 cups milk chocolate chips (or your preferred chocolate)
- 2 tablespoons vegetable oil (for melting chocolate)
Instructions
Prepare the Butterfinger Mixture:
- Crush the Butterfingers: Unwrap the Butterfinger bars and crush them into small pieces using a food processor or by placing them in a zip-top bag and crushing them with a rolling pin.
- Mix Peanut Butter and Powdered Sugar: In a large mixing bowl, combine the creamy peanut butter and powdered sugar. Mix until smooth and fully incorporated.
- Add Crushed Butterfingers: Stir the crushed Butterfingers into the peanut butter mixture until the candy is evenly distributed throughout.
Form the Balls:
- Shape the Balls: Using your hands, roll the mixture into small balls, about 1 inch in diameter, and place them on a parchment-lined baking sheet or tray.
- Chill the Balls: Refrigerate the balls for about 30 minutes to allow them to firm up.
Coat with Chocolate:
- Melt the Chocolate: In a microwave-safe bowl, combine the milk chocolate chips and vegetable oil. Microwave in 30-second intervals, stirring between each, until the chocolate is fully melted and smooth.
- Dip the Balls: Using a fork or dipping tool, dip each chilled Butterfinger ball into the melted chocolate, covering it completely. Tap off any excess chocolate and return the ball to the parchment paper.
- Chill Again: Place the coated balls back in the fridge for an additional 10 minutes to let the chocolate set.
- Prep Time: 20 minutes
- Category: lunch
Nutrition
- Calories: 200 kcal
- Fat: 14g
- Carbohydrates: 18g
- Protein: 3g
Conclusion
Butterfinger Balls are an irresistible treat that combines the perfect balance of sweet, salty, and crunchy flavors in every bite. Made with just a few simple ingredients, these homemade candies come together with minimal effort, making them an easy yet delicious snack for any occasion. Whether you’re serving them at a party, preparing a holiday gift, or simply craving something sweet, these bite-sized delights are sure to be a crowd-pleaser.
The recipe is incredibly versatile, allowing you to customize the sweetness or add extra toppings like crushed nuts or drizzles of chocolate. The crunchiness of the crushed Butterfingers coated in a smooth chocolate shell is a perfect combination that will satisfy your cravings with every bite. These treats are as fun to make as they are to eat!
I can’t wait to see how your Butterfinger Balls turn out! Don’t forget to snap a photo and tag me on Instagram—I’d love to see your sweet creations. Feel free to leave a comment or share any unique twists you added to the recipe! Enjoy!

