Introduction
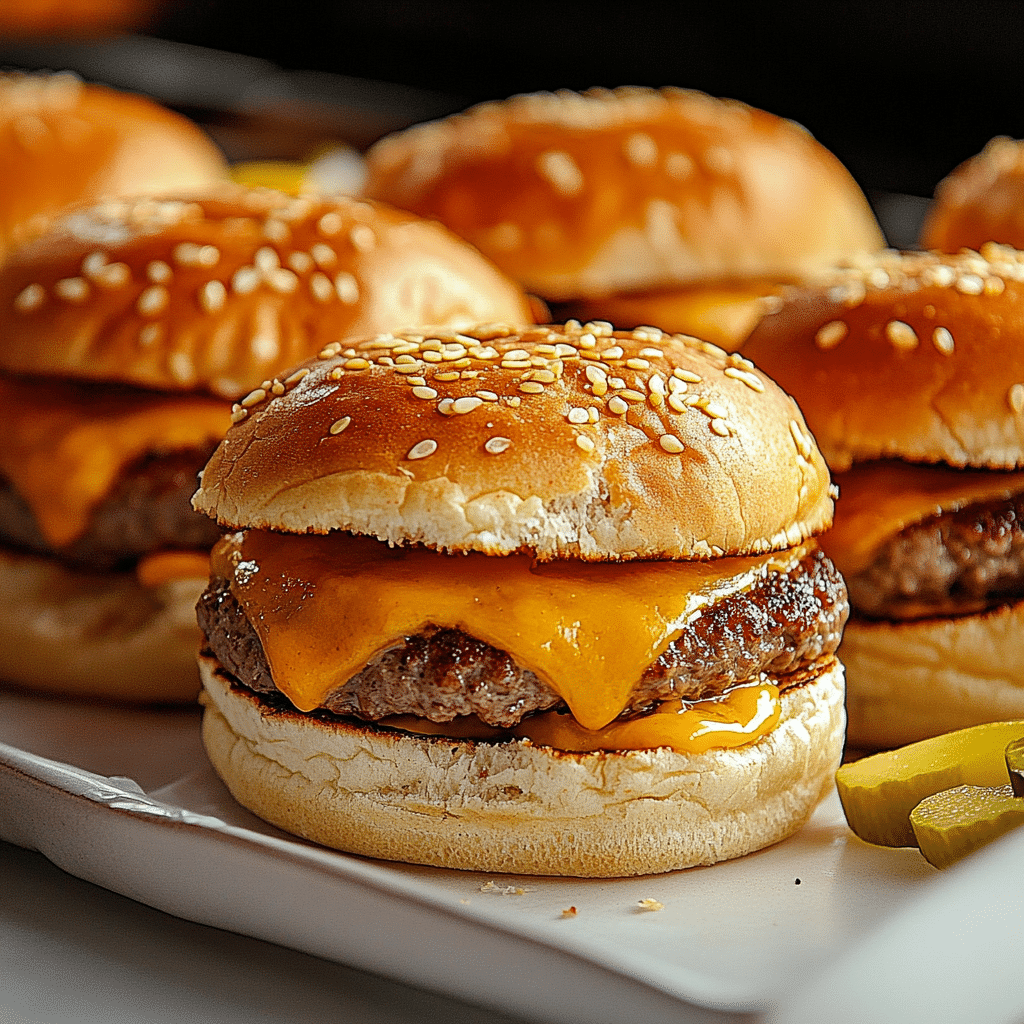
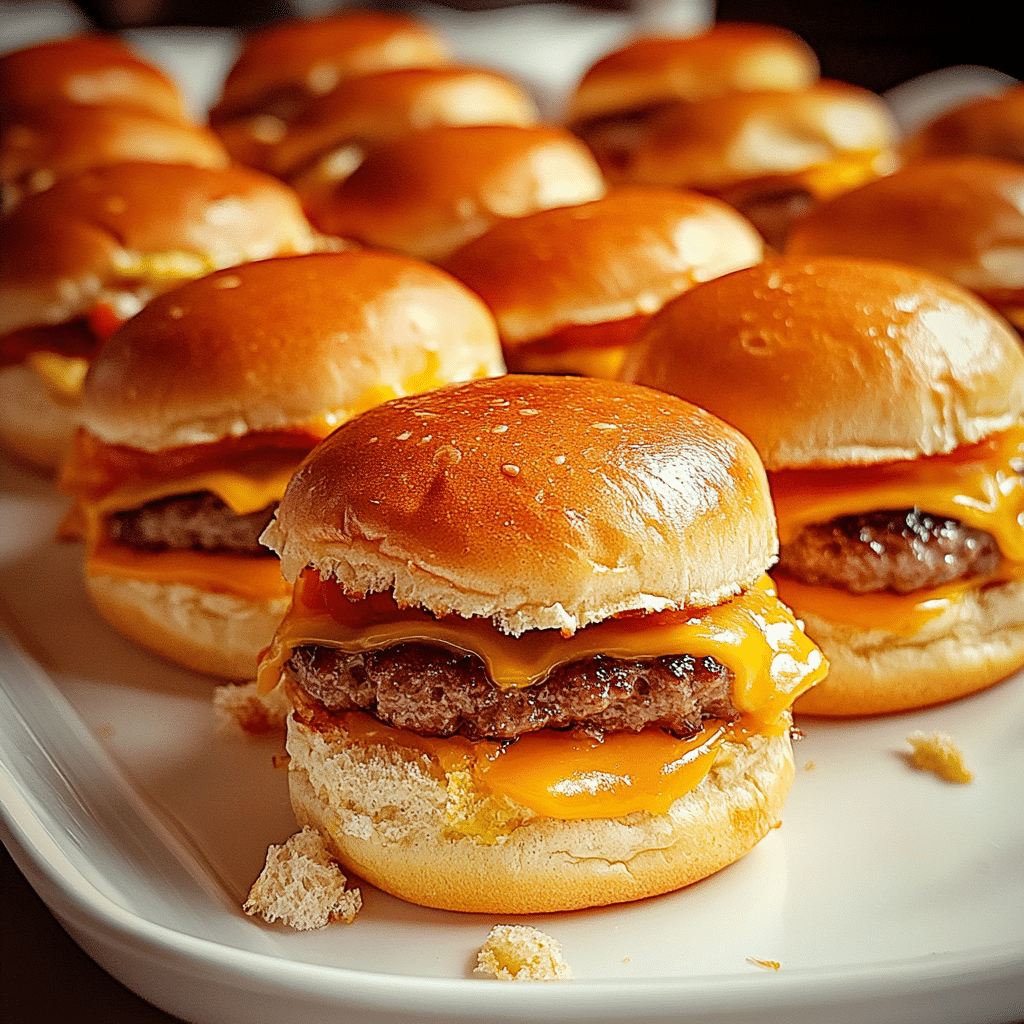
Cheeseburger Sliders are the ultimate crowd-pleaser, a fun, bite-sized version of the classic cheeseburger that’s perfect for any casual gathering. These mini burgers pack all the delicious flavors of a full-sized cheeseburger into a small, easy-to-eat package. Juicy beef patties, melty cheese, and all the classic fixings like pickles, lettuce, and ketchup are tucked between soft, fluffy slider buns. They’re not just delicious—they’re totally customizable, so everyone can add their favorite toppings and enjoy a personalized treat!
I love making these sliders when I’m hosting a casual gathering or family BBQ. They’re so easy to assemble, and the best part is, they’re perfect for little hands or big appetites. I remember the first time I made them for a game night with friends. Everyone loved how fun and flavorful they were, and it was so easy to set up a mini slider bar with different toppings, from classic lettuce and tomato to some more adventurous options like crispy bacon or jalapeños.
What’s great about Cheeseburger Sliders is how versatile they are. You can switch up the meat, using turkey or chicken, or even try a plant-based patty for a vegetarian version. You can also get creative with the cheese, from American to cheddar or even something like gouda for a gourmet twist. These sliders are a guaranteed hit, whether you’re serving them at a game day party or just enjoying a fun dinner at home with the family!
Perfect for:
- Game days
- Family gatherings
- Casual dinner parties
- BBQs
- Picnic treats
Why You’ll Love This Recipe
Here’s why Cheeseburger Sliders are a must-try:
- Miniature Delight: These sliders are the perfect size for snacking, making them ideal for parties, gatherings, or a light meal.
- Juicy Beef Patties: Each slider features a perfectly seasoned and juicy beef patty, bringing out the rich, savory flavors we all love in a classic cheeseburger.
- Melted Cheese: A slice of your favorite cheese, like cheddar or American, melts beautifully over the warm patties, adding a creamy and comforting texture.
- Customizable Toppings: You can add all your favorite cheeseburger toppings, from crispy bacon and pickles to fresh lettuce, tomato, and ketchup.
- Easy to Make and Serve: These sliders are simple to prepare and easy to serve, making them the perfect finger food for any occasion.
Preparation and Cooking Time
- Total Time: 45 minutes
- Preparation Time: 15 minutes
- Cooking Time: 30 minutes
- Servings: 12 sliders
- Calories per serving: Approximately 200-250 calories (depending on toppings)
- Key Nutrients: Protein: 12g, Carbs: 16g, Fat: 14g
Ingredients
Gather these ingredients to make your Cheeseburger Sliders:
- 1 lb ground beef (80% lean)
- 12 slider buns
- 12 slices of cheddar cheese (or your favorite cheese)
- 2 tablespoons olive oil
- 1 small onion, finely chopped
- 1 tablespoon Worcestershire sauce
- Salt and pepper to taste
- 6 tablespoons butter, melted
- 2 tablespoons sesame seeds (optional)
- Toppings: lettuce, tomato slices, pickles, ketchup, mustard, mayonnaise, or any other favorite condiments
Ingredient Highlights
- Ground Beef: Using 80% lean beef ensures juicy, flavorful patties that stay tender during cooking. If you prefer a leaner option, you can choose 90% lean beef.
- Cheddar Cheese: Classic cheddar cheese melts beautifully and complements the savory flavors of the beef patty, but you can use other varieties like American or Swiss if you prefer.
- Slider Buns: Soft, pillowy buns are the best choice for sliders, providing the perfect balance of texture without overpowering the burger patty.
- Worcestershire Sauce: A splash of Worcestershire sauce enhances the flavor of the beef patties, adding depth and richness to the overall taste.
Step-by-Step Instructions
Here’s how to make Cheeseburger Sliders:
Prepare the Beef Patties:
- Preheat the Oven: Preheat your oven to 375°F (190°C).
- Season the Beef: In a mixing bowl, combine the ground beef with Worcestershire sauce, salt, and pepper. Mix until just combined—be careful not to overwork the meat.
- Form the Patties: Divide the beef mixture into 12 equal portions and shape each portion into a small patty that fits the slider buns. Place the patties on a baking sheet lined with parchment paper.
Cook the Sliders:
- Cook the Patties: Heat a skillet over medium-high heat and add olive oil. Cook the patties in batches, about 3-4 minutes per side, until browned and cooked through (internal temperature should reach 160°F or 71°C). Alternatively, you can cook the patties in the oven for 12-15 minutes.
- Add the Cheese: In the last minute of cooking, top each patty with a slice of cheese. Cover with a lid to help the cheese melt evenly.
Assemble the Sliders:
- Prepare the Buns: While the patties are cooking, slice the slider buns in half horizontally. Brush the top of each bun with melted butter and sprinkle with sesame seeds if desired.
- Assemble the Sliders: Once the patties are cooked and the cheese is melted, place each patty on the bottom half of the buns. Add your favorite toppings like lettuce, tomato, pickles, and condiments. Top with the other half of the bun.
Serve the Sliders:
- Serve Immediately: Serve the sliders hot, either on a platter or as individual sandwiches. They are great for serving with fries, onion rings, or a side salad.
How to Serve
Here are 10 ways to serve Cheeseburger Sliders:
- With Fries: Serve with crispy French fries or sweet potato fries for the ultimate cheeseburger experience.
- On a Platter: Arrange the sliders on a large platter for easy serving at parties and gatherings.
- With Onion Rings: Pair with crispy, golden onion rings for an extra indulgent treat.
- With Pickles on the Side: Serve with pickle spears on the side for a tangy crunch that complements the sliders.
- As a Party Snack: These sliders make perfect bite-sized snacks for any event—serve them on toothpicks for easy eating.
- With a Side Salad: Add a light, fresh salad with a tangy vinaigrette to balance out the richness of the sliders.
- For Game Day: Serve these sliders during game day as the perfect handheld treat for watching the big game.
- With Toppings Bar: Set up a toppings bar with options like ketchup, mustard, lettuce, tomatoes, onions, and pickles so guests can customize their sliders.
- With a Cold Drink: Serve these sliders with cold beverages like iced tea, lemonade, or a beer for a classic pairing.
- For Family Dinner: These sliders are also perfect for a simple, fun family dinner where everyone can build their own mini burgers.
Additional Tips
Here are 10 tips to make your Cheeseburger Sliders even better:
- Don’t Overwork the Meat: When forming the patties, handle the meat gently to avoid tough sliders. Just mix and shape the beef until combined.
- Make Them Mini: For true sliders, keep the patties small enough to fit comfortably on the buns. You can use a mini burger press for uniformity.
- Customize the Cheese: Experiment with different cheeses, like Swiss, pepper jack, or blue cheese, for unique flavor combinations.
- Grill the Patties: For an added smoky flavor, grill the patties instead of pan-frying them.
- Use Fresh Ingredients: Freshly chopped veggies, crispy lettuce, and ripe tomatoes make a big difference in flavor and texture.
- Add Bacon: For extra flavor, cook up some crispy bacon and add it to each slider.
- Add a Sauce: A homemade or store-bought sauce like special burger sauce, aioli, or barbecue sauce can elevate your sliders even more.
- Use Ground Turkey: For a lighter version, swap the beef with ground turkey or chicken.
- Prepare Ahead: You can prepare the beef patties ahead of time, refrigerating them until you’re ready to cook.
- Serve Warm: Sliders are best enjoyed warm, so serve them right after assembling for the best flavor and texture.
Recipe Variations
Here are 10 variations of Cheeseburger Sliders to try:
- Bacon Cheeseburger Sliders: Add crispy bacon strips on top of the patties before serving.
- BBQ Cheeseburger Sliders: Add a spoonful of BBQ sauce to the patties or top the sliders with caramelized onions and BBQ sauce.
- Mushroom Swiss Sliders: Add sautéed mushrooms and Swiss cheese to the patties for a savory twist.
- Spicy Jalapeño Sliders: Add sliced jalapeños and spicy mayo for a little heat.
- Veggie Burger Sliders: Swap the beef patties with veggie burger patties for a vegetarian version.
- Buffalo Cheeseburger Sliders: Toss the patties in buffalo sauce before serving for a spicy kick.
- Blue Cheese Sliders: Top the patties with crumbled blue cheese and a drizzle of balsamic glaze.
- Tex-Mex Sliders: Add guacamole, jalapeños, and cheddar cheese for a southwestern flavor.
- Hawaiian Sliders: Add a slice of grilled pineapple and teriyaki sauce for a tropical twist.
- Cheeseburger Sliders with Fried Egg: Top the patties with a fried egg for a rich, creamy addition.
Freezing and Storage
- Freezing: If you want to prepare sliders in advance, you can freeze the cooked patties and buns separately. To reheat, just warm them in the oven and assemble when ready to serve.
- Storage: Store leftover cooked sliders in an airtight container in the fridge for up to 2 days. Reheat them in the oven to maintain the texture of the buns.
Special Equipment
Here are 10 special equipment items to make your Cheeseburger Sliders:
- Griddle or Grill Pan: Ideal for cooking the patties with a nice sear.
- Burger Press: Perfect for making uniform patties.
- Skillet: Use a skillet for cooking the patties indoors.
- Oven: For melting the cheese and finishing the patties if cooking them in the oven.
- Basting Brush: To brush melted butter on the buns.
- Bun Cutter: For cutting slider buns in half easily.
- Meat Thermometer: Ensure the patties are cooked to a safe internal temperature.
- Serving Platter: A large platter for displaying the finished sliders.
- Toothpicks: To serve the sliders on for easy eating.
- Grill Basket: If grilling the sliders, a grill basket will keep them intact while cooking.
FAQ Section
Here are 10 frequently asked questions about Cheeseburger Sliders:
- Can I make these sliders ahead of time?
Yes! You can prepare the patties ahead of time and refrigerate them until you’re ready to cook. - Can I use turkey or chicken instead of beef?
Yes, you can substitute ground turkey or chicken for a lighter option. - Can I make these sliders vegetarian?
Absolutely! Use veggie burger patties or a plant-based protein alternative. - How do I keep the sliders warm for a party?
Keep the sliders warm by covering them with foil or placing them in a slow cooker on the warm setting. - Can I use store-bought slider buns?
Yes, store-bought buns work perfectly well for sliders. - Can I freeze cooked sliders?
Yes, you can freeze the cooked patties and buns separately. Just reheat when you’re ready to serve. - Can I make sliders without cheese?
Sure! If you prefer, you can skip the cheese and still enjoy delicious sliders. - Can I add extra toppings like fried onions?
Yes, fried onions or other toppings like avocado or mushrooms can be great additions to your sliders. - What’s the best cheese for sliders?
Cheddar is a classic choice, but feel free to experiment with American, Swiss, or even blue cheese. - How can I make these sliders spicier?
Add jalapeños, spicy mustard, or hot sauce to make your sliders have a little more heat.

Cheeseburger Sliders
- Total Time: 45 minutes
Ingredients
Gather these ingredients to make your Cheeseburger Sliders:
- 1 lb ground beef (80% lean)
- 12 slider buns
- 12 slices of cheddar cheese (or your favorite cheese)
- 2 tablespoons olive oil
- 1 small onion, finely chopped
- 1 tablespoon Worcestershire sauce
- Salt and pepper to taste
- 6 tablespoons butter, melted
- 2 tablespoons sesame seeds (optional)
- Toppings: lettuce, tomato slices, pickles, ketchup, mustard, mayonnaise, or any other favorite condiments
Instructions
Prepare the Beef Patties:
- Preheat the Oven: Preheat your oven to 375°F (190°C).
- Season the Beef: In a mixing bowl, combine the ground beef with Worcestershire sauce, salt, and pepper. Mix until just combined—be careful not to overwork the meat.
- Form the Patties: Divide the beef mixture into 12 equal portions and shape each portion into a small patty that fits the slider buns. Place the patties on a baking sheet lined with parchment paper.
Cook the Sliders:
- Cook the Patties: Heat a skillet over medium-high heat and add olive oil. Cook the patties in batches, about 3-4 minutes per side, until browned and cooked through (internal temperature should reach 160°F or 71°C). Alternatively, you can cook the patties in the oven for 12-15 minutes.
- Add the Cheese: In the last minute of cooking, top each patty with a slice of cheese. Cover with a lid to help the cheese melt evenly.
Assemble the Sliders:
- Prepare the Buns: While the patties are cooking, slice the slider buns in half horizontally. Brush the top of each bun with melted butter and sprinkle with sesame seeds if desired.
- Assemble the Sliders: Once the patties are cooked and the cheese is melted, place each patty on the bottom half of the buns. Add your favorite toppings like lettuce, tomato, pickles, and condiments. Top with the other half of the bun.
Serve the Sliders:
- Serve Immediately: Serve the sliders hot, either on a platter or as individual sandwiches. They are great for serving with fries, onion rings, or a side salad.
- Prep Time: 15 minutes
- Cook Time: 30 minutes
Nutrition
- Serving Size: 12 sliders
- Calories: 200-250 kcal
- Fat: 14g
- Carbohydrates: 16g
- Protein: 12g
Conclusion
Cheeseburger Sliders are a perfect combination of convenience and flavor, making them ideal for any gathering or meal. With their juicy beef patties, melted cheese, and customizable toppings, these sliders are sure to please everyone. Whether served as a snack, main course, or party food, they’re easy to make and always a crowd-pleaser.
These sliders are fun to assemble, simple to serve, and packed with all the flavors you love in a cheeseburger—just in a mini, bite-sized form. Whether you’re hosting a game day or a casual dinner, these sliders will quickly become a favorite.
Enjoy making and sharing these delicious sliders with your friends and family! I can’t wait to see how yours turn out! Don’t forget to snap a photo and tag me on Instagram—I love seeing your tasty creations! Feel free to leave a comment or share your thoughts. Happy cooking!

