
There’s something magical about a dessert that looks like freshly fallen snow dotted with bright red cherries.
Cherries in the Snow is exactly that kind of dessert—light, creamy, and beautifully festive, making it perfect for Christmas, New Year’s, Valentine’s Day, or any special gathering where you want a show-stopping sweet treat without spending hours in the kitchen.
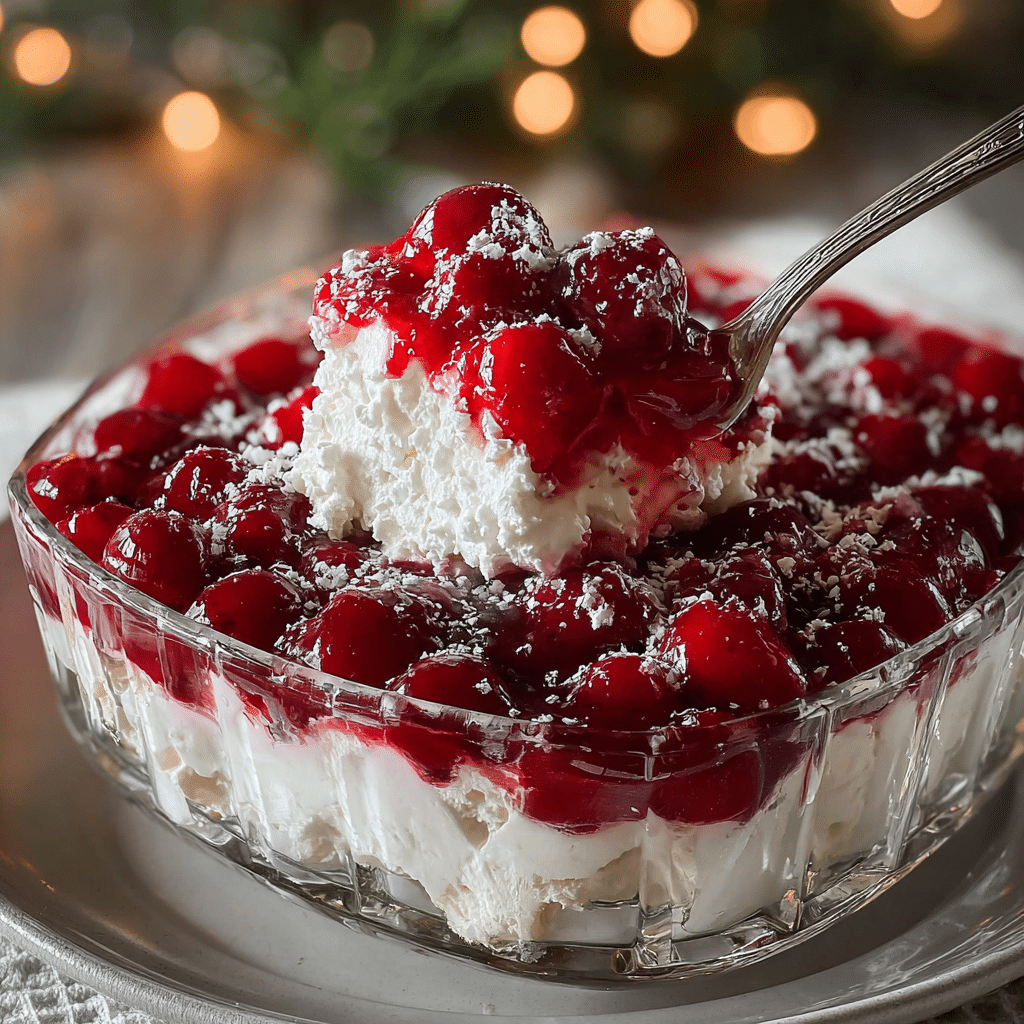
This dessert layers fluffy cake or cookie crumbs, a silky cream cheese mixture, and a glossy cherry topping into one irresistible spoonful.
Every bite gives you a mix of cool cream, soft cake, and juicy cherries—a combination that feels both nostalgic and elegant at the same time.
Unlike traditional baked cheesecakes or complicated layered cakes, Cherries in the Snow is wonderfully simple.
There’s no baking required if you use a store-bought angel food cake or ladyfingers, and the cream cheese layer comes together in just a few minutes with a mixer. The dessert chills in the refrigerator until it sets, making it a fantastic make-ahead option for busy holidays or parties.
Whether you’re hosting a big family celebration or just want a pretty dessert to enjoy at home, this recipe delivers a light yet satisfying treat that looks more impressive than the effort it requires.
Core Ingredients for Making the Recipe
To prepare this dreamy, creamy Cherries in the Snow Dessert, you only need a handful of simple, easy-to-find ingredients.
Each component plays an important role in creating the layers of flavor and texture that make this dessert so special.
For the Creamy “Snow” Layer
This is the star of the dessert: a smooth, lightly sweet, cloud-like mixture that tastes like a cross between cheesecake and whipped cream.
- 12 oz block-style cream cheese, room temperature
Using block-style (not whipped) cream cheese gives the dessert structure and a slight tang that balances the sweetness. - ¾ cup powdered sugar, sifted
Powdered sugar dissolves easily and helps create a smooth, velvety texture in the cream cheese mixture. - ⅓ cup whole milk
The milk thins the mixture just enough to make it light and silky without losing body. Whole milk adds a richer taste, but you can use 2% if preferred. - 1 teaspoon vanilla extract
Vanilla rounds out the flavors and enhances the sweetness of the cream layer. - 2 cups whipped topping (such as Cool Whip), thawed
Or use lightly sweetened whipped cream. This is what gives the “snow” its airy, fluffy texture.
For the Base Layer
You can customize this part according to your taste, but the idea is a soft, light base that soaks up some of the creamy layer and cherry juices.
Choose one of the following:
- 1 store-bought angel food cake, cut into small cubes
or - 1 pound cake or sponge cake, cut into cubes
or - 24 ladyfingers, roughly broken into pieces
or - 2 cups crushed vanilla wafers or shortbread cookies (for a slightly firmer, more cookie-like base)
Angel food cake is the most traditional choice for a truly “snowy,” airy texture, but any of these options will work well.
For the Cherry Topping
The “cherries” are the jewel-like crown of this dessert. They add color, flavor, and just the right amount of tartness.
- 2 cans (about 21 oz each) cherry pie filling
This gives you enough coverage for a nice, generous cherry layer.
Optional for extra freshness:
- ½–1 cup fresh or thawed frozen cherries, halved and pitted
These add texture and a slightly brighter cherry flavor if you want to mix them into the pie filling.
Optional Garnishes
These are not required, but they make your dessert extra pretty and add a bit of crunch or flavor contrast.
- White chocolate shavings or curls
- Crushed graham crackers or cookies, sprinkled on top
- Toasted sliced almonds or chopped pecans (for a little crunch)
- A dusting of powdered sugar just before serving
- Fresh mint leaves for a pop of green against the red cherries
Step-by-Step

Once you see how simple this dessert is to put together, it will quickly become one of your go-to recipes for the holidays and beyond.
Step 1: Prepare the Base
- Prepare your dish:
Lightly grease or spray a 9×13 inch (23×33 cm) baking dish. You can also line it with parchment paper if you’d like to lift the dessert out for slicing. - Cube or crush the base:
- If using angel food cake, pound cake, or sponge cake, cut it into small, bite-sized cubes.
- If using ladyfingers, break them into chunks.
- If using cookies, crush them into coarse crumbs.
- Create an even layer:
Spread your chosen base in an even layer across the bottom of the dish.
For a softer, more classic texture, use cake or ladyfingers. For a slightly firmer, more “trifle-like” dessert, use crushed cookies.
Step 2: Make the Creamy “Snow” Layer
- Beat the cream cheese:
Place the 12 oz block-style cream cheese, room temperature into a large mixing bowl.
Beat with an electric mixer on medium speed until smooth, creamy, and free of lumps. Starting with softened cream cheese is key to avoiding a grainy texture. - Add the powdered sugar:
Gradually add the ¾ cup powdered sugar, sifted, beating until fully combined and smooth. Scrape down the sides of the bowl as needed. - Blend in milk and vanilla:
Pour in the ⅓ cup whole milk and 1 teaspoon vanilla extract.
Beat again until the mixture is silky, slightly thickened, and completely homogeneous. It should be smooth and pourable, but still hold some body. - Fold in the whipped topping:
Add 2 cups whipped topping to the bowl.
Using a spatula, gently fold the whipped topping into the cream cheese mixture. Avoid overmixing; you want to keep as much air in the mixture as possible to create that “snowy” lightness. - Check the consistency:
The mixture should be fluffy and spreadable, not runny. If it feels too thick, you can add a splash more milk. If too thin, you can add a bit more whipped topping or chill briefly to firm up.
Step 3: Layer the Dessert
- Spread the cream layer over the base:
Pour or spoon the cream cheese mixture over the prepared base in the 9×13 dish.
Use a spatula to spread it evenly, making sure to cover every corner. This will “seal” the base and create a smooth surface for the cherries. - Smooth the top:
Try to create a flat, even top—this will help the cherry layer sit nicely and look beautiful when the dessert is sliced. - Chill briefly (optional but helpful):
For a cleaner layering effect, you can place the dish in the refrigerator for about 20–30 minutes before adding the cherries. This helps the cream layer set slightly.
Step 4: Add the Cherry Topping
- Prepare the cherry layer:
Open your 2 cans of cherry pie filling. If desired, fold in some fresh or thawed cherries to add extra texture and a homemade feel. - Layer the cherries:
Gently spoon the cherry mixture over the cream layer.
Spread it carefully with a spatula or the back of a spoon, trying not to disturb the layer beneath. Aim for an even, generous blanket of cherries from edge to edge. - Decorate if desired:
At this stage, you can sprinkle on white chocolate shavings, cookie crumbs, or sliced almonds. Or, you can wait and add garnishes just before serving.
Step 5: Chill and Set the Dessert
- Refrigerate:
Cover the dish with plastic wrap or a lid and refrigerate for at least 4 hours, or preferably overnight.
This chilling time allows the layers to set, the base to soften slightly, and the flavors to meld together. - Check before serving:
When you’re ready to serve, the dessert should be firm enough to cut into neat squares or scoop into bowls. - Slice and serve:
Use a sharp knife to cut the dessert into squares, or use a large spoon or spatula to scoop generous portions into dessert bowls. Each serving should show off the distinct base, creamy middle, and cherry top—like little slices of winter sky and snow.
Flavor Variations and Creative Twists
One of the charms of Cherries in the Snow is its flexibility.
You can stay classic with cherries, or easily transform the dessert with different flavors for any time of year.
1. Mixed Berry “Snow”
- Replace the cherry pie filling with mixed berry pie filling.
- Or combine cherry, blueberry, and raspberry fillings for a colorful, jewel-toned topping.
- Garnish with fresh berries and mint for a summer-friendly version.
2. Chocolate Cherry Snow
- Add 2–3 tablespoons of cocoa powder to the cream cheese mixture for a light chocolate flavor.
- Sprinkle a thin layer of chocolate shavings or mini chocolate chips between the cream layer and the cherry topping.
- Use a chocolate cookie crumb base (like crushed chocolate wafers or Oreos without the cream) for a black-forest-inspired dessert.
3. Almond Cherry Dream
- Add ½ teaspoon almond extract along with the vanilla in the cream layer.
- Top with toasted sliced almonds for crunch.
- Almond and cherry are a classic, elegant flavor pairing perfect for holidays and dinner parties.
4. Citrus Cherry Snow
- Add 1–2 teaspoons of lemon zest or orange zest to the cream cheese mixture.
- The citrus brightens the dessert and balances the sweetness, especially good if you like a refreshing note.
5. Individual Servings in Glasses
- Instead of a large 9×13 dish, assemble the dessert in small glasses, jars, or dessert cups:
- Cake or cookie pieces at the bottom
- Cream layer in the middle
- Cherry topping on top
- This makes for a beautiful, layered presentation for special occasions.
How to Serve Cherries in the Snow Dessert
This dessert is wonderfully versatile and can be presented in several ways depending on the occasion.
- Straight from the pan in squares:
Cut the dessert into neat squares for potlucks, family dinners, or casual gatherings.
It’s easy to transport and serve directly from the dish. - Scooped into dessert bowls:
For a softer, more trifle-like presentation, spoon generous portions into small bowls or dessert dishes.
Add a drizzle of extra cherry sauce on top for drama. - In individual cups or jars:
Layer the components in small glass jars for parties, buffets, or holiday dinners.
Each guest gets their own pretty, portable dessert. - With extra toppings:
Serve with a little dollop of whipped cream, a sprinkle of white chocolate curls, or a dusting of powdered sugar to mimic fresh snow.
No matter how you serve it, this dessert looks festive and inviting—the red cherries against the white cream are always a crowd-pleaser.
Tips & Variations for Perfect Results
To make sure your Cherries in the Snow Dessert turns out light, creamy, and beautiful every time, keep these tips in mind:
- Soften the cream cheese properly
Room-temperature cream cheese mixes smoothly and prevents lumps. If it’s too cold, you’ll end up with a grainy texture. - Sift the powdered sugar
Sifting removes any clumps and ensures a silky cream layer. - Fold, don’t beat, the whipped topping
Gently folding keeps the mixture airy. Over-mixing can deflate the whipped topping and make the cream layer too dense. - Choose the right base for your taste
- Angel food cake = light and airy, more traditional “snowy” feel
- Pound cake = richer and slightly denser
- Ladyfingers = soft but structured, perfect for individual cups
- Cookie crumbs = more structure and a slight crunch
- Allow enough chilling time
This dessert really benefits from resting in the refrigerator.
Overnight chilling gives the best texture and flavor; the base softens, and the cream layer sets beautifully. - Adjust the sweetness if needed
Cherry pie filling and whipped topping are both sweet. If you prefer a less sweet dessert, you can:- Reduce the powdered sugar slightly (for example, use ½ cup instead of ¾ cup).
- Choose an unsweetened or lightly sweetened whipped cream instead of sweet whipped topping.
- Use a tangier cream cheese or add a splash of lemon juice to the cream mixture.
- Make it more festive
For holidays, garnish with:- White chocolate curls (snowy effect)
- Crushed candy cane for a minty Christmas twist
- Red and white sprinkles for a fun, playful look
Final Thoughts
Cherries in the Snow Dessert is one of those recipes that feels special yet is almost effortless to make.
With its layers of soft cake or cookies, fluffy cream cheese “snow,” and jewel-like cherries, it brings both comfort and elegance to any table.
It’s the kind of dessert people remember:
- Kids love the bright color and sweetness.
- Adults appreciate the creamy texture and balanced flavors.
- Hosts adore how easy it is to prepare in advance, freeing them up to enjoy their guests.
You don’t need complicated techniques or fancy equipment—just simple ingredients and a bit of time in the fridge.
Whether you’re planning a holiday feast, a family celebration, or just craving something light and beautiful, this dessert is a wonderful choice.
Once you make it, there’s a good chance it will become one of your go-to recipes for winter gatherings and beyond—
your very own tradition of sweet cherries resting on a bed of snowy cream.
FAQ
Can I use homemade cherry topping instead of canned cherry pie filling?
Yes, absolutely. If you prefer homemade, you can make a simple cherry topping by simmering pitted cherries with sugar, a bit of lemon juice, and cornstarch until thickened. Just make sure the mixture is completely cooled before spreading it over the cream layer.
Can I use fresh whipped cream instead of whipped topping?
Yes. You can replace the whipped topping with about 2 cups of heavy cream, whipped with a bit of powdered sugar and vanilla until soft peaks form. Fold it gently into the cream cheese mixture just as you would with whipped topping. Keep in mind that fresh whipped cream may soften a bit more over several days, so the dessert is best eaten within 1–2 days.
Can I make Cherries in the Snow ahead of time?
Definitely. This dessert is ideal for making ahead. Prepare the layers, cover the dish, and refrigerate for at least 4 hours and up to 24 hours before serving. The flavors actually improve as they sit, and the texture becomes wonderfully set and creamy.
How long does this dessert keep in the refrigerator?
Stored in an airtight container or tightly covered, Cherries in the Snow will keep in the fridge for about 3–4 days. The base may soften more over time, but the flavors will still be delicious.
Can I freeze Cherries in the Snow Dessert?
You can freeze it, but the texture may change slightly once thawed—especially if you’re using fresh whipped cream. If you decide to freeze it:
- Wrap the dish well in plastic wrap and then in foil.
- Freeze for up to 1 month.
- Thaw overnight in the refrigerator before serving.
The cream layer may become a bit softer, but it will still taste great.
Can I make a smaller or larger batch?
Yes.
- For a smaller batch, you can halve the recipe and assemble it in an 8×8 inch (20×20 cm) pan.
- For a larger crowd, you can increase the ingredients by 50% and use a slightly larger pan or make two 9×13 dishes.
Can I use a different fruit topping instead of cherries?
Of course. This dessert is very flexible. You can try:
- Strawberry pie filling
- Blueberry pie filling
- Raspberry topping
Just keep the same general amount (about two 21 oz cans) and follow the same layering method.
Can I reduce the sugar in the recipe?
Yes. You can:
- Reduce the powdered sugar from ¾ cup to ½ cup in the cream layer.
- Use a lower-sugar pie filling, if available.
- Choose unsweetened whipped cream and sweeten it lightly to taste.
The dessert will be less sweet but still creamy, fruity, and delicious.
What’s the best base if I want a light, airy texture?
For the most “snowy” and light texture, angel food cake is the best choice. It’s airy and soaks up the creamy and fruity layers beautifully without becoming heavy.


