Introduction
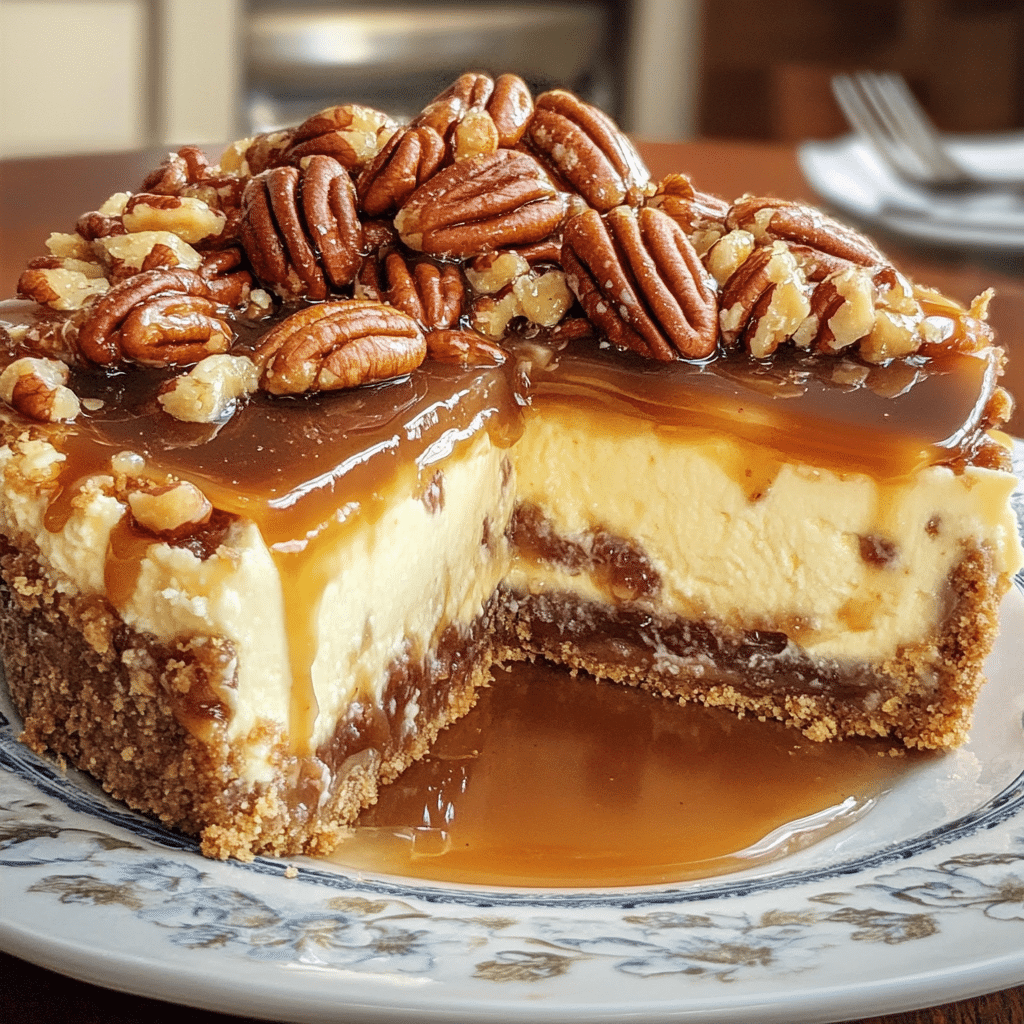
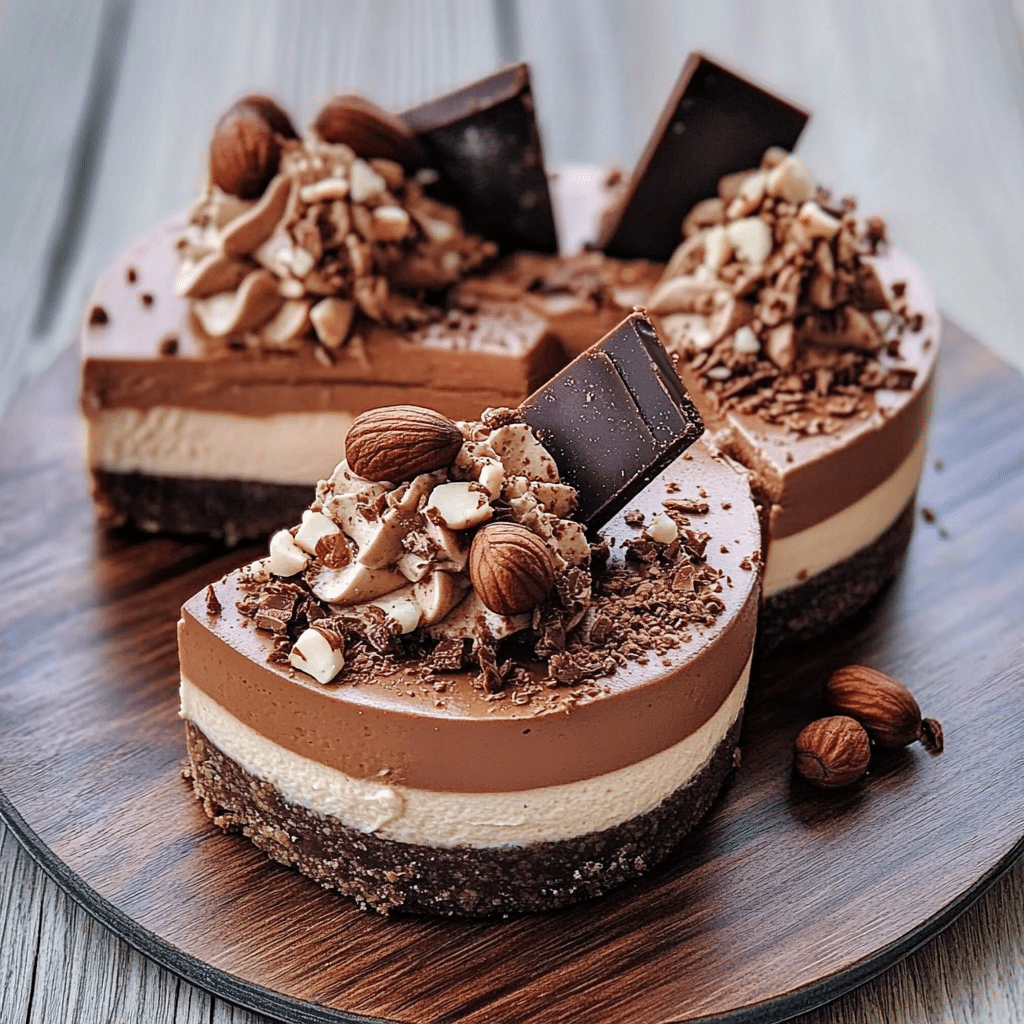
Choc Hazelnut Cheesecake is truly the ultimate indulgence, combining the rich, creamy texture of cheesecake with the irresistible combination of hazelnuts and chocolate. The smooth, velvety cheesecake filling pairs perfectly with a crunchy hazelnut crust and a glossy, decadent chocolate ganache topping. Every bite is a sweet, nutty dream come true, making this cheesecake the perfect choice for a special occasion when you want to wow your guests.
One of my favorite memories with this cheesecake was when I made it for a holiday dinner last year. It was the talk of the evening! Everyone was impressed not only by how beautiful it looked but also by the perfect balance of flavors. The creamy filling is just the right amount of sweetness, while the hazelnut crust adds that satisfying crunch. When you cut into it, the chocolate ganache oozes slightly, giving you that perfect bite.
What I love most about this dessert is that it looks far more complicated than it really is. The prep work is pretty straightforward, and the best part is you can prepare it in stages, allowing you to do most of the work ahead of time. You can make the crust, cheesecake filling, and ganache a day or two before serving—leaving you more time to relax and enjoy the celebration. Whether it’s for a birthday, anniversary, or any reason to indulge, this Choc Hazelnut Cheesecake will undoubtedly steal the show!
Perfect for:
- Birthdays or special occasions
- Holiday desserts
- Chocolate lovers
- Impressing guests at dinner parties
- Gifting homemade desserts
Why You’ll Love This Recipe
The Choc Hazelnut Cheesecake is a showstopper in both flavor and presentation. Here’s why you’ll adore this recipe:
- Rich and Creamy Texture: The smooth, creamy cheesecake filling melts in your mouth with every bite.
- Perfect Balance of Flavors: The combination of chocolate and hazelnuts brings a harmonious balance of sweetness and nuttiness, complemented by a hint of vanilla.
- Decadent Chocolate Ganache: The glossy ganache topping adds an extra layer of richness, making the cheesecake even more indulgent.
- Nutty Hazelnut Crust: The buttery crust adds a delightful crunch and enhances the flavor profile of the cheesecake.
- Customizable: You can adjust the sweetness of the ganache or add extra hazelnut crunch by topping the cheesecake with chopped hazelnuts.
- Impressive Presentation: This cheesecake looks sophisticated and elegant, perfect for showcasing at dinner parties or family celebrations.
- Make-Ahead Dessert: Perfect for preparing in advance, this cheesecake holds up well in the fridge, making it a stress-free dessert option for busy hosts.
Preparation and Cooking Time
- Total Time: 4 hours 30 minutes (including chilling)
- Preparation Time: 25 minutes
- Cook Time: 1 hour
- Chill Time: 3 hours
- Servings: 12 slices
- Calories per serving: Approximately 350-400 calories
- Key Nutrients: Carbs: 30g, Fat: 25g, Protein: 6g
Ingredients
Gather the following ingredients to make your Choc Hazelnut Cheesecake:
- For the Crust:
- 1 1/2 cups graham cracker crumbs
- 1/2 cup crushed hazelnuts
- 1/4 cup melted butter
- 2 tablespoons sugar
- For the Filling:
- 3 (8 oz) packages cream cheese, softened
- 1 cup sugar
- 1 teaspoon vanilla extract
- 3 large eggs
- 1/2 cup sour cream
- 1/2 cup heavy cream
- 1/2 cup hazelnut spread (like Nutella)
- For the Ganache:
- 1 cup dark chocolate chips (or chopped dark chocolate)
- 1/2 cup heavy cream
- 1 tablespoon butter
- For Garnish (optional):
- Chopped hazelnuts
- Whipped cream
Ingredient Highlights
- Hazelnut Spread: The addition of hazelnut spread in the filling gives the cheesecake a unique, nutty flavor that pairs beautifully with the chocolate.
- Cream Cheese: Full-fat cream cheese helps create the rich, creamy texture that’s essential for a perfect cheesecake.
- Dark Chocolate: Dark chocolate is the best choice for ganache as it provides a rich and slightly bitter contrast to the sweet cheesecake filling.
- Hazelnuts: Hazelnuts add both texture and flavor, offering a slight crunch and a nutty, toasty taste in both the crust and as garnish.
Step-by-Step Instructions
Here’s how to make your Choc Hazelnut Cheesecake:
Prepare the Crust:
- Preheat the Oven: Preheat your oven to 325°F (163°C) and grease a 9-inch springform pan with butter or cooking spray.
- Make the Crust: In a bowl, mix graham cracker crumbs, crushed hazelnuts, melted butter, and sugar until the mixture is well combined and slightly damp.
- Press the Crust: Press the crumb mixture evenly into the bottom of the prepared pan to form a firm crust. Use the back of a spoon to compact it.
- Bake the Crust: Bake in the preheated oven for 10 minutes, then remove it and allow it to cool while you prepare the filling.
Prepare the Filling:
- Beat the Cream Cheese: In a large mixing bowl, beat the softened cream cheese and sugar with an electric mixer until smooth and creamy.
- Add Vanilla and Hazelnut Spread: Mix in the vanilla extract and hazelnut spread until fully combined.
- Add Eggs: Add the eggs one at a time, beating well after each addition.
- Add Sour Cream and Heavy Cream: Mix in the sour cream and heavy cream until smooth. The filling should be thick but pourable.
- Pour the Filling into the Pan: Pour the cheesecake filling over the cooled crust in the springform pan, spreading it evenly.
Bake the Cheesecake:
- Bake the Cheesecake: Bake at 325°F (163°C) for 50-60 minutes or until the center is almost set (it should still slightly wobble when shaken).
- Cool the Cheesecake: Turn off the oven, crack the oven door, and let the cheesecake cool for about 1 hour. Then, transfer it to the fridge and chill for at least 3 hours, or overnight for the best results.
Prepare the Ganache:
- Make the Ganache: In a small saucepan, heat the heavy cream and butter over medium heat until it begins to simmer. Remove from heat and stir in the dark chocolate until smooth and glossy.
- Cool the Ganache: Let the ganache cool for 10 minutes before pouring it over the chilled cheesecake.
Garnish and Serve:
- Top the Cheesecake: Pour the ganache over the chilled cheesecake, allowing it to gently drip down the sides. Garnish with chopped hazelnuts and whipped cream if desired.
- Chill and Serve: Let the cheesecake set in the fridge for another 30 minutes before slicing and serving.
How to Serve
These Choc Hazelnut Cheesecake slices can be served in various ways:
- On a Dessert Table: Serve alongside other decadent desserts at a gathering or special event.
- With Fresh Berries: Top with fresh raspberries or strawberries to add a refreshing contrast to the richness of the cheesecake.
- After a Meal: Pair with a cup of coffee or espresso for a delightful dessert after dinner.
- As a Gift: This cheesecake makes a fantastic homemade gift when packaged in a decorative box for birthdays or holidays.
- With a Drizzle of Caramel: Add extra indulgence by drizzling caramel sauce over each slice before serving.
Additional Tips
Here are some additional tips to make your Choc Hazelnut Cheesecake even better:
- Ensure Cream Cheese is Softened: Make sure the cream cheese is fully softened before mixing to prevent lumps in the filling.
- Don’t Overmix the Eggs: Overmixing can incorporate too much air, causing cracks in the cheesecake.
- Use a Water Bath: To avoid cracks, you can bake the cheesecake in a water bath by wrapping the springform pan in foil and placing it in a larger pan with hot water.
- Avoid Overbaking: The cheesecake is done when the edges are set but the center is slightly wobbly. It will firm up as it cools.
- Make Ahead: This cheesecake can be made up to two days in advance and stored in the fridge, making it an ideal dessert for planning ahead.
- For a Thicker Ganache: Use more chocolate or less cream in the ganache recipe if you prefer a thicker topping.
- Customize the Crust: For a different flavor, use crushed chocolate cookies or digestive biscuits in place of graham crackers.
- Freeze for Longer Storage: Freeze leftover cheesecake for up to a month in an airtight container. Let it thaw in the fridge before serving.
- Substitute Nuts: If you’re allergic to hazelnuts, you can substitute almonds or walnuts for the crust and topping.
- Try a No-Bake Version: For a no-bake option, use a no-bake cheesecake filling and chill instead of baking it.
Recipe Variations
Here are 10 variations you can try with your Choc Hazelnut Cheesecake:
- Hazelnut Praline Topping: Instead of chopped hazelnuts, add a layer of crunchy hazelnut praline on top.
- Caramel Hazelnut Cheesecake: Drizzle homemade caramel sauce over the ganache for an added layer of sweetness.
- Chocolate Hazelnut Cheesecake Bars: Make individual bars by using a smaller pan and slicing the cheesecake into squares.
- Nut-Free Version: Omit the hazelnuts and crust to create a nut-free version of this cheesecake.
- Fruity Hazelnut Cheesecake: Add a layer of fruit compote, such as raspberry or strawberry, on top of the ganache.
- White Chocolate Ganache: Swap dark chocolate for white chocolate for a sweeter ganache.
- Peanut Butter Hazelnut Cheesecake: Swirl peanut butter into the cheesecake filling for a nutty and creamy twist.
- Vegan Hazelnut Cheesecake: Use a dairy-free cream cheese substitute and plant-based crust for a vegan-friendly version.
- Mini Cheesecakes: Make individual mini cheesecakes by using a muffin tin or mini springform pans.
- Mocha Hazelnut Cheesecake: Add a tablespoon of instant coffee granules to the cheesecake filling for a mocha flavor.
Freezing and Storage
Store leftover Choc Hazelnut Cheesecake in an airtight container in the fridge for up to 5 days. For longer storage, freeze individual slices by wrapping them in plastic wrap and placing them in a freezer-safe container. Thaw in the fridge for several hours before serving.
Special Equipment
Here are some items that will help you make your Choc Hazelnut Cheesecake:
- Springform Pan: Essential for making cheesecakes, this pan allows you to easily remove the cheesecake after it’s set.
- Electric Mixer: Use an electric mixer to beat the cream cheese and eggs to a smooth consistency.
- Double Boiler or Microwave-Safe Bowl: For melting the chocolate and cream for the ganache.
- Cake Stand or Serving Plate: For presenting your cheesecake beautifully at your next gathering.
- Bench Scraper or Offset Spatula: These tools help in smoothing the ganache over the cheesecake evenly.
- Measuring Cups and Spoons: Accurate measurements ensure the perfect balance of ingredients for the cheesecake and ganache.
- Rubber Spatula: Use a spatula for scraping down the sides of the bowl and folding in ingredients gently.
- Whisk: For mixing the ganache to achieve a smooth and glossy texture.
- Parchment Paper: Useful for lining the base of the springform pan to prevent sticking.
FAQ Section
- Can I make this cheesecake ahead of time?
Yes, this cheesecake can be made up to two days in advance and stored in the fridge. The flavor actually improves as it chills. - Can I use a different type of nut?
Yes, you can substitute hazelnuts with almonds, walnuts, or pecans for a slightly different flavor and texture. - How do I prevent cracks in my cheesecake?
To prevent cracks, avoid overbaking the cheesecake, ensure the ingredients are mixed at a low speed, and consider using a water bath. - Can I use a graham cracker crust instead of a hazelnut crust?
Absolutely! While the hazelnut crust complements the cheesecake’s flavor, a traditional graham cracker crust works perfectly as well. - How should I store leftover cheesecake?
Store leftovers in an airtight container in the fridge for up to 5 days, or freeze slices for up to a month. - Can I make a dairy-free version of this cheesecake?
Yes, you can use dairy-free cream cheese and a dairy-free crust to make this cheesecake vegan-friendly. - Can I use Nutella in place of hazelnut spread?
Yes, Nutella works well as a substitute for hazelnut spread in both the filling and the ganache. - Is this recipe suitable for a gluten-free diet?
To make this cheesecake gluten-free, use gluten-free graham crackers or gluten-free cookies for the crust. - How can I make the ganache thicker?
To make the ganache thicker, reduce the amount of cream or increase the amount of chocolate. - Can I freeze this cheesecake?
Yes, you can freeze the cheesecake by wrapping it tightly and storing it in a freezer-safe container for up to a month. Thaw in the fridge before serving.
Choc Hazelnut Cheesecake
- Total Time: 4 hours 30 minutes
Ingredients
Gather the following ingredients to make your Choc Hazelnut Cheesecake:
- For the Crust:
- 1 1/2 cups graham cracker crumbs
- 1/2 cup crushed hazelnuts
- 1/4 cup melted butter
- 2 tablespoons sugar
- For the Filling:
- 3 (8 oz) packages cream cheese, softened
- 1 cup sugar
- 1 teaspoon vanilla extract
- 3 large eggs
- 1/2 cup sour cream
- 1/2 cup heavy cream
- 1/2 cup hazelnut spread (like Nutella)
- For the Ganache:
- 1 cup dark chocolate chips (or chopped dark chocolate)
- 1/2 cup heavy cream
- 1 tablespoon butter
- For Garnish (optional):
- Chopped hazelnuts
- Whipped cream
Instructions
Prepare the Crust:
- Preheat the Oven: Preheat your oven to 325°F (163°C) and grease a 9-inch springform pan with butter or cooking spray.
- Make the Crust: In a bowl, mix graham cracker crumbs, crushed hazelnuts, melted butter, and sugar until the mixture is well combined and slightly damp.
- Press the Crust: Press the crumb mixture evenly into the bottom of the prepared pan to form a firm crust. Use the back of a spoon to compact it.
- Bake the Crust: Bake in the preheated oven for 10 minutes, then remove it and allow it to cool while you prepare the filling.
Prepare the Filling:
- Beat the Cream Cheese: In a large mixing bowl, beat the softened cream cheese and sugar with an electric mixer until smooth and creamy.
- Add Vanilla and Hazelnut Spread: Mix in the vanilla extract and hazelnut spread until fully combined.
- Add Eggs: Add the eggs one at a time, beating well after each addition.
- Add Sour Cream and Heavy Cream: Mix in the sour cream and heavy cream until smooth. The filling should be thick but pourable.
- Pour the Filling into the Pan: Pour the cheesecake filling over the cooled crust in the springform pan, spreading it evenly.
Bake the Cheesecake:
- Bake the Cheesecake: Bake at 325°F (163°C) for 50-60 minutes or until the center is almost set (it should still slightly wobble when shaken).
- Cool the Cheesecake: Turn off the oven, crack the oven door, and let the cheesecake cool for about 1 hour. Then, transfer it to the fridge and chill for at least 3 hours, or overnight for the best results.
Prepare the Ganache:
- Make the Ganache: In a small saucepan, heat the heavy cream and butter over medium heat until it begins to simmer. Remove from heat and stir in the dark chocolate until smooth and glossy.
- Cool the Ganache: Let the ganache cool for 10 minutes before pouring it over the chilled cheesecake.
Garnish and Serve:
- Top the Cheesecake: Pour the ganache over the chilled cheesecake, allowing it to gently drip down the sides. Garnish with chopped hazelnuts and whipped cream if desired.
- Chill and Serve: Let the cheesecake set in the fridge for another 30 minutes before slicing and serving.
- Prep Time: 25 minutes
- Cook Time: 1 hour
Nutrition
- Serving Size: 12 slices
- Calories: 350-400 kcal
- Fat: 25g
- Carbohydrates: 30g
- Protein: 6g
Conclusion
The Choc Hazelnut Cheesecake is an unforgettable dessert that combines rich chocolate, creamy cheesecake, and crunchy hazelnuts in every bite. Its velvety smooth texture and the perfect balance of sweet and nutty flavors create a decadent treat that will impress anyone lucky enough to try it. Whether you’re celebrating a special occasion or simply indulging in a homemade treat, this cheesecake is sure to delight with its luxurious taste.
The rich chocolate base, complemented by a creamy cheesecake layer, makes each bite an indulgent experience. The added crunch of hazelnuts provides the perfect texture contrast, elevating this dessert to new heights. Whether served at a dinner party or enjoyed as a special family dessert, this cheesecake will be a standout.
Give this recipe a try, and enjoy every creamy, chocolatey bite. I can’t wait to see how your Choc Hazelnut Cheesecake turns out! Don’t forget to share a photo on social media and tag me—I love seeing your amazing creations! Enjoy your baking!
