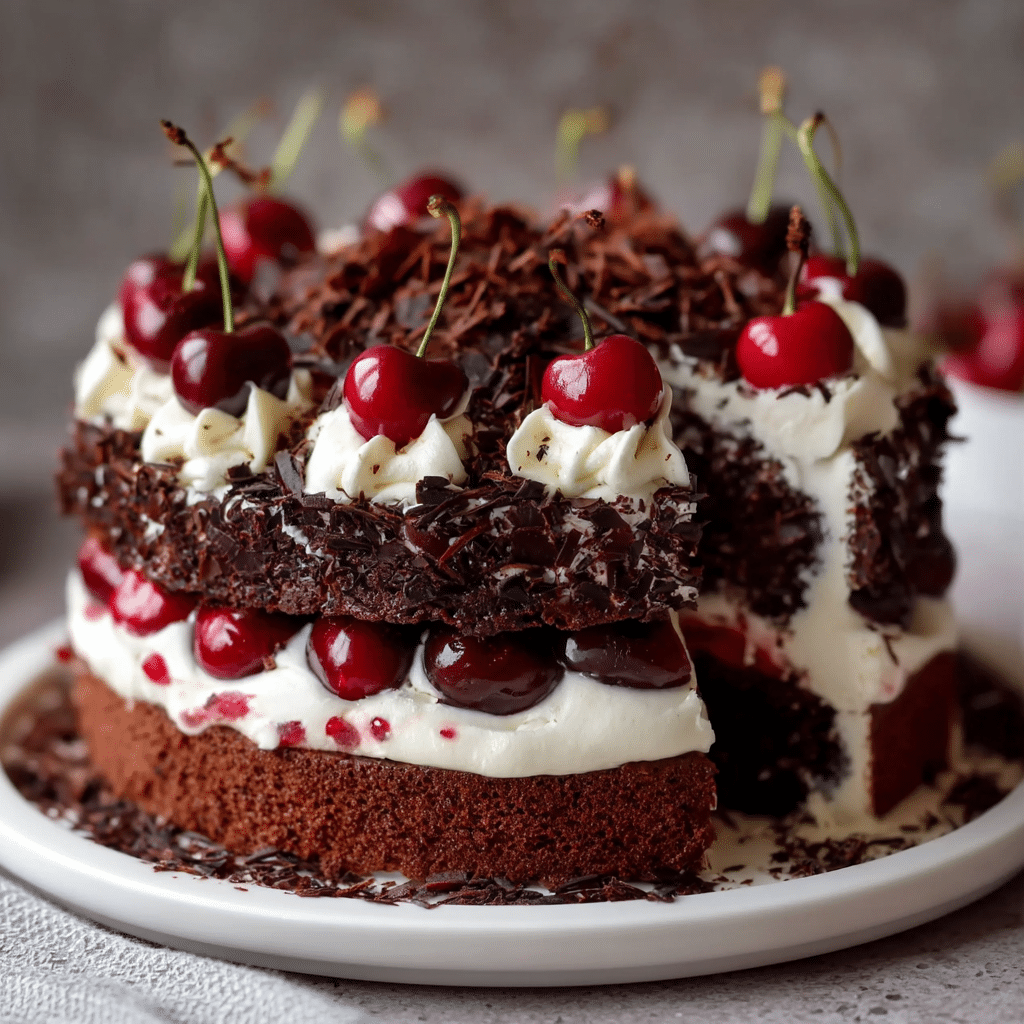
A timeless chocolate-cherry masterpiece with fluffy whipped cream and dramatic layers—pure celebration in cake form.
There are some desserts that don’t just taste good—they feel like an occasion. Classic Black Forest Cake is one of them. It’s the kind of cake that instantly turns an ordinary day into something festive, whether it’s served at a birthday table, a holiday gathering, or simply as a weekend treat “just because.” With its deep chocolate layers, sweet-tart cherries, silky whipped cream, and that signature finishing touch of chocolate shavings, Black Forest Cake is both elegant and irresistibly comforting.
What makes this cake so special is how perfectly its flavors play together. The chocolate sponge is rich but not heavy. The cherries add brightness and a little tartness that keeps every bite lively. The whipped cream lightens the whole experience, giving the cake that airy, melt-in-your-mouth feel. When you slice into the layers, it’s not only beautiful—it’s dramatic in the best way. Every forkful gives you a bit of everything: chocolate, cherry, cream, and a hint of luxurious sweetness.
Classic Black Forest Cake also has a nostalgic charm. Even if you didn’t grow up eating it, it feels like a dessert from a storybook—something you’d see in a pastry case and dream about. Yet, once you break it down step by step, it’s far more approachable than it looks. With a few smart techniques, you can make a bakery-style Black Forest Cake right in your own kitchen, and the result is a dessert that feels proud, generous, and unforgettable.
If you’ve ever wanted a “showstopper” cake that tastes as impressive as it looks, this is it. Below you’ll find a full, detailed guide—following the same structure and format as your Apple Pie Bars article—so you can confidently bake, assemble, and serve a Classic Black Forest Cake that turns heads and wins hearts.
Core Ingredients for Making the Recipe
Black Forest Cake is all about three main elements: chocolate sponge cake, cherries, and whipped cream. The ingredients are simple, but the magic comes from how they come together.
For the Chocolate Cake Layers
- 2 cups all-purpose flour
- 1 ¾ cups granulated sugar
- ¾ cup unsweetened cocoa powder
- 1 ½ teaspoons baking powder
- 1 ½ teaspoons baking soda
- 1 teaspoon salt
- 2 large eggs
- 1 cup buttermilk (or milk + 1 tbsp vinegar/lemon juice)
- ½ cup vegetable oil
- 2 teaspoons vanilla extract
- 1 cup hot coffee (or hot water)
Why coffee? Hot coffee deepens the cocoa flavor and makes the chocolate taste richer without making the cake taste like coffee.
For the Cherry Filling
- 4 cups cherries (fresh pitted, frozen thawed, or canned)
- ½ cup sugar (adjust depending on cherry sweetness)
- 2 tablespoons cornstarch
- 2 tablespoons water
- 1 teaspoon lemon juice
- (Optional) 1–2 tablespoons cherry juice for extra flavor
For the Whipped Cream Frosting
- 3 cups heavy whipping cream (very cold)
- ⅓ cup powdered sugar
- 1 teaspoon vanilla extract
- 1–2 tablespoons instant vanilla pudding mix (optional stabilizer)
For Decorating
- Chocolate shavings or curls
- Whole cherries (fresh or maraschino)
- Extra cocoa powder (optional dusting)
Step-by-Step
 Guide to Making the Recipe

1. Prep Your Pans and Oven
Preheat your oven to 350°F (175°C).
Grease and line two or three 8-inch or 9-inch cake pans with parchment paper. This step ensures your cake releases cleanly without tearing.
2. Mix the Dry Ingredients
In a large bowl, whisk together:
- flour
- sugar
- cocoa powder
- baking powder
- baking soda
- salt
Whisking well here prevents cocoa lumps and helps the cake rise evenly.
3. Add the Wet Ingredients
Add the eggs, buttermilk, oil, and vanilla. Mix until smooth.
The batter will start thick, but that changes in the next step.
4. Add Hot Coffee
Slowly pour in the hot coffee (or hot water), mixing as you go.
The batter will become thin—this is normal and exactly what makes the cake moist and tender.
5. Bake
Divide the batter evenly into your pans and bake:
- 8-inch pans: 28–35 minutes
- 9-inch pans: 25–32 minutes
The cake is done when a toothpick inserted in the center comes out with a few moist crumbs (not wet batter).
Let the cakes cool in pans for 10 minutes, then turn them out onto a rack to cool completely.
6. Make the Cherry Filling
While the cakes cool, make the cherries.
In a saucepan, add cherries, sugar, and lemon juice. Cook on medium heat until juicy and simmering.
In a small bowl, stir cornstarch with water until smooth, then pour it into the cherries. Stir until the mixture thickens into a glossy cherry sauce.
Remove from heat and let it cool completely.
Tip: If the filling is warm when assembling, it can melt the whipped cream and slide the layers.
7. Whip the Cream
In a cold mixing bowl, beat the heavy cream until it begins to thicken. Add powdered sugar and vanilla.
Whip until soft peaks form. If using pudding mix as a stabilizer, add it in while whipping.
Stop once the cream holds its shape. Over-whipping can turn it grainy.
8. Assemble the Cake
Place the first cake layer on a serving plate. Spread a thick layer of whipped cream. Spoon cherries over the cream, letting some sauce soak slightly into the cake.
Repeat with the next layer. Finish with the final layer on top.
Frost the entire cake with whipped cream, smoothing the sides and top.
9. Decorate
Press chocolate shavings onto the sides, pile curls on top, and finish with cherries for that classic Black Forest look.
Refrigerate the cake for at least 2–4 hours before slicing. This helps everything set beautifully.
Flavor Variations and Creative Twists
Classic Black Forest Cake is iconic, but there are fun ways to personalize it while keeping the same spirit.
1. Dark Chocolate Upgrade
Use dark cocoa powder or add melted dark chocolate to the batter for an even deeper flavor.
2. Cherry Options
- Fresh cherries: brightest flavor
- Frozen cherries: convenient and delicious
- Canned cherries: easiest option and very classic
3. Add a Chocolate Ganache Drip
Pour a thin ganache over the top for a modern bakery-style look while still keeping the traditional flavors.
4. Mini Black Forest Cakes
Bake cupcakes or mini layers in ramekins for individual servings—perfect for parties.
5. Extra Chocolate Texture
Add chocolate chips between layers, or sprinkle crushed chocolate cookies into the filling for crunch.
How to Serve
Black Forest Cake is naturally celebratory, but it can be served in many ways depending on the mood and occasion.
Classic Serving
Slice cleanly with a sharp knife wiped between cuts. Serve chilled for neat layers and a stable whipped cream frosting.
With Coffee or Tea
The chocolate and cherries pair beautifully with:
- espresso
- cappuccino
- black tea
- cherry or berry herbal tea
For Special Occasions
Serve with a small scoop of vanilla ice cream or a drizzle of cherry sauce on the plate for restaurant-style presentation.
Light, Refreshing Option
Serve with fresh berries on the side—raspberries and strawberries complement the cherries beautifully.
Tips & Variations
Choose the Right Cake Texture
A sponge-like chocolate cake is traditional, but you can also use a moist cocoa cake. Just avoid overly dense cakes that overwhelm the whipped cream.
Make Sure Everything Is Cool
This is the golden rule:
- Cool cake layers fully
- Cool cherry filling fully
- Use cold cream and a cold bowl
Heat is the enemy of whipped cream stability.
Stabilize the Whipped Cream
If you want the cake to hold up longer (especially for parties), stabilize the cream with:
- instant pudding mix
- or a bit of gelatin (advanced method)
Prevent Sliding Layers
If your cherry filling is very juicy, don’t overload the layers. Keep cherries mostly centered, not spilling out the sides.
Best Slicing Trick
Chill the cake, then slice with a hot knife (run under hot water, wipe dry). It cuts through cleanly without dragging cream.
Final Thoughts
Classic Black Forest Cake is more than dessert—it’s a statement. It brings together bold chocolate, bright cherries, and soft clouds of whipped cream in a way that feels timeless, dramatic, and deeply satisfying. It’s the kind of cake that makes people pause after the first bite, then smile, then immediately ask for another slice.
What makes it truly special is that it’s both luxurious and comforting at the same time. The ingredients are familiar, yet the result feels elegant. The layers are beautiful, yet the flavors feel warm and nostalgic. It’s the perfect cake when you want something that looks impressive without requiring professional pastry skills.
Once you make it at home, you’ll realize why it has survived generations of celebrations. It’s a classic for a reason: it’s unforgettable.
FAQ
Can I use canned cherries?
Yes. Canned cherries are very common for Black Forest Cake. Just drain them well and thicken the juices into a sauce if needed.
Can I make it ahead of time?
Absolutely. In fact, Black Forest Cake tastes even better after chilling for several hours. You can make it a day ahead and keep it refrigerated.
Can I freeze Black Forest Cake?
You can freeze the chocolate cake layers (wrapped tightly) for up to 2–3 months.
However, whipped cream frosting doesn’t freeze perfectly—it can change texture. For best results, freeze cake layers only and assemble fresh.
How long does it last in the fridge?
It keeps well for 2–3 days refrigerated in a covered container. The whipped cream will be at its best within the first 48 hours.
What if my whipped cream gets runny?
Make sure your cream is very cold and don’t whip in a warm kitchen. If needed, use a stabilizer like pudding mix to help it hold.
Print
Classic Black Forest Cake (Schwarzwälder Kirschtorte)
Ingredients
For the Chocolate Cake Layers
- 2 cups all-purpose flour
- 1 ¾ cups granulated sugar
- ¾ cup unsweetened cocoa powder
- 1 ½ teaspoons baking powder
- 1 ½ teaspoons baking soda
- 1 teaspoon salt
- 2 large eggs
- 1 cup buttermilk (or milk + 1 tbsp vinegar/lemon juice)
- ½ cup vegetable oil
- 2 teaspoons vanilla extract
- 1 cup hot coffee (or hot water)
Why coffee? Hot coffee deepens the cocoa flavor and makes the chocolate taste richer without making the cake taste like coffee.
For the Cherry Filling
- 4 cups cherries (fresh pitted, frozen thawed, or canned)
- ½ cup sugar (adjust depending on cherry sweetness)
- 2 tablespoons cornstarch
- 2 tablespoons water
- 1 teaspoon lemon juice
- (Optional) 1–2 tablespoons cherry juice for extra flavor
For the Whipped Cream Frosting
- 3 cups heavy whipping cream (very cold)
- ⅓ cup powdered sugar
- 1 teaspoon vanilla extract
- 1–2 tablespoons instant vanilla pudding mix (optional stabilizer)
For Decorating
- Chocolate shavings or curls
- Whole cherries (fresh or maraschino)
- Extra cocoa powder (optional dusting)