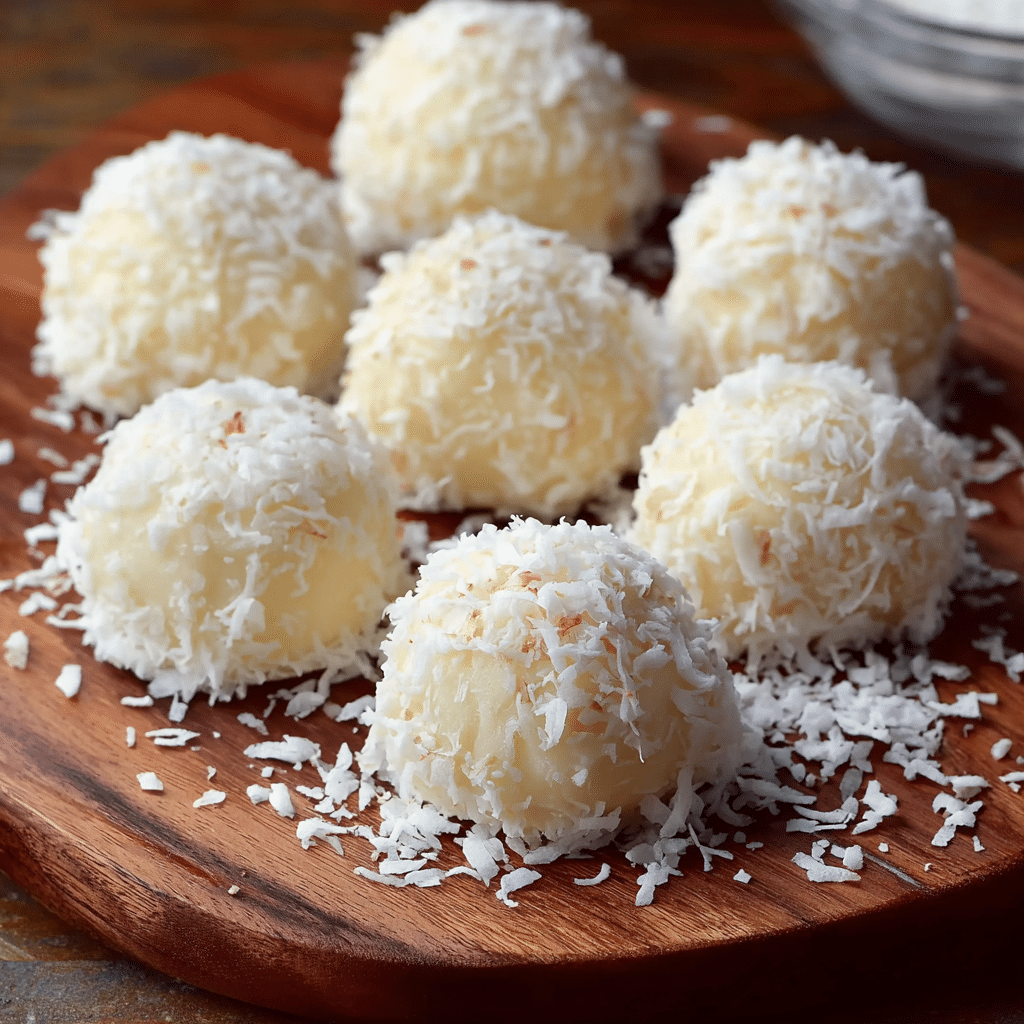
Coconut Snowball Truffles are one of those treats that instantly evoke warmth, celebration, and pure indulgence. Soft, creamy, and coated in a delicate blanket of snowy coconut or powdered sugar, these bite-sized delights feel festive yet comforting at the same time. Whether enjoyed during the holidays, prepared for a special gathering, or made simply to satisfy a sweet craving, Coconut Snowball Truffles are a dessert that never fails to impress.
What makes these truffles truly special is their simplicity. There’s no baking involved, no complicated techniques, and no need for fancy equipment. With just a handful of pantry-friendly ingredients and a bit of patience, you can create an elegant confection that looks as beautiful as it tastes. Each bite melts gently in your mouth, releasing rich coconut flavor balanced with creamy sweetness.
Unlike many desserts that require precise timing or advanced skills, Coconut Snowball Truffles are forgiving and beginner-friendly. They’re perfect for anyone who wants to create something impressive without spending hours in the kitchen. Even better, they’re highly customizable, allowing you to adjust flavors, textures, and coatings to suit your personal taste or the occasion.
Whether you’re preparing treats for a holiday cookie platter, a party dessert table, or a cozy evening at home, these Coconut Snowball Truffles bring joy in the simplest form—sweet, creamy, and irresistibly good.
Core Ingredients for Making the Recipe
To prepare these luscious Coconut Snowball Truffles, you’ll need just a few simple ingredients. Each one plays an important role in creating the perfect texture and flavor.
For the Truffles
- 2 cups shredded coconut (unsweetened or lightly sweetened)
- 1 cup sweetened condensed milk
- 1 teaspoon vanilla extract
- 2 tablespoons unsalted butter, melted
- A pinch of salt
For the Coating
- 1 cup shredded coconut or
- 1 cup powdered sugar
These ingredients combine to create a truffle that’s rich, creamy, and delicately sweet, with coconut as the star of the show.
Step-by-Step
Guide to Making the Recipe
Begin by gathering all your ingredients and ensuring your workspace is clean and ready. Since this is a no-bake recipe, preparation and chilling time are key to achieving the best texture.
In a large mixing bowl, combine the shredded coconut, sweetened condensed milk, vanilla extract, melted butter, and a pinch of salt. Use a spatula or spoon to mix everything together until well combined. The mixture should be moist, sticky, and hold together easily when pressed.
Once mixed, cover the bowl with plastic wrap and refrigerate for about 30–45 minutes. Chilling helps firm up the mixture, making it easier to shape into neat, round truffles.
After chilling, remove the mixture from the refrigerator. Using a small cookie scoop or a tablespoon, scoop out portions of the mixture and roll them gently between your palms to form smooth balls. Aim for uniform size so the truffles look consistent when served.
Place the rolled truffles on a baking sheet lined with parchment paper. Once all the truffles are shaped, return the tray to the refrigerator for another 20–30 minutes to firm up further.
While the truffles chill, prepare your coating. If using shredded coconut, spread it out in a shallow bowl. If using powdered sugar, sift it into a separate bowl to remove any lumps.
Remove the chilled truffles from the refrigerator and roll each one gently in your chosen coating until fully covered. Shake off any excess and place them back on the parchment-lined tray.
Once coated, the Coconut Snowball Truffles are ready to serve or store. Their snowy appearance and soft, creamy centers make them irresistible from the very first bite.
Flavor Variations and Creative Twists
One of the greatest joys of Coconut Snowball Truffles is how adaptable they are. With a few simple additions or substitutions, you can transform the flavor profile and make each batch feel new and exciting.
For a chocolate lover’s twist, mix mini chocolate chips or finely chopped dark chocolate into the coconut mixture before chilling. The contrast between creamy coconut and rich chocolate adds depth and indulgence.
If you enjoy citrus notes, add a teaspoon of lemon or orange zest to the mixture. The bright citrus aroma enhances the coconut flavor and adds a refreshing touch that balances the sweetness beautifully.
For a nutty variation, finely chop almonds, pecans, or macadamia nuts and fold them into the mixture. Nuts add texture and a subtle crunch that contrasts nicely with the soft truffle center.
You can also experiment with extracts. Almond extract, coconut extract, or even a hint of rum extract can elevate the flavor and make the truffles feel more sophisticated.
For a festive touch, roll the truffles in colored sugar, finely crushed cookies, or even cocoa powder instead of coconut or powdered sugar. Each coating brings its own personality and visual appeal.
How to Serve
Coconut Snowball Truffles are incredibly versatile when it comes to serving. Their small size and elegant appearance make them suitable for many occasions.
Serve them chilled on a decorative platter for parties, holidays, or dessert buffets. Their snowy coating makes them especially fitting for winter celebrations and festive gatherings.
For a cozy treat, enjoy them with a warm cup of coffee, tea, or hot chocolate. The creamy coconut pairs wonderfully with both bold and mild beverages.
If you’re preparing a dessert spread, pair these truffles with other bite-sized treats like cookies or brownies. Their light, creamy texture balances heavier desserts perfectly.
They also make wonderful edible gifts. Place them in decorative boxes or tins lined with parchment paper for a thoughtful, homemade present that feels luxurious and personal.
Tips & Variations
Choosing the right coconut is key. Finely shredded coconut blends more smoothly into the mixture, creating a creamier texture. Larger flakes can be used, but they will result in a slightly chunkier truffle.
If your mixture feels too sticky, add a little extra shredded coconut. If it feels too dry, add a tablespoon of condensed milk until the desired consistency is reached.
Always chill the mixture before shaping. Skipping this step can make rolling difficult and result in uneven truffles.
When rolling, lightly grease your hands with a bit of butter or oil to prevent sticking. This small trick makes shaping much easier.
For a firmer truffle, extend the chilling time after shaping. This is especially helpful if you plan to transport or stack them.
Final Thoughts
Coconut Snowball Truffles are proof that simple ingredients can create extraordinary results. With their creamy centers, delicate sweetness, and elegant snowy coating, they embody comfort and celebration in every bite.
These truffles are perfect for both beginners and experienced home cooks. They require minimal effort, yet the result feels polished and indulgent. Whether you’re making them for a holiday, a gathering, or a quiet moment of self-indulgence, they never disappoint.
What truly sets Coconut Snowball Truffles apart is their versatility. They can be customized endlessly, stored easily, and served in countless ways. Once you make them, they’re likely to become a staple in your dessert rotation.
Sometimes, the most memorable desserts aren’t the most complicated—they’re the ones that bring joy through simplicity. Coconut Snowball Truffles do exactly that.
FAQ
Can I make Coconut Snowball Truffles ahead of time?
Yes, absolutely. These truffles are perfect for making ahead. Store them in an airtight container in the refrigerator for up to one week. Their flavor and texture actually improve after resting.
Can I freeze Coconut Snowball Truffles?
Yes, they freeze very well. Place them in a single layer in a freezer-safe container and freeze for up to three months. Thaw in the refrigerator before serving.
Can I make them dairy-free?
You can substitute sweetened condensed coconut milk and plant-based butter to make a dairy-free version. The texture may vary slightly, but the coconut flavor remains delicious.
Are these truffles very sweet?
They are moderately sweet. If you prefer less sweetness, use unsweetened coconut and reduce the amount of condensed milk slightly.
Can kids help make this recipe?
Definitely. Since there’s no baking involved, this is a fun and safe recipe for kids to help with—especially rolling and coating the truffles.