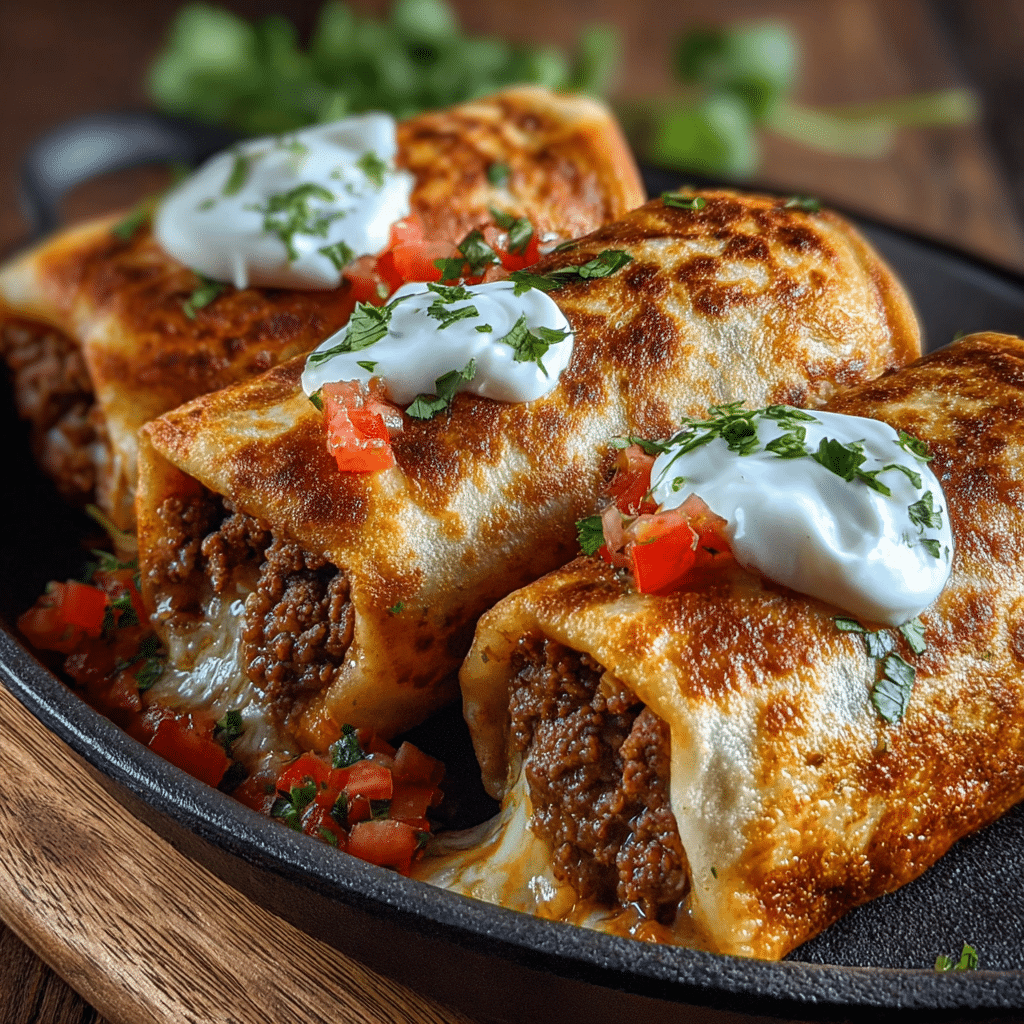
There are days when you don’t just want dinner—you want a moment. Something hot, crispy, cheesy, and insanely satisfying. That’s exactly what these Crispy Beef Cheese Chimichangas deliver.
Think of them as the playful, deep-fried cousins of burritos: stuffed with savory seasoned beef, loaded with melty cheese, wrapped in soft tortillas, then fried (or baked) until golden and irresistibly crunchy. One bite into that flaky crust and you’re greeted with a molten, cheesy, flavorful filling that feels like a fiesta in every mouthful.
What makes these chimichangas so special is their balance of textures and flavors. The outside is crisp and buttery, while the inside is rich and savory with perfectly seasoned ground beef, tender onions, aromatic garlic, and pockets of melted cheese. Serve them with cool toppings like sour cream, guacamole, and fresh salsa, and you get that magical contrast of hot and crispy with cool and creamy.
Perfect for family dinners, game nights, weekend comfort meals, or anytime you want to impress with something that looks restaurant-worthy but is actually simple to make at home, these Crispy Beef Cheese Chimichangas are sure to become a new favorite. Once you try them, you’ll find yourself craving that first, dramatic crunchy bite again and again.
Core Ingredients for Making the Recipe
To prepare these comforting, flavor-packed chimichangas, you’ll need straightforward ingredients that come together to build layers of taste and texture. Here’s what you’ll need:
For the Beef Filling
These ingredients create a rich, savory base that’s loaded with flavor.
- 500 g (1 lb) ground beef (80% lean for juiciness)
Provides a flavorful, tender, and juicy filling. - 1 medium onion, finely chopped
Adds sweetness and depth to the beef mixture. - 3 cloves garlic, minced
Brings a fragrant, savory aroma that ties the filling together. - 2 tablespoons tomato paste
Concentrated flavor that adds richness and body. - ½ cup tomato sauce or mild salsa
Keeps the filling moist and adds subtle tang and spice. - 1 teaspoon chili powder
- 1 teaspoon ground cumin
- ½ teaspoon smoked paprika (or regular paprika)
- ½ teaspoon dried oregano
- ½ teaspoon salt (or to taste)
- ¼ teaspoon black pepper
These spices work together to create a bold, Tex-Mex-style flavor. - 2–3 tablespoons water or beef broth (as needed)
Helps loosen the mixture if it gets too thick while cooking.
For the Cheese & Tortilla Layer
This is where the chimichangas get their gooey, cheesy center.
- 1½–2 cups shredded cheese
(Cheddar, Monterey Jack, or a Mexican blend all work beautifully.) - 8 large flour tortillas (8–10 inch, burrito-size)
Soft, pliable tortillas are key for wrapping and folding. - 2 tablespoons chopped fresh cilantro (optional)
Adds freshness and a pop of color. - 1 small jalapeño, finely chopped (optional)
For a gentle heat if you like a little kick.
For Frying & Serving
- Vegetable oil, canola oil, or sunflower oil
Enough for shallow frying in a large skillet. - Sour cream
- Guacamole or sliced avocado
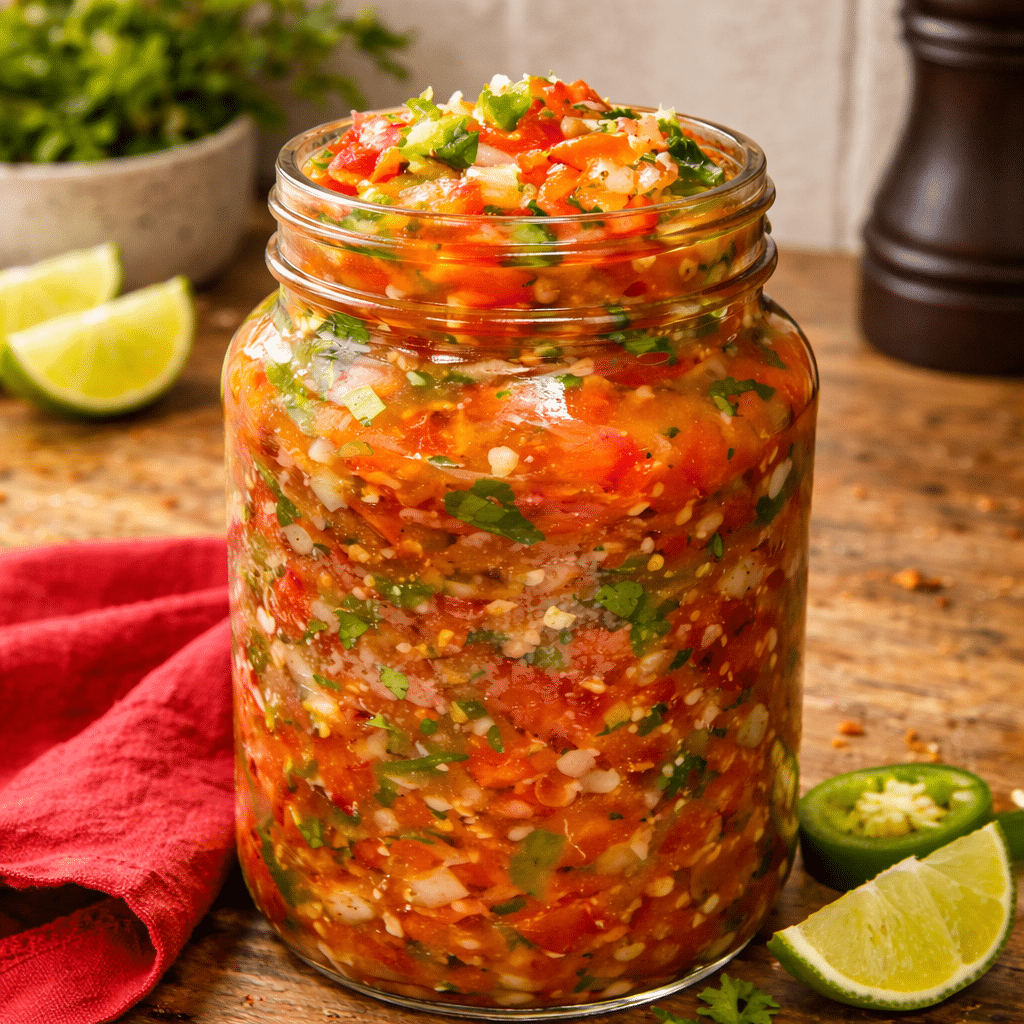
- Fresh salsa or pico de gallo
- Lime wedges
- Shredded lettuce or cabbage (optional)
- Extra shredded cheese for topping (optional)
These toppings turn your chimichangas into a full, vibrant plate that feels like a restaurant meal made at home.
Step-by-Step
Guide to Making the Recipe
1. Cook the Beef Filling
- Sauté the aromatics:
In a large skillet over medium heat, add a drizzle of oil if your beef is very lean. Add the finely chopped onion and cook for 3–4 minutes, stirring occasionally, until it softens and turns translucent. - Add the garlic:
Stir in the minced garlic and cook for another 30–60 seconds, just until fragrant. Be careful not to let it burn. - Brown the beef:
Add the ground beef to the skillet. Use a spatula or wooden spoon to break it up into small pieces. Cook for 5–7 minutes, stirring now and then, until the beef is no longer pink. - Drain excess fat (if needed):
If the mixture looks very greasy, carefully spoon off some of the fat or drain briefly. Leave a little for flavor. - Season the filling:
Stir in the tomato paste, chili powder, cumin, smoked paprika, oregano, salt, and pepper. Mix well so the beef is evenly coated in the seasonings. - Add moisture:
Pour in the tomato sauce or salsa and 2–3 tablespoons of water or broth. Stir to combine. - Simmer briefly:
Reduce the heat to low and let the mixture simmer for 3–5 minutes, until slightly thickened but still moist. You want a rich, scoopable filling—not dry and crumbly. - Finish and cool slightly:
Taste and adjust seasoning if needed. Remove the skillet from the heat and let the filling cool for a few minutes while you prepare the rest of the ingredients.
2. Set Up Your Rolling Station
Before assembling, gather everything in one place:
- Slightly cooled beef filling
- Shredded cheese
- Tortillas
- Optional cilantro and jalapeños
Warm the tortillas briefly in the microwave or a dry skillet for 10–15 seconds each. Warm tortillas are more pliable and less likely to tear when you fold them.
3. Assemble the Chimichangas
- Lay one warm tortilla on a flat surface or plate.
- Spoon 2–3 generous tablespoons of beef filling into the center, slightly closer to the edge near you.
- Sprinkle a small handful of shredded cheese over the beef. Add cilantro and jalapeño if using.
- Fold in the left and right sides of the tortilla toward the center, then fold the bottom edge up over the filling, and roll forward tightly like a burrito, tucking as you go.
- Place the rolled chimichanga seam-side down on a tray or plate.
- Repeat the process with the remaining tortillas and filling until everything is assembled.
You should end up with neat, tightly rolled chimichangas that won’t leak when you fry them.
4. Fry Until Golden and Crispy
You can shallow-fry on the stove or bake for a lighter version. Here’s how to shallow-fry for that classic crunch:
- Pour about 1–2 cm (½ inch) of oil into a large, deep skillet. Heat over medium to medium-high heat until the oil is hot but not smoking.
- You can test the oil by dipping the edge of a tortilla scrap—if it sizzles immediately, it’s ready.
- Carefully place 2–3 chimichangas seam-side down in the hot oil, depending on the size of your skillet. Don’t overcrowd the pan.
- Fry for 2–3 minutes per side, turning gently with tongs, until all sides are golden brown and crispy.
- Transfer the fried chimichangas to a plate lined with paper towels to drain excess oil.
- Repeat with the remaining chimichangas, adjusting the heat as needed so they brown evenly without burning.
5. Serve and Enjoy
Once the chimichangas are fried to a beautiful golden color, it’s time to plate them:
- Place one or two chimichangas on a plate.
- Top with a spoonful of sour cream, guacamole, and fresh salsa.
- Add shredded lettuce or cabbage on the side for crunch.
- Sprinkle with extra cheese or cilantro if desired.
- Serve with lime wedges for squeezing over the top.
Every bite will give you the perfect combination of crispy shell, gooey cheese, and savory, spiced beef.
Flavor Variations and Creative Twists
The beauty of Crispy Beef Cheese Chimichangas is their versatility. Once you’ve mastered the basic method, you can customize the filling, spices, and toppings to create new versions again and again.
1. Spicy Chipotle Beef Chimichangas
Add finely chopped chipotle peppers in adobo or 1–2 teaspoons of chipotle chili powder to the beef mixture for smoky heat. Top with a drizzle of chipotle mayo for extra flavor.
2. Beef & Bean Chimichangas
Stir ½–1 cup of black beans or refried beans into the beef mixture. This stretches the filling and adds extra protein and fiber while giving the chimichangas a heartier texture.
3. Loaded Veggie Version
Add finely chopped bell peppers, corn, or jalapeños to the onion and garlic mixture when sautéing. It boosts flavor, color, and nutrition without much extra work.
4. Queso Chimichangas
Replace part of the shredded cheese with queso blanco or pepper jack for a melty, slightly spicy cheese pull when you slice into the chimichanga.
5. Breakfast Chimichangas
Swap the ground beef for breakfast sausage, and add scrambled eggs and cheese. Serve with salsa and avocado for a breakfast or brunch twist.
6. Baked Instead of Fried
For a lighter version, brush the rolled chimichangas with a bit of oil or melted butter and bake at 400°F (200°C) for about 18–22 minutes, flipping halfway through, until crisp and golden.
How to Serve
Crispy Beef Cheese Chimichangas are incredibly flexible when it comes to serving. They can be the star of the plate or part of a larger Tex-Mex spread.
As a Main Dish
Serve one or two chimichangas per person with:
- A side of Mexican rice or cilantro-lime rice
- Refried beans or black beans
- A simple side salad or shredded lettuce with lime
With Topping Bar Style
For parties or family dinners, set up a topping bar so everyone can customize their chimichanga:
- Sour cream
- Guacamole or sliced avocado
- Salsa, pico de gallo, or salsa verde
- Sliced jalapeños
- Shredded lettuce or cabbage
- Lime wedges
- Extra cheese
This turns dinner into an interactive, fun experience where everyone builds their perfect plate.
As a Party Finger Food
Make smaller chimichangas using fajita-size tortillas, slice them in halves or thirds, and serve with toothpicks and dipping sauces like queso, salsa, and spiced sour cream.
Tips & Variations
To get the best result every time, here are some helpful tips:
1. Don’t Overfill the Tortillas
It’s tempting to stuff them to the brim, but overfilling makes rolling harder and increases the chance they’ll burst while frying. Aim for a modest line of filling that you can wrap securely.
2. Seal Them Well
Always place chimichangas seam-side down first in the hot oil. This helps the seam seal and keeps the filling inside.
3. Keep the Oil at the Right Temperature
If the oil is too hot, the outside will brown too quickly while the inside stays cool. If it’s too cool, the chimichangas will absorb more oil and become greasy. Medium to medium-high heat with a steady sizzle is ideal.
4. Use Good Melting Cheese
Cheeses like cheddar, Monterey Jack, Colby Jack, or a Mexican blend melt beautifully and give you that satisfying stretch when you bite into the chimichanga.
5. Adjust the Spice Level
You can easily make this recipe mild or spicy.
- For milder chimichangas: reduce or omit jalapeños and chili powder.
- For spicier ones: add extra chili powder, jalapeños, chipotle, or hot sauce to the filling.
6. Let Them Rest a Minute Before Cutting
If you plan to slice chimichangas in half before serving, give them 2–3 minutes to rest after frying. This helps the filling set slightly and keeps things neat inside.
Final Thoughts
Crispy Beef Cheese Chimichangas are a celebration of bold flavor and comfort food at its best. They bring together juicy, seasoned beef, melty cheese, and a golden, crunchy tortilla shell in a way that feels indulgent and deeply satisfying.
What makes them truly special is how approachable they are: no fancy techniques, no complicated equipment—just layering, rolling, and frying (or baking) simple ingredients to create something that looks and tastes like a restaurant favorite.
Whether you’re cooking for family, feeding a crowd, or just treating yourself to a cozy night in, these chimichangas deliver everything you’re craving: crunch, cheesiness, warmth, and just enough spice. They’re the kind of recipe you’ll return to whenever you want dinner to feel like a little fiesta on the plate.
FAQ
Can I make these chimichangas ahead of time?
Yes. You can assemble the chimichangas, place them on a tray, cover them tightly, and refrigerate for up to 24 hours before frying or baking. Let them sit at room temperature for about 15 minutes before cooking so they heat evenly.
Can I freeze them?
Absolutely. Assemble the chimichangas and freeze them uncooked on a baking sheet until solid. Transfer them to a freezer-safe bag or container. Fry or bake from frozen—just add a few extra minutes to the cooking time and bake at a slightly lower temperature at first if baking.
Can I use ground turkey or chicken instead of beef?
Yes. Ground turkey or chicken both work well. You may want to add a little extra oil when browning lean meats and taste for seasoning, as they have a milder flavor than beef.
Can I bake instead of fry for a lighter version?
Definitely. Brush each chimichanga with a bit of oil or melted butter and bake at 400°F (200°C) for about 18–22 minutes, flipping once, until golden and crisp.
What’s the best cheese to use?
Cheddar, Monterey Jack, Colby Jack, or a Mexican blend are great options. You can also mix cheeses for more depth of flavor.
How do I keep chimichangas crispy?
Place them on a wire rack after frying instead of directly on a plate so air can circulate underneath. If you need to keep them warm, hold them in a low oven (about 200°F / 95°C) for a short time before serving.