Golden, Crusty Artisan Bread With Almost No Effort
Introduction
There’s something deeply comforting about the smell of freshly baked bread filling your kitchen. It signals warmth, home, and simplicity—especially when that bread is rustic, crusty, and made with your own hands. What if you could achieve bakery-style artisan bread without kneading, special equipment, or years of baking experience? That’s exactly what this Easy Dutch Oven No-Knead Bread delivers.
This recipe is perfect for beginner bakers and seasoned home cooks alike. Using just a handful of pantry staples, a bit of patience, and a Dutch oven, you can create a loaf with a crackly golden crust and a soft, airy interior. The long, slow rise does all the work for you, developing incredible flavor and structure without any kneading at all.
Whether you’re serving it warm with butter, pairing it with soup, or using it for sandwiches, this no-knead bread is one of those “forever recipes” you’ll come back to again and again.
Why You’ll Love This Recipe
1. No Kneading Required
If traditional bread recipes intimidate you, this one is a game-changer. There’s no kneading, no stand mixer, and no complicated techniques. You simply mix the ingredients until combined and let time do the rest.
2. Minimal Ingredients
This bread uses basic pantry staples you probably already have on hand: flour, water, yeast, salt, and sugar. No fancy flours or additives required.
3. Incredible Crust and Texture
Baking the bread inside a hot Dutch oven traps steam, which is the secret to achieving that crisp, crackly crust and soft, chewy interior—just like artisan bakery bread.
4. Flexible Timing
The dough can rise anywhere from 8 to 24 hours, or even be refrigerated for several days. This makes it easy to fit into your schedule, whether you plan ahead or bake on a whim.
5. Perfect for Any Occasion
Serve it with butter and jam for breakfast, alongside soups and stews for dinner, or slice it for sandwiches. This loaf is endlessly versatile.
Ingredients
Here’s everything you’ll need to make this simple yet impressive loaf:
- 4.5 cups (585 grams) all-purpose flour, plus more for dusting
- 1 tablespoon (15 grams) sugar
- 2½ teaspoons (14 grams) fine sea salt
- ¾ teaspoon (2 grams) active dry yeast
(or 1 teaspoon instant yeast) - 2¼ cups (17.8 ounces) warm water (105°F / 40°C)
- Cornmeal, optional, for dusting
- Butter and/or jam, for serving
Ingredient Notes
- Flour: All-purpose flour works beautifully here. Bread flour can be used for a slightly chewier crumb.
- Yeast: This recipe uses a small amount of yeast and a long fermentation to develop flavor.
- Water temperature: Warm, not hot. Too hot can kill the yeast; too cool will slow fermentation.
Instructions
Step 1: Make the Dough
In a large mixing bowl, combine the flour, sugar, salt, and yeast. Pour the warm water over the dry ingredients. Using a wooden spoon, spatula, dough whisk, or your hands, mix until everything is fully incorporated.
The dough should look shaggy, wet, and sticky. This is exactly what you want. If the dough feels impossible to work with, you can add one or two tablespoons of flour, but avoid adding too much.
Step 2: Let It Rise
Cover the bowl with a clean kitchen towel or plastic wrap lightly sprayed with nonstick spray. Let the dough rise at room temperature for 8 to 24 hours.
- For best flavor: Let it rise overnight
- Short on time? You can bake after about 3 hours, but the flavor won’t be as developed
- Make-ahead option: Refrigerate the dough for up to 7 days
During this time, the dough will bubble and expand as fermentation works its magic.
Step 3: Shape the Dough
Generously flour your countertop and hands using about ¼ cup of flour. Gently turn the dough out onto the floured surface. Do not knead or punch it down.
Using floured hands, gently pull the edges of the dough toward the center to form a loose round shape. Transfer the dough into a lightly floured glass bowl. Dust the top with more flour, cover, and let it rest for 30 minutes.
Step 4: Preheat the Oven
About 1½ hours before serving, preheat your oven to 450°F (232°C). Place a 4–6 quart Dutch oven with its lid inside the oven and let it heat for 30 minutes.
This step is essential for creating steam and achieving a beautiful crust.
Step 5: Bake the Bread
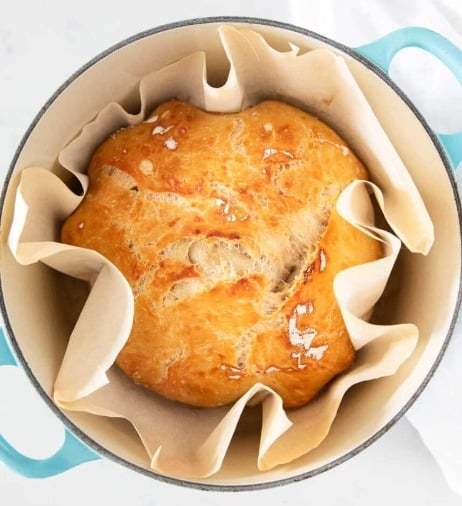
Carefully remove the hot Dutch oven from the oven. Sprinkle cornmeal into the bottom or line it with parchment paper.
Gently place the dough into the hot pot. If desired, use a sharp knife or bread lame to make 1–3 shallow slashes on top.
Cover with the lid and bake for 30 minutes. Remove the lid and bake for an additional 15–20 minutes, until the bread is deep golden brown and sounds hollow when tapped.
Step 6: Cool the Bread
Transfer the bread to a cooling rack and let it cool for at least 30 minutes before slicing. The interior continues to cook as it cools, so resist cutting into it too soon.
Variations
One of the best things about this recipe is how customizable it is. Try these variations to switch things up:
Whole Wheat No-Knead Bread
Replace up to 1½ cups of all-purpose flour with whole wheat flour. Add an extra 2–3 tablespoons of water if the dough feels dry.
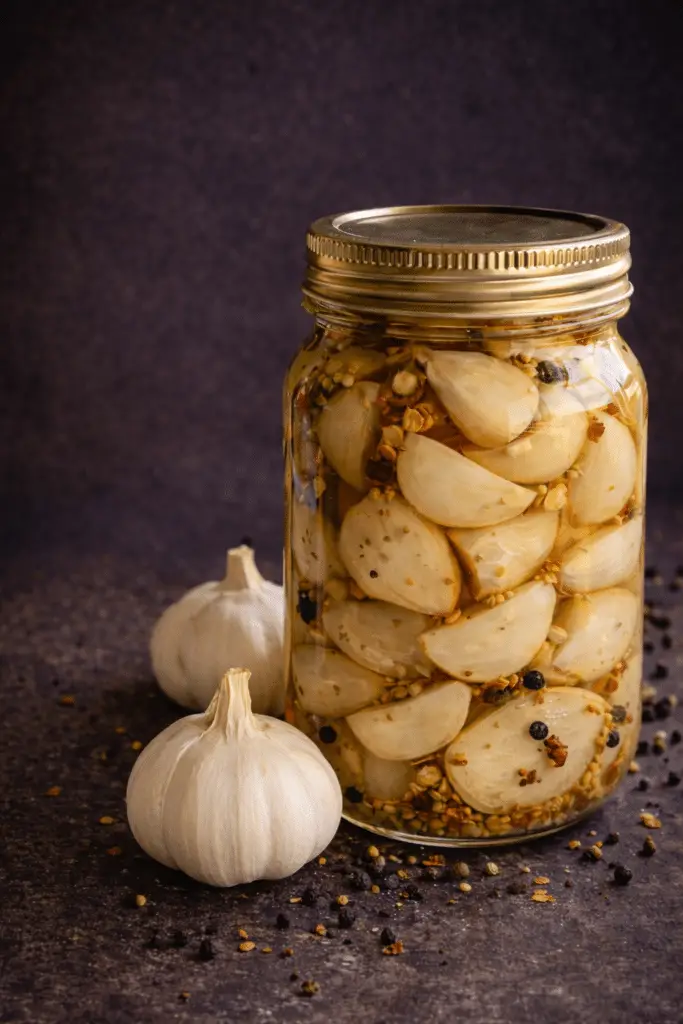
Garlic & Herb Bread
Add 1–2 teaspoons garlic powder and 1 tablespoon dried herbs (rosemary, thyme, or oregano) to the dry ingredients.
Seeded Bread
Mix in ¼–½ cup sunflower seeds, pumpkin seeds, or sesame seeds for added crunch and nutrition.
Cheesy Bread
Fold in ½ cup shredded cheddar or parmesan before shaping the dough for a savory twist.
Olive Oil & Rosemary
Drizzle 1 tablespoon olive oil into the dough and sprinkle fresh rosemary over the top before baking.
Frequently Asked Questions (FAQ)
Can I make this bread without a Dutch oven?
Yes, but the crust won’t be quite the same. You can bake it on a baking stone or sheet pan and place a pan of hot water in the oven to create steam.
Why is my dough so sticky?
That’s normal. No-knead dough is wetter than traditional bread dough. This high hydration is what gives the bread its airy texture.
Can I use instant yeast instead of active dry yeast?
Absolutely. Use 1 teaspoon instant yeast and follow the same instructions.
How do I store leftover bread?
Store the bread at room temperature in a paper bag or wrapped in a clean towel for up to 2 days. Avoid plastic bags, which can make the crust soft.
Can I freeze this bread?
Yes. Slice the bread, wrap it tightly, and freeze for up to 3 months. Toast slices directly from frozen.
Why did my bread turn out dense?
This usually happens if the dough didn’t rise long enough or if too much flour was added. Measuring flour accurately and allowing enough fermentation time makes a big difference.
Final Thoughts
This Easy Dutch Oven No-Knead Bread proves that homemade bread doesn’t have to be complicated. With minimal effort and maximum reward, it’s a recipe that builds confidence and delivers incredible results every time.
Once you try it, you’ll realize just how satisfying it is to bake your own bread—and how hard it is to go back to store-bought loaves. Serve it warm with butter and jam, share it with family and friends, or enjoy it as part of a cozy homemade meal.
Happy baking 🍞✨
Print
Easy Dutch Oven No-Knead Bread
Ingredients
- 4.5 cups (585 grams) all-purpose flour (more for dusting)
- 1 Tablespoon (15 grams) sugar
- 2 ½ teaspoons (14 grams) fine sea salt
- ¾ teaspoon (2 grams) active dry yeast (or 1 teaspoon instant yeast)
- 2 ¼ cups (17.8 ounces) warm water (105°F)
- cornmeal, optional
- For serving: Butter and/or Jam
Instructions
- Make the Dough: In a large mixing bowl, combine 4 1/2 cups of flour, 1 tablespoon of sugar, 2 1/2 teaspoons of salt, and 3/4 teaspoon of yeast. Pour 2 1/4 cups of warm water over the mixture. Use a dough whisk, spatula, wooden spoon, or your hands to mix the ingredients until a shaggy dough forms and is fully incorporated. The dough should be wet and sticky; if it proves too difficult to handle, add an extra tablespoon or two of flour.
- Let It Rise: Once the flour is fully mixed in, cover the bowl with a towel or plastic wrap that has been lightly sprayed with nonstick spray. Allow the dough to rise at room temperature for 8-24 hours. If you’re short on time, you can bake it after just 3 hours (it is recommended to prepare it in the morning for baking in the evening). Alternatively, you can refrigerate the dough for up to 7 days.
- Shape the Dough: Generously flour your countertop and your hands with about 1/4 cup of flour. Gently turn the dough out onto the floured surface. The dough will be sticky; do not punch it down, knead it, or roll it out. Instead, softly and quickly form the dough into a round shape by pulling the edges into the center. Transfer the shaped dough into a glass bowl. Lightly dust the top with more flour, cover it, and let it rest for 30 minutes while preheating the oven.
- Preheat the Oven: About 1.5 hours before serving, preheat the oven to 450°F. Place a 4-6 quart Dutch oven (with the lid on) into the oven for 30 minutes to heat up.
- Bake the Bread: Carefully remove the Dutch oven from the oven and sprinkle cornmeal into the bottom of the pot or line it with parchment paper. Gently pour the dough into the hot Dutch oven. If desired, use a bread knife to make 1-3 slashes across the top of the dough. Cover with the hot lid and bake for 30 minutes, or until it begins to turn golden.
- Remove the lid and continue baking for an additional 15-20 minutes, or until it achieves a golden brown color. When tapped, the bread should sound hollow.
- Cool the Bread: Allow the bread to cool on a cooling rack for at least 30 minutes before slicing. The interior will continue to cook as it cools, so be patient and give it adequate time to rest.