Fruity cereals are one of those childhood favorites that never really leave us.
Their bright colors, sweet crunch, and playful flavor can instantly bring back memories of lazy weekend mornings and oversized cereal bowls.
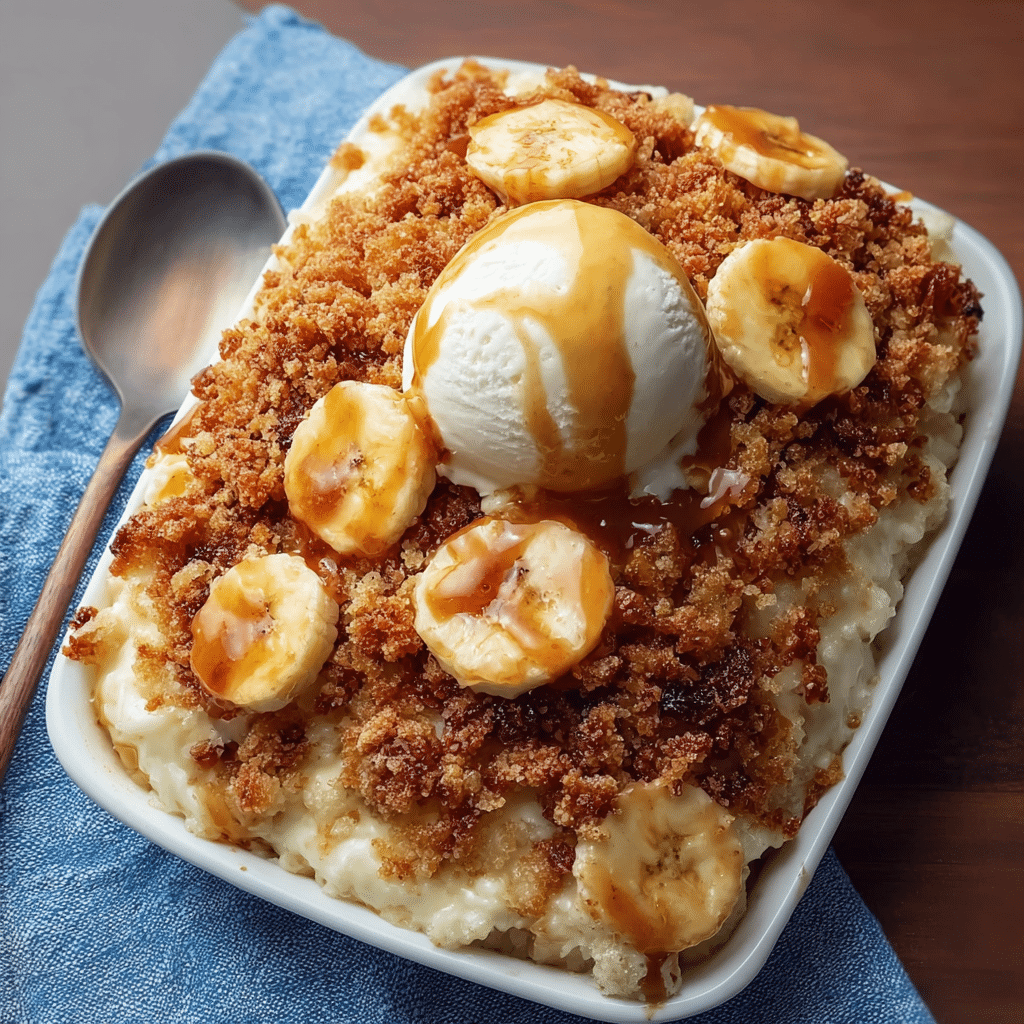
This Fruity Cereal Cheesecake takes that nostalgia and wraps it in a creamy, dreamy no-bake dessert.
Imagine a crunchy, colorful cereal crust topped with a silky vanilla cheesecake filling, dotted with bits of fruity cereal throughout, and finished with a fluffy whipped topping and more cereal on top. Every slice is a celebration—fun, vibrant, and irresistible.
Because it’s a no-bake recipe, you don’t need to fuss with ovens, water baths, or complicated techniques.
You simply crush, stir, whip, spread, and chill. The result is a dessert that looks like something from a bakery display case but is surprisingly easy to put together at home.
Whether you’re making this for a birthday, a kids’ party, a fun weekend treat, or just to satisfy a colorful craving, Fruity Cereal Cheesecake is a dessert that makes people smile before they even take a bite.
Recipe Snapshot
- Recipe Name: Fruity Cereal Cheesecake
- Style: No-bake, fun & nostalgic dessert
- Yield: 8–10 slices (one 9-inch cheesecake)
- Temperature: No-bake (chill only)
- Time: About 25 minutes prep + 4 hours chilling (or overnight for best results)
Core Ingredients for Making Fruity Cereal Cheesecake
To create this playful cheesecake, you’ll rely on a handful of simple ingredients that you probably recognize right away.
The magic comes from combining a crunchy cereal crust, a smooth and creamy filling, and a cheerful cereal topping.
Key Ingredients First
- 3 cups fruity cereal (like Fruity Pebbles or any colorful, fruity rice cereal)
- 1 stick (½ cup) butter, melted
- 16 oz cream cheese, softened (two 8-oz blocks)
- 1 cup heavy whipping cream
These four base ingredients build the heart of the recipe: the crust and the creamy filling.
Now, let’s expand that list into a complete ingredient breakdown.
For the Fruity Cereal Crust
- 3 cups fruity cereal (lightly crushed, not powdered)
- 1 stick (½ cup) unsalted butter, melted
- 2–3 tablespoons granulated sugar (optional, depending on how sweet your cereal is)
- 1 pinch of salt (optional, to balance sweetness)
For the Cheesecake Filling
- 16 oz cream cheese, softened to room temperature
- ¾ cup powdered sugar (confectioners’ sugar), sifted
- 1 teaspoon pure vanilla extract
- 1 tablespoon lemon juice (optional, adds brightness)
- 1 cup heavy whipping cream, very cold
- 1 cup fruity cereal, lightly crushed (to fold into the filling)
For the Topping
- 1 cup heavy whipping cream (for topping)
- 2–3 tablespoons powdered sugar
- ½ teaspoon vanilla extract
- 1–1½ cups fruity cereal (left whole for crunch and decoration)
You can adjust the amount of cereal on top to your liking—some people love a thick layer of cereal, while others prefer just a sprinkling.
Step-by-Step

This cheesecake comes together in three easy stages: prepare the crust, whip the filling, then top and chill. No baking, no water baths, no stress.
Step 1: Prepare the Cereal Crust
- Prep Your Pan
- Lightly grease a 9-inch springform pan or line the bottom with parchment paper.
- This makes it easier to remove and slice the cheesecake later.
- Crush the Cereal
- Add 3 cups of fruity cereal to a large zip-top bag.
- Use a rolling pin or the bottom of a glass to crush the cereal lightly.
- You want small pieces and crumbs, but not a fine powder—some texture is perfect for a crunchy crust.
- Combine with Butter
- In a medium bowl, combine the crushed cereal, melted butter, and 2–3 tablespoons of granulated sugar if needed.
- Stir until all the cereal is evenly coated and the mixture looks like colorful, buttery crumbs.
- Press the Crust
- Pour the cereal mixture into the prepared springform pan.
- Use the back of a spoon, a flat measuring cup, or your fingertips to press the crumbs evenly into the bottom of the pan.
- Press firmly enough so the crust holds together, but don’t crush it completely—you still want some crunch.
- Chill the Crust
- Place the pan in the refrigerator while you prepare the filling.
- Chilling helps the butter firm up and gives the crust structure.
Step 2: Make the Creamy Cheesecake Filling
- Beat the Cream Cheese
- In a large mixing bowl, add the softened cream cheese.
- Beat with a hand mixer or stand mixer on medium speed for 2–3 minutes, until smooth, soft, and lump-free.
- Scrape down the sides of the bowl to make sure everything is evenly mixed.
- Add Powdered Sugar and Flavorings
- Add ¾ cup powdered sugar to the cream cheese.
- Beat again on low speed at first (to avoid a sugar cloud), then increase to medium until smooth.
- Add the vanilla extract and lemon juice, and mix until fully combined.
- The mixture should be creamy and slightly fluffy.
- Whip the Heavy Cream (Separately)
- In another clean, chilled bowl, pour in 1 cup of cold heavy whipping cream.
- Beat on medium-high speed until stiff peaks form.
- You’ll know it’s ready when the cream holds its shape and doesn’t slide off the whisk.
- Fold the Whipped Cream into the Cream Cheese
- Add about one-third of the whipped cream into the cream cheese mixture and gently fold it in using a spatula.
- This first addition lightens the mixture, making it easier to fold in the rest without deflating the cream.
- Add the remaining whipped cream and continue folding carefully until fully combined.
- You should have a smooth, airy cheesecake filling.
- Add the Fruity Cereal to the Filling
- Lightly crush 1 cup of fruity cereal (again, not to a powder—just break larger pieces).
- Gently fold the cereal into the cheesecake mixture.
- Try not to overmix, as the cereal colors may start to bleed slightly. A bit of swirl is cute, but you don’t want a muddy look.
Step 3: Assemble and Chill the Cheesecake
- Add the Filling to the Crust
- Remove the springform pan with the crust from the fridge.
- Spoon the cheesecake filling over the chilled cereal crust.
- Use an offset spatula or the back of a spoon to smooth the top into an even layer.
- Chill the Cheesecake
- Cover the pan loosely with plastic wrap or foil.
- Refrigerate for at least 4 hours, or preferably overnight.
- Chilling allows the filling to firm up and the flavors to meld together.
- Prepare the Whipped Topping
- When you’re ready to decorate and serve, whip 1 cup of heavy cream with 2–3 tablespoons powdered sugar and ½ teaspoon vanilla extract.
- Beat until soft to medium peaks form—creamy and fluffy but still spreadable.
- Add the Whipped Topping and Cereal
- Spread or pipe the whipped cream over the top of the chilled cheesecake.
- Right before serving, sprinkle 1–1½ cups of fruity cereal over the top.
- Adding the cereal just before serving helps keep it crunchy and vibrant.
- Slice and Serve
- Carefully run a knife around the edge of the cheesecake to loosen it from the sides of the pan.
- Release the springform ring and slice into 8–10 slices.
- Enjoy the rainbow of crunchy, creamy goodness in each bite.
Flavor Variations and Creative Twists
One of the best things about Fruity Cereal Cheesecake is how flexible and fun it is.
With a few simple tweaks, you can create new flavor combinations every time you make it.
1. Chocolate Fruity Cheesecake
- Add 2–3 tablespoons of cocoa powder to the cream cheese mixture for a chocolate base.
- Use a mix of fruity cereal and chocolate cereal in the crust.
- Drizzle melted chocolate or chocolate sauce over the top along with the cereal.
This version tastes like a mash-up between a fruity chocolate bar and cheesecake—rich, playful, and perfect for chocolate lovers.
2. Citrus Burst Cheesecake
- Increase the lemon juice in the filling to 2 tablespoons.
- Add 1 teaspoon of grated lemon or orange zest.
- Garnish the top with thin citrus slices or curls of zest along with the cereal.
The bright citrus note cuts through the richness and works beautifully with the fruity cereal.
3. Strawberry or Berry Swirl Cheesecake
- Swirl a few tablespoons of strawberry, raspberry, or mixed berry sauce into the top of the cheesecake filling before chilling.
- Use a toothpick or skewer to gently swirl the sauce into pretty patterns.
- Top with fresh berries plus the fruity cereal.
This twist adds a fresh, tangy-fruit layer that complements the sweetness of the cereal.
4. Yogurt Cheesecake Variation (Lighter Texture)
- Replace 4 oz (about ½ cup) of the cream cheese with ½ cup thick Greek yogurt.
- This creates a slightly lighter, tangier filling while still staying creamy.
It’s a nice option when you want something a bit less rich without losing that cheesecake feel.
5. Marshmallow Fun Cheesecake
- Add 1 cup mini marshmallows to the filling or sprinkle them on top before adding the cereal.
- Toast the marshmallows with a kitchen torch for a toasted-cereal vibe (if desired).
This variation leans into a “cereal & marshmallow bar” flavor and looks extra festive.
How to Serve Fruity Cereal Cheesecake
This cheesecake is designed to be fun and eye-catching, so serving it is half the joy.
- For a party: Cut the cheesecake into smaller squares or slim slices so everyone can have a colorful piece.
- For a birthday: Add candles on top of the whipped cream and cereal, turning it into a playful “cake substitute.”
- For a brunch table: Serve alongside fresh fruit, mini pastries, and coffee for a fun, dessert-like brunch centerpiece.
You can also play around with garnishes:
- A drizzle of white chocolate or vanilla glaze
- Extra dollops of whipped cream around the edges
- A ring of cereal clusters pressed gently into the sides of the cheesecake
Serve slices chilled for the cleanest cuts and the firmest texture.
If you prefer a softer, creamier bite, let slices sit at room temperature for 10–15 minutes before serving.
Tips & Variations for the Best Results
A few simple tips will help you get a perfect Fruity Cereal Cheesecake every time.
Choose Your Cereal Wisely
- Fruity Pebbles or similar fruity rice cereals work great because they are small and distribute evenly.
- Larger cereals (like fruit rings) can still work but may need to be crushed a bit more for a stable crust.
Don’t Over-Crush the Crust
- If the cereal is crushed into a fine powder, the crust can become dense and lose its signature crunch.
- Aim for a mix of fine crumbs and small pieces.
Room-Temperature Cream Cheese Is Key
- Cold cream cheese is more likely to stay lumpy and resist mixing.
- Let it sit out for 20–30 minutes before starting so it beats up smooth and creamy.
Chill Long Enough
- The cheesecake needs time to firm up.
- Four hours is the minimum—overnight chilling gives the best texture and flavor.
- Try not to rush this step; it’s what turns a soft filling into sliceable cheesecake.
Add the Cereal Topping at the Right Time
- Cereal gets soft as it sits on whipped cream or moist surfaces.
- For maximum crunch and color, add the cereal topping just before serving.
- If you need to top earlier, expect a slightly softer cereal texture (still tasty, just less crunchy).
Adjusting Sweetness
- Fruity cereal is already sweet, so taste as you go.
- If you’re using a very sweet cereal, you can reduce the powdered sugar in the filling to ½ cup.
- You can also make the whipped topping less sweet to balance the dessert.
Final Thoughts
Fruity Cereal Cheesecake is one of those desserts that brings joy even before the first forkful.
The rainbow colors, creamy texture, and crunchy cereal layers make it a guaranteed conversation starter.
It’s a playful twist on classic cheesecake—no baking, no water baths, no intricate techniques.
Just simple steps, familiar ingredients, and a lot of personality.
Whether you’re revisiting childhood favorites or creating new memories with kids, this recipe captures the feeling of Saturday morning cartoons and big cereal bowls… upgraded into a fun, shareable dessert.
From birthday parties and sleepovers to potlucks and family dinners, Fruity Cereal Cheesecake fits anywhere you want something both nostalgic and a little over-the-top.
It’s proof that dessert can be both simple to make and big on impact.
FAQ – Fruity Cereal Cheesecake
Can I use a different type of cereal?
Yes! While fruity rice cereals like Fruity Pebbles work best for this specific flavor, you can experiment with other sweet cereals.
Try fruit-flavored loops, rainbow crisped rice, or even a mix of fruity and vanilla cereals. Just keep in mind that the flavor and texture will change slightly depending on what you use.
Will the cereal stay crunchy?
The crust will stay pleasantly firm and slightly crunchy, especially if the cheesecake is stored chilled.
The cereal folded into the filling will soften over time, giving a fun chewy texture.
The cereal sprinkled on top is where you’ll get the most crunch—this is why it’s best added right before serving.
Can I make Fruity Cereal Cheesecake ahead of time?
Absolutely. This dessert is perfect for making ahead.
You can assemble the cheesecake (without the cereal topping) and refrigerate it overnight or up to 24 hours in advance.
Just add the whipped topping and cereal garnish shortly before serving.
Can I freeze Fruity Cereal Cheesecake?
Yes, this cheesecake freezes quite well, though the cereal texture will change slightly.
- Chill the cheesecake until fully set.
- Remove the ring from the springform pan and wrap the cheesecake tightly in plastic wrap, then in foil.
- Freeze for up to 2 months.
To serve, thaw overnight in the refrigerator. Add fresh whipped cream and cereal on top just before serving for the best texture and color.
How do I prevent the filling from turning streaky or grayish from the cereal colors?
The colors in fruity cereal can bleed if they sit too long in liquid. To minimize this:
- Lightly fold the cereal into the filling at the end, just until combined.
- Avoid overmixing.
- Chill promptly after assembling.
A little bit of color swirl is normal and actually looks fun, but if you prefer a very clean white filling, skip folding cereal inside and only use it for the crust and topping.
Can I make this recipe in a different pan?
Yes. Instead of a 9-inch round springform pan, you can use:
- A 9×9-inch square pan for cheesecake bars
- An 8×8-inch pan for a slightly taller cheesecake
If you change the pan size, slice accordingly and keep the chilling time about the same.
Can I make this cheesecake less rich?
You can make a slightly lighter version by:
- Replacing part of the cream cheese with thick Greek yogurt
- Using less whipped cream or a lighter topping
- Reducing the sugar in the filling
Keep in mind that changes may affect the texture, but the cheesecake will still be delicious.
What’s the best way to slice Fruity Cereal Cheesecake cleanly?
Use a sharp, thin-bladed knife and wipe it clean between cuts.
You can dip the knife in warm water, wipe it dry, and then slice.
This helps you get neat slices with distinct layers and less dragging through the crust and filling.