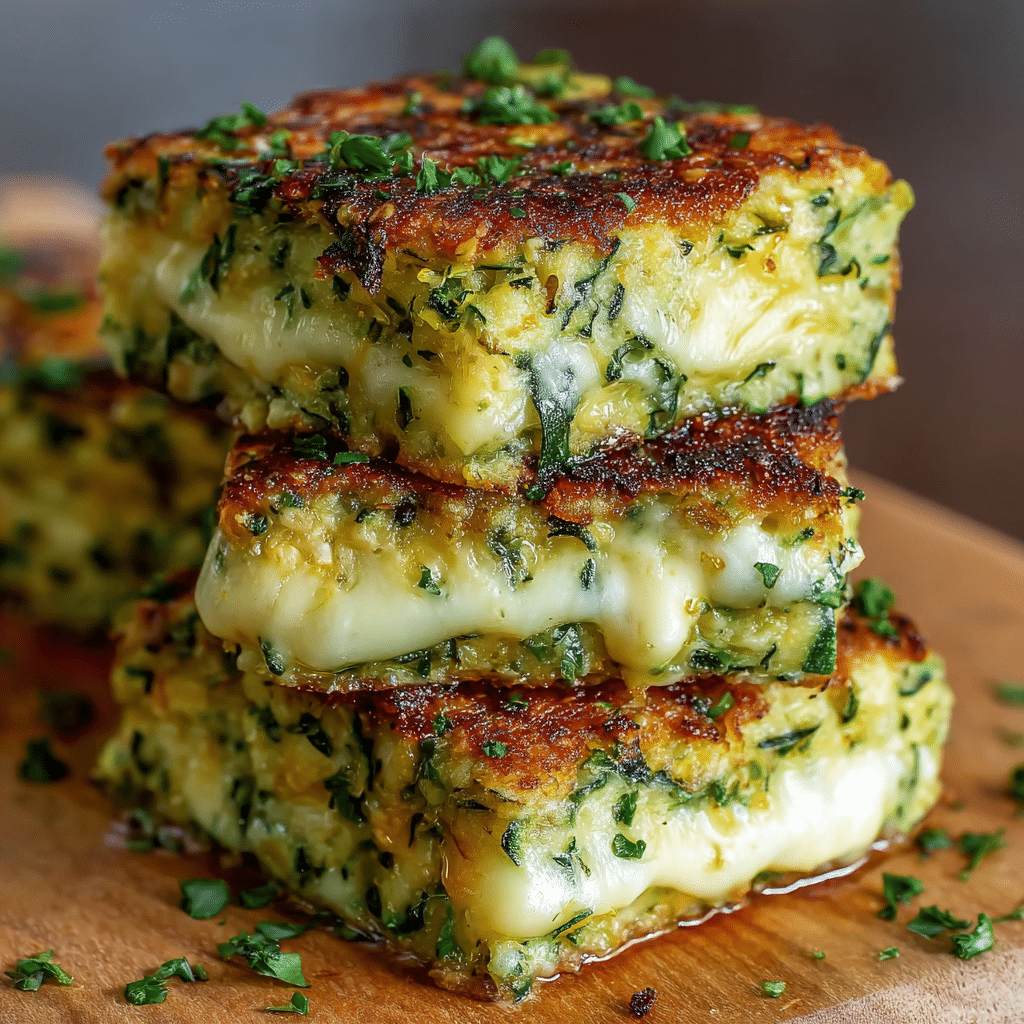
Grilled cheese is the ultimate comfort food—golden, melty, and satisfying in every bite. But sometimes we crave that same cozy, cheesy goodness in a lighter, veggie-packed form that we can enjoy without feeling weighed down. That’s where Healthy Zucchini Crust Grilled Cheese Squares come in.
Instead of traditional bread, this recipe uses a tender, flavor-packed zucchini crust as the base and top layer, hugging a gooey cheese center. You still get the irresistible combination of crisp edges and stretchy cheese, but with the added bonus of sneaking in extra vegetables and cutting back on refined carbs. Every square delivers the nostalgic comfort of grilled cheese with a fresh, modern twist.
What makes these squares especially appealing is how simple and approachable they are. There’s no complicated dough, no yeast, and no long resting time. You grate the zucchini, mix everything in a bowl, press it into a pan, bake, add cheese, and bake again. It’s the kind of recipe you can pull together on a busy weeknight or a lazy weekend afternoon, yet it still feels creative, wholesome, and fun.
Perfect as a snack, light lunch, or party appetizer, these Healthy Zucchini Crust Grilled Cheese Squares are made to share—but you may find yourself wanting to keep a few extra pieces just for you. Crispy on the outside, cheesy in the middle, and packed with flavor, they’re a great way to enjoy comfort food while still staying aligned with a more balanced way of eating.
Core Ingredients for Making the Recipe
To prepare these delicious, veggie-forward grilled cheese squares, you’ll only need a handful of simple ingredients you can easily find in any grocery store. Each ingredient plays an important role in creating a crust that holds together well, bakes up golden, and pairs perfectly with the cheesy center.
Here’s what you’ll need:
For the Zucchini Crust
- 2 medium zucchinis, grated (about 2 cups)
Zucchini forms the base of the crust. It adds moisture, fiber, and a mild flavor that pairs beautifully with cheese and garlic. - 1 teaspoon salt
The salt helps season the crust and also draws out excess moisture from the zucchini, which is key to getting a crust that isn’t soggy. - 1 cup shredded mozzarella cheese
Mozzarella provides stretch and meltiness. It helps bind the zucchini mixture together and gives the crust a slightly chewy, cheesy bite. - 1/2 cup grated Parmesan cheese
Parmesan adds depth, saltiness, and a subtle nutty flavor. It also helps the crust crisp up and brown nicely in the oven. - 1 large egg
The egg is the glue that binds everything together. It prevents the crust from crumbling and helps it bake into firm, sliceable squares. - 1 teaspoon garlic powder
Garlic powder infuses the crust with savory flavor. It turns a simple vegetable base into something fragrant and deeply satisfying.
Optional Add-Ins (Highly Recommended)
These aren’t strictly required, but they’re great for boosting flavor:
- 1/2 teaspoon black pepper
- 1/2 teaspoon dried oregano, Italian seasoning, or dried basil
- Cooking spray or 1 tablespoon olive oil for greasing the baking dish and/or brushing the top of the crust for crispiness
Even with just the core ingredients, you’ll have a delicious zucchini crust and a cheesy center. But a sprinkle of herbs and pepper helps transform this dish into something you’ll crave again and again.
Step-by-Step

These Healthy Zucchini Crust Grilled Cheese Squares come together in a few straightforward steps: prep the zucchini, build the crust, bake, add the cheese, and bake again. The key to success is removing as much water as possible from the zucchini, so your crust turns out sturdy and lightly crisp rather than soggy.
Follow this simple guide to create perfect squares every time.
1. Prepare Your Baking Dish and Preheat the Oven
- Preheat your oven to 400°F (200°C). This slightly higher temperature helps the crust become golden and lightly crisp around the edges.
- Lightly grease an 8×8 inch (20×20 cm) baking dish with cooking spray or a thin layer of olive oil. You can also line it with parchment paper for easier removal and cleaner cuts later on.
2. Grate and Salt the Zucchini
- Wash and dry the zucchinis, then trim off the ends.
- Using a box grater or the grating attachment of a food processor, grate the zucchinis on the medium side. You want small, even shreds.
- Place the grated zucchini in a large bowl and sprinkle it with the 1 teaspoon of salt. Toss gently to distribute the salt evenly.
- Let the zucchini sit for about 10–15 minutes. During this time, the salt will draw out excess moisture from the vegetable.
3. Squeeze Out the Excess Moisture
This step makes the difference between a soggy crust and a sturdy, sliceable one.
- After the zucchini has rested, transfer it to a clean kitchen towel, cheesecloth, or several layers of paper towel.
- Gather the towel around the zucchini and wring it out firmly over the sink or a large bowl.
- Squeeze out as much liquid as you can—don’t be shy here. The more water you remove, the better your crust will hold together.
- Once well-drained, place the zucchini back into a clean mixing bowl.
You’ll notice the volume of zucchini decreases significantly after squeezing—that’s normal and exactly what you want.
4. Mix the Zucchini Crust Mixture
Now it’s time to turn that grated zucchini into a flavorful, cohesive crust.
- To the bowl of drained zucchini, add:
- 1 cup shredded mozzarella cheese
- 1/2 cup grated Parmesan cheese
- 1 large egg
- 1 teaspoon garlic powder
- If using optional seasonings, add:
- 1/2 teaspoon black pepper
- 1/2 teaspoon dried oregano or Italian seasoning
- Use a fork or your hands to mix everything together until well combined. The mixture should be slightly sticky but not wet or runny.
You should be able to press some of the mixture between your fingers and have it hold its shape.
5. Press the Crust into the Baking Dish
- Transfer the zucchini mixture to your prepared 8×8 inch baking dish.
- Use your fingertips or the back of a spoon to press the mixture evenly into the bottom of the dish.
- Take your time to spread it out and smooth the top. Make sure the layer is even, with no gaps or overly thick spots. A uniform thickness ensures even baking.
- For a slightly crisper finish, you can brush the top lightly with olive oil.
This layer will act as both the “bread” and the structure for your grilled cheese squares.
6. Bake the Zucchini Crust
- Place the dish in your preheated 400°F (200°C) oven.
- Bake for 18–22 minutes, or until:
- The crust is lightly golden around the edges.
- The center looks set and no longer appears wet.
- If you want a deeper golden color, you can bake for an additional 3–5 minutes, keeping a close eye to prevent overbrowning.
When the crust is done, remove it from the oven and let it cool for a few minutes. This short rest helps it firm up slightly before you add more cheese on top.
7. Add the Cheesy Layer
To mimic that classic grilled cheese feel, we add another layer of cheese on top of the pre-baked crust. You can use a combination of mozzarella and Parmesan, or any other melty cheese you enjoy.
- Sprinkle an additional ½ to 1 cup shredded mozzarella evenly over the baked zucchini crust.
- If you like a sharper flavor, add a little extra grated Parmesan or even some shredded cheddar.
- Optionally, sprinkle a pinch of black pepper or dried herbs on top for extra flavor and a pretty finish.
8. Bake Until Melty and Golden
- Return the dish to the oven and bake for another 8–10 minutes, or until:
- The cheese is fully melted.
- The top is bubbly and beginning to turn golden in spots.
- If you enjoy extra browning, you can switch to the broiler for the last 1–2 minutes. Just watch closely so it doesn’t burn.
At this point, your kitchen will smell like a hybrid of cheesy breadsticks and comforting grilled cheese.
9. Cool Slightly and Slice into Squares
- Remove the dish from the oven and let the cheesy zucchini bake cool for about 10 minutes. This helps it firm up, making it easier to slice cleanly.
- Using a sharp knife or a pizza cutter, slice the bake into small squares or rectangles. You can make them bite-sized for appetizers or larger for a light meal.
- Use a spatula to lift out the pieces, keeping the cheesy top and zucchini crust intact.
Serve warm while the cheese is still wonderfully gooey and stretchy.
Flavor Variations and Creative Twists
One of the best things about this recipe is how adaptable it is. Once you master the basic zucchini crust and cheese combo, you can add your own twist to match your cravings, dietary preferences, or the ingredients you have on hand.
Here are some fun variations to try:
1. Italian-Inspired Zucchini Grilled Cheese Squares
Give your squares a pizza-like flair with classic Italian flavors:
- Add 1 teaspoon Italian seasoning and a pinch of crushed red pepper flakes to the crust mixture.
- Spread a thin layer of marinara sauce over the baked crust before adding the cheese layer.
- Top with a mix of mozzarella and a little shredded provolone or cheddar.
- Finish with a sprinkle of dried basil or oregano.
The result? Squares that taste like a cross between cheesy breadsticks and zucchini pizza.
2. Spicy Jalapeño Cheddar Squares
For those who like a kick of heat:
- Swap some or all of the mozzarella in the cheese layer with shredded cheddar or pepper jack.
- Add finely diced jalapeños to the top before baking—remove the seeds for milder heat or leave some in for extra spice.
- Sprinkle paprika or smoked paprika over the top for a beautiful color and added flavor.
These are perfect for game days, parties, or when you’re craving something a little bolder.
3. Herb and Garlic Lover’s Squares
If you can’t get enough of savory, herbaceous flavors:
- Add extra garlic powder or even minced fresh garlic to the crust mixture.
- Toss in fresh chopped parsley, chives, or basil to brighten the flavor and add color.
- Use a blend of mozzarella and a bit of feta or goat cheese on top for tanginess.
This variation pairs wonderfully with tomato soup, roasted vegetables, or a simple side salad.
4. Protein-Packed Squares
Turn these into a more filling main dish by adding some protein:
- After the first bake, top the zucchini crust with thinly sliced grilled chicken, turkey, or deli ham before adding cheese.
- For a vegetarian option, add crumbled tofu or tempeh tossed in a bit of soy sauce and garlic.
You’ll end up with hearty, satisfying squares that work well as a full meal rather than just a snack.
5. Extra-Crispy Version
If you love crisp edges and a firmer crust:
- Spread the zucchini crust mixture a little thinner in a slightly larger baking pan.
- Bake for a few extra minutes during the first bake, until the edges are deeply golden.
- Use a bit more Parmesan in the mixture; it crisps up beautifully.
These will have the crunchy-chewy contrast that’s incredibly satisfying.
How to Serve
Healthy Zucchini Crust Grilled Cheese Squares are incredibly versatile in how you can serve them. They can play many roles: cozy snack, kid-friendly lunch, appetizer at a gathering, or a side dish alongside soup or salad.
As a Warm Snack or Light Lunch
Fresh from the oven, these squares are best when the cheese is still melty and the edges are lightly crisp. Serve them:
- On a plate with a side of marinara sauce or garlic yogurt dip for dunking.
- With a simple green salad for a balanced meal.
- Alongside sliced tomatoes or cucumber for a light, refreshing contrast.
They’re perfect for days when you want something warm and savory that still feels lighter than a traditional grilled cheese sandwich.
As a Party or Game-Day Appetizer
Cut the squares into smaller, bite-sized pieces and arrange them on a platter:
- Add small dipping bowls of marinara, ranch, spicy mayo, or pesto.
- Garnish the platter with sprigs of fresh parsley or basil for a colorful, inviting presentation.
- Use toothpicks to make them easier to grab and eat.
They’re a great low-carb alternative to cheesy bread bites or pizza rolls, and most people won’t even realize they’re eating a zucchini-based crust.
As a Side Dish
These squares also make a wonderful side dish for:
- Soups like tomato, vegetable, or chicken soup.
- Main courses such as grilled chicken, baked fish, or roasted vegetables.
- A brunch spread with eggs, salads, and fresh fruit.
They fit seamlessly into various meals and add that comforting, cheesy element everyone loves.
Tips & Variations
While this recipe is simple, a few key tips will help you get the best possible texture and flavor every time. Think of these as your success secrets for flawless Healthy Zucchini Crust Grilled Cheese Squares.
1. Don’t Skip the Zucchini Squeezing Step
Zucchini contains a lot of water. If you don’t squeeze it out thoroughly:
- The crust may bake up soft and soggy.
- The cheese might slide around instead of sitting on a firm base.
Take the time to really wring out the zucchini—it’s the single most important step for a sturdy, cohesive crust.
2. Use Finely Grated Parmesan
Finely grated Parmesan blends better into the mixture and melts more evenly throughout the crust. Coarse shreds can create little pockets that don’t bind as well.
3. Don’t Overbake the Cheese Layer
You want the cheese on top to be:
- Fully melted
- Bubbly
- Slightly golden in spots
If overbaked, it can become tough or oily instead of stretchy and soft. Keep an eye on the oven during the second bake, especially in the last couple of minutes.
4. Adjust Seasonings to Taste
The base recipe is mild and family-friendly, but you can easily ramp up the flavors:
- Add more garlic powder for extra savoriness.
- Use additional herbs like thyme, rosemary, or basil.
- Play with a pinch of smoked paprika or chili flakes for warmth.
Taste the zucchini mixture (before adding the egg, or after mixing well) and adjust seasonings if needed.
5. Let It Cool Before Slicing
It can be tempting to cut into the bake the moment it comes out of the oven, but letting it cool for about 10 minutes is crucial:
- The crust will firm up and hold its shape better.
- The cheese will still be wonderfully warm and melty, but less runny.
You’ll get cleaner slices and squares that don’t fall apart.
6. Make It Your Own
This recipe is a flexible base. Don’t hesitate to:
- Swap in different cheeses (cheddar, gouda, Monterey Jack).
- Add finely chopped veggies like bell pepper or spinach to the top layer.
- Use your favorite dipping sauces to change the vibe—from Italian to Mexican to classic American comfort.
Final Thoughts
Healthy Zucchini Crust Grilled Cheese Squares are a beautiful example of how comfort food and wholesome ingredients can come together in one delicious, satisfying recipe. You still get that cozy, melty cheese experience, but the traditional bread is replaced with a flavorful, veggie-rich crust that feels lighter and more nourishing.
This recipe proves that eating a bit healthier doesn’t mean giving up the flavors and textures you love. With just a few simple ingredients—zucchini, cheese, egg, and seasonings—you can create something that looks impressive, tastes amazing, and fits into a more balanced lifestyle.
Whether you’re cooking for kids, friends, or just yourself, these squares are a crowd-pleaser. They’re easy to adapt, fun to eat, and versatile enough to serve as a snack, appetizer, or light meal. Once you make them, you may find yourself coming back to this recipe whenever you have extra zucchini on hand and a craving for something cheesy and comforting.
Sometimes, the best recipes are the ones that strike that perfect balance: simple to prepare, nourishing, and incredibly delicious. These Healthy Zucchini Crust Grilled Cheese Squares do exactly that—one golden, melty bite at a time.
FAQ
Can I make these zucchini crust squares ahead of time?
Yes, you can! These squares are quite meal-prep friendly. You have two main options:
- Bake Completely and Reheat
- Prepare and bake the squares as directed.
- Let them cool completely, then store them in an airtight container in the refrigerator for up to 3–4 days.
- Reheat in a preheated oven or air fryer at 350°F (175°C) for about 5–10 minutes, until warmed and slightly crisp again.
- Partially Prep Ahead
- Prepare and bake the zucchini crust only.
- Let it cool, then refrigerate it in the baking dish.
- When ready to serve, add the cheese layer and bake again until melty and bubbly.
This second method is great if you want the cheese to be freshly melted right before serving.
Can I freeze Healthy Zucchini Crust Grilled Cheese Squares?
Yes, these squares can be frozen, though the texture is best when they’re eaten fresh. If you’d like to freeze them:
- Let the squares cool completely after baking.
- Cut them into individual pieces.
- Place the squares on a baking sheet lined with parchment and freeze until solid.
- Transfer the frozen squares to a freezer-safe bag or container, separating layers with parchment paper.
They can be stored for up to 2–3 months. To reheat, bake from frozen at 350°F (175°C) until hot and bubbly, about 12–18 minutes.
Can I make this recipe low-carb or keto-friendly?
This recipe is already quite low in carbs compared to traditional grilled cheese sandwiches since it uses zucchini crust instead of bread. To make it even more keto-friendly:
- Ensure you use full-fat cheeses like mozzarella, cheddar, and Parmesan.
- Serve with low-carb dips (no added sugar).
- Avoid any sugary sauces or sides.
Most of the carbs in this recipe come from the zucchini and small amounts in the cheese, making it suitable for many low-carb and keto-style eating plans.
Can I use a different cheese instead of mozzarella?
Absolutely. Mozzarella is a great base because it melts beautifully and has a mild flavor, but you can swap or mix in other cheeses such as:
- Cheddar for a sharper flavor
- Monterey Jack or Pepper Jack for a creamier melt or added spice
- Provolone for a slightly smoky taste
- Gouda for richness
Just keep in mind that some cheeses are oilier than others when melted, so you may see a bit of extra fat on the surface. That’s normal and can be dabbed with a paper towel if desired.
What if my crust turns out too soft or soggy?
If your crust doesn’t firm up the way you hoped, it’s usually due to excess moisture in the zucchini. Next time, try:
- Squeezing out more water from the grated zucchini.
- Baking the crust a little longer during the first bake.
- Spreading the crust in a thinner layer for better evaporation.
- Adding a bit more Parmesan, which helps crisp things up.
Even if the crust is softer than ideal, the squares will still taste delicious—they just might be better eaten with a fork.
Can I make this recipe egg-free?
The egg plays a key role in binding the zucchini crust together, so skipping it can make the crust more fragile. However, if you need an egg-free version, you can experiment with:
- 1 tablespoon ground flaxseed mixed with 3 tablespoons water (flax “egg”)
- 1 tablespoon chia seeds mixed with 3 tablespoons water
Let the mixture sit for 5–10 minutes until it thickens, then use it in place of the egg. The crust may be a bit more delicate, but it can still work.
Can I cook this in an air fryer instead of the oven?
Yes, if your air fryer is large enough or has a baking insert:
- Press the zucchini mixture into a small, air fryer–safe baking dish.
- Air fry at 375°F (190°C) for about 10–15 minutes, checking for doneness and browning.
- Add the cheese layer and air fry for another 5–7 minutes, until melted and golden.
Cooking times may vary depending on your air fryer model, so keep an eye on the crust and cheese.