Sourdough baking doesn’t have to be rigid, intimidating, or ruled by a stopwatch.
In reality, great sourdough is about understanding the flow of fermentation and learning how to fit that flow into your own daily life, kitchen temperature, and schedule.
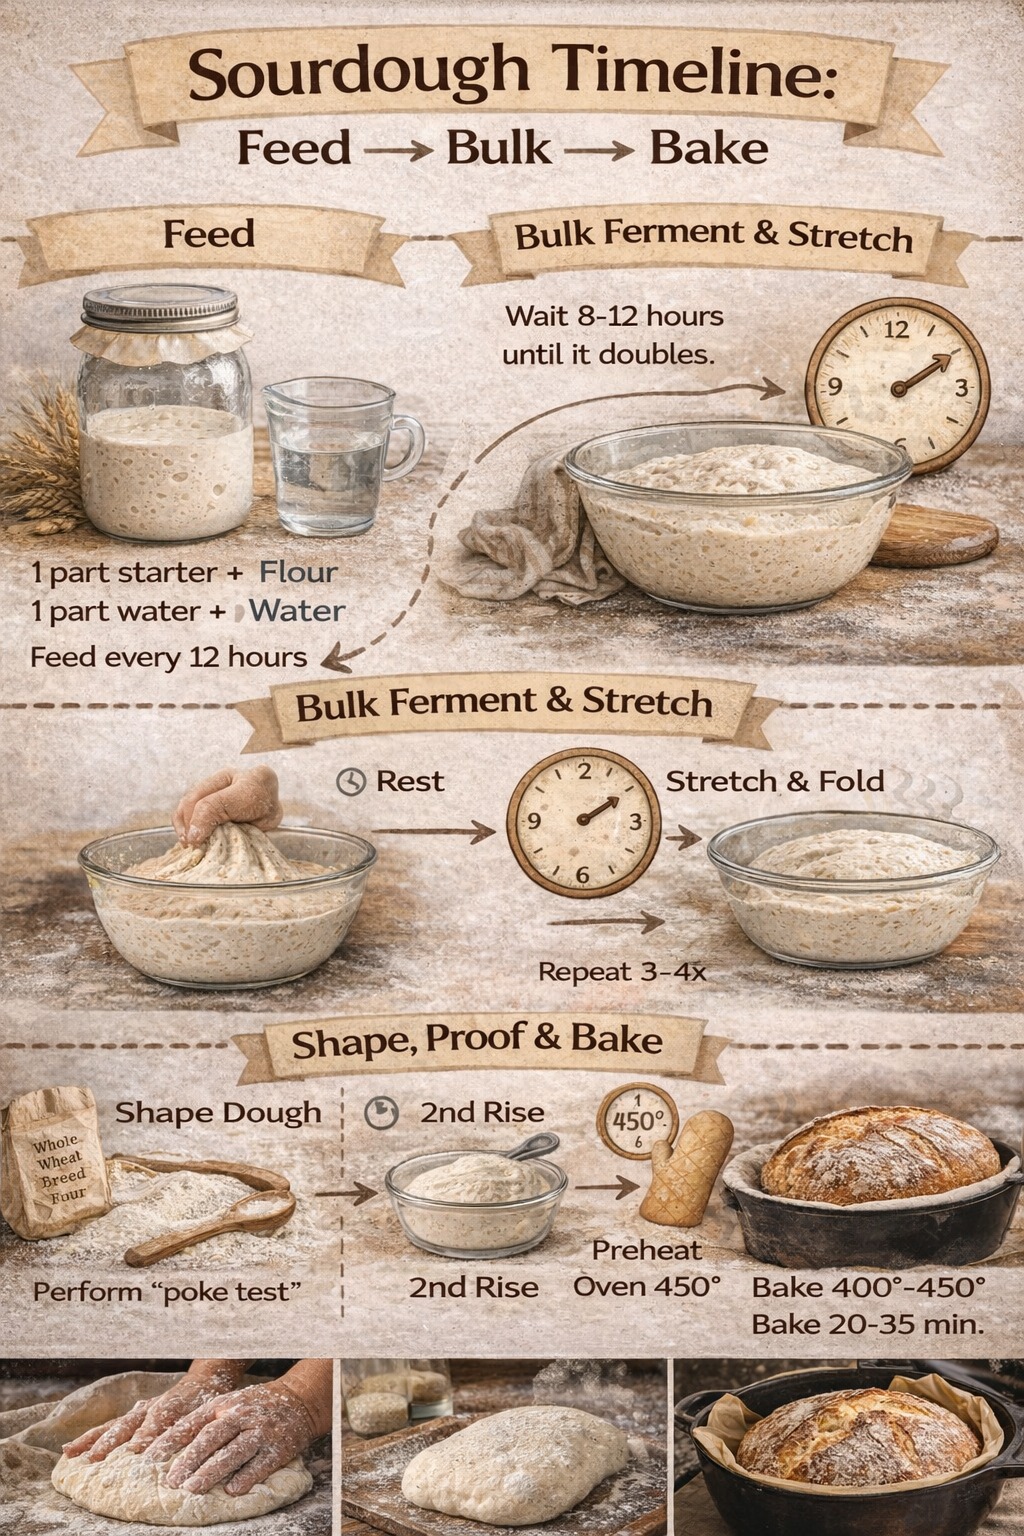
The visual timeline you’re working from—Feed → Bulk → Stretch & Fold → Shape → Proof → Bake—captures the essential rhythm of sourdough. This article expands that framework into a complete, practical guide and shows how the same master method can be adjusted using several real-world timetables.
Whether you bake on weekends, work long days, live in a warm climate, or deal with cold kitchens, you can shape sourdough to fit your routine.
Understanding the Core Sourdough Timeline
Before diving into specific schedules, it helps to understand what each phase actually does.
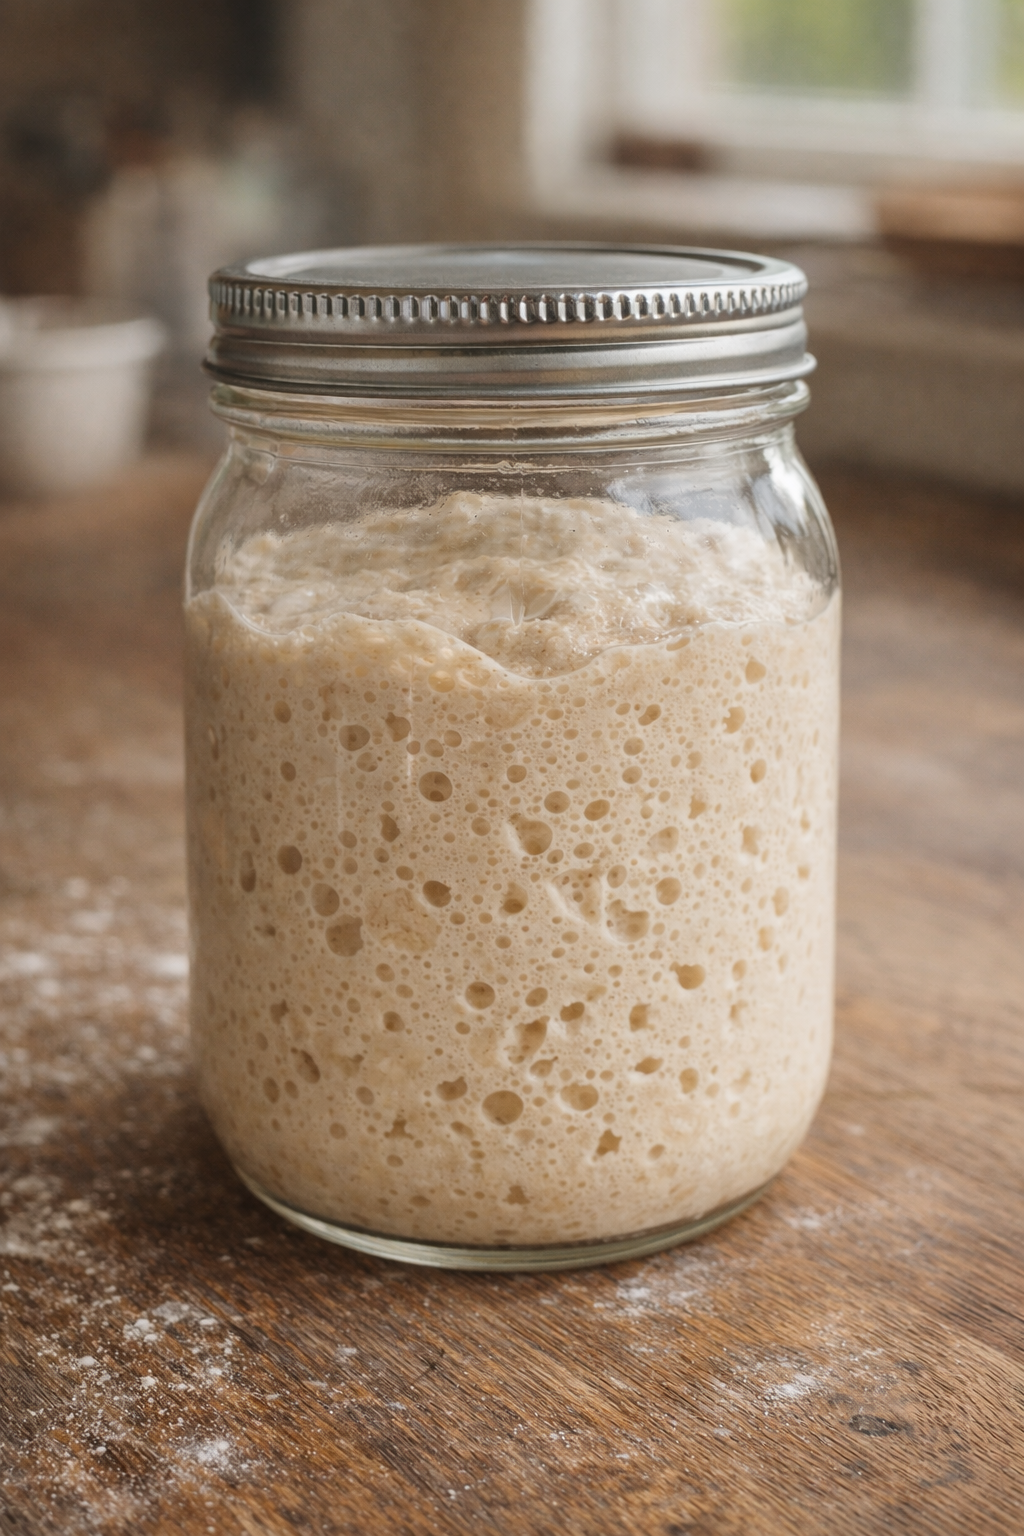
Feed the Starter
Feeding wakes your starter, replenishes its food supply, and builds strength. A simple feeding ratio works beautifully:
- 1 part starter
- 1 part flour
- 1 part water
After feeding, your starter should double, look airy, and smell lightly tangy. This stage determines how strong your fermentation will be later.
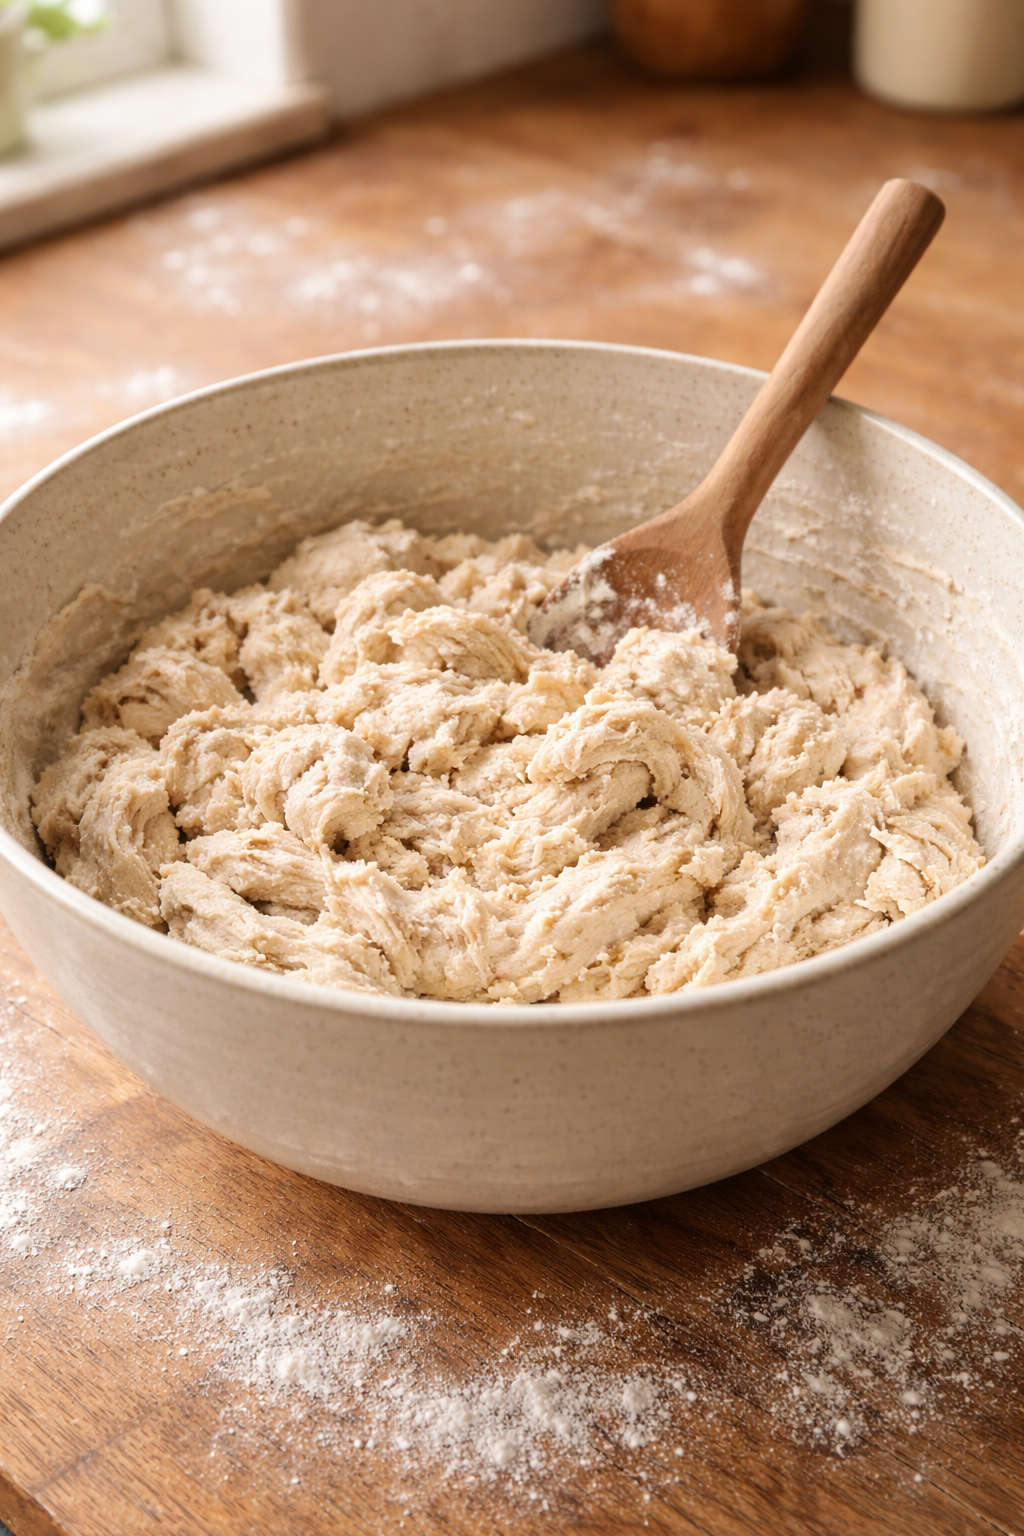
Bulk Fermentation
Bulk fermentation begins once flour, water, salt, and starter are combined into dough. This is when the dough develops:
- Flavor
- Strength
- Gas retention
- Structure
Bulk fermentation is not just waiting—it includes periodic strengthening through stretch and folds.
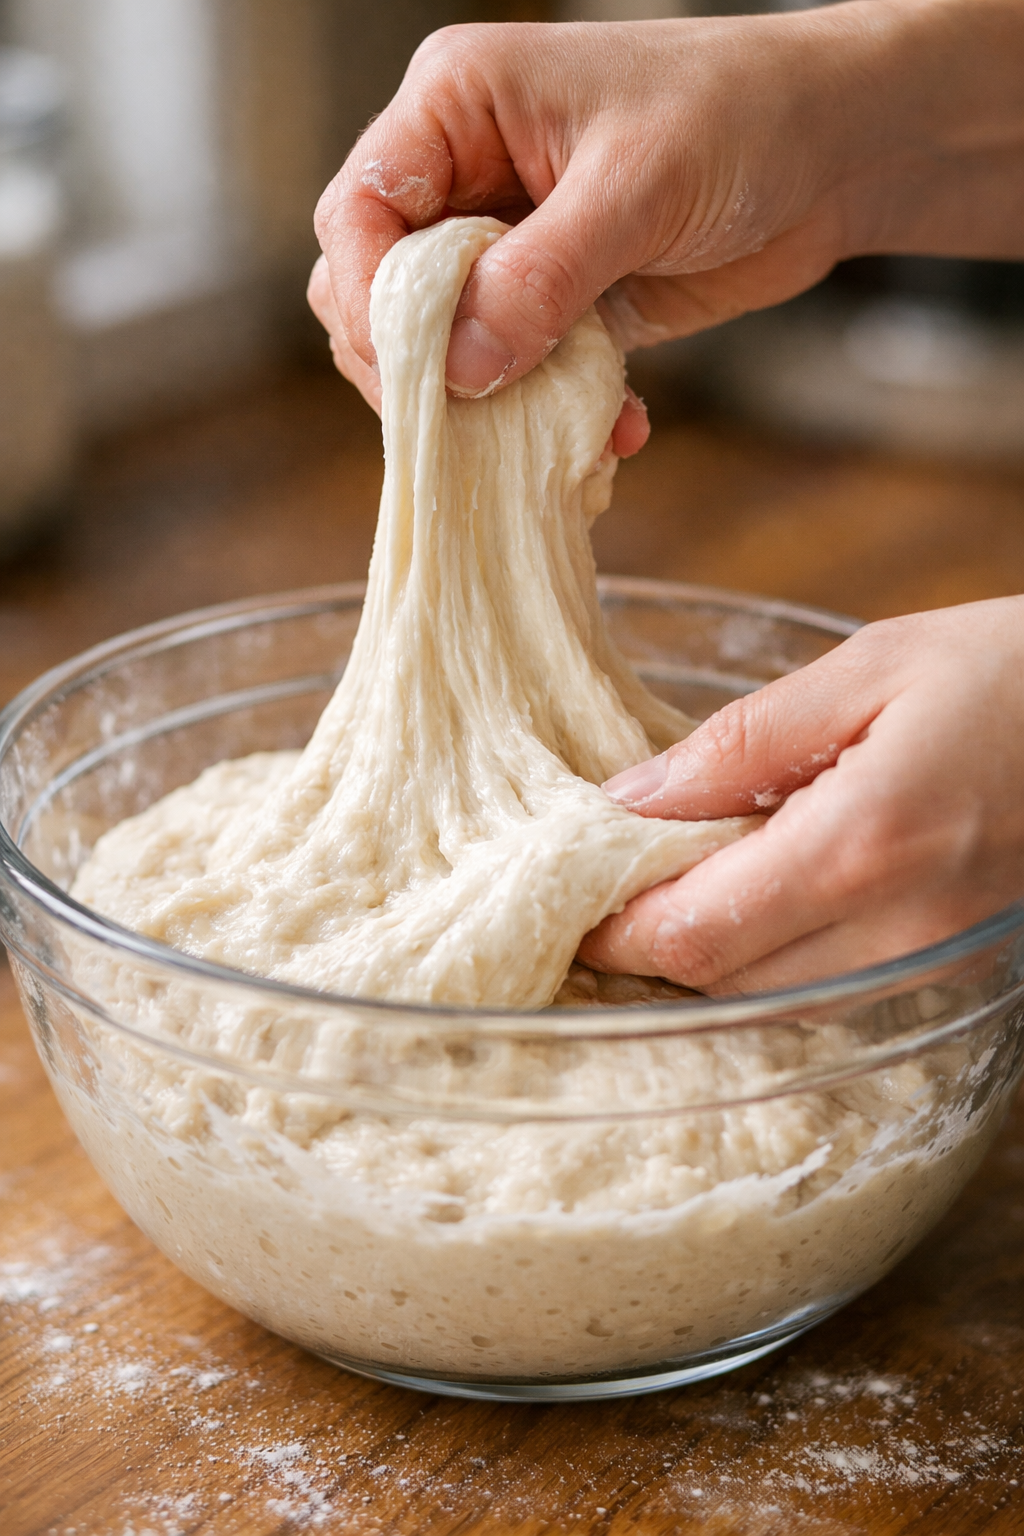
Stretch & Fold (Strength Building)
Stretching and folding aligns gluten strands and traps fermentation gases. Instead of intensive kneading, gentle folds over time build dough strength naturally.
Shaping
Shaping organizes the dough into a tight, cohesive form so it rises upward rather than outward.
Cold Proof
A cold proof in the refrigerator slows fermentation, deepens flavor, and makes baking more convenient.
Bake
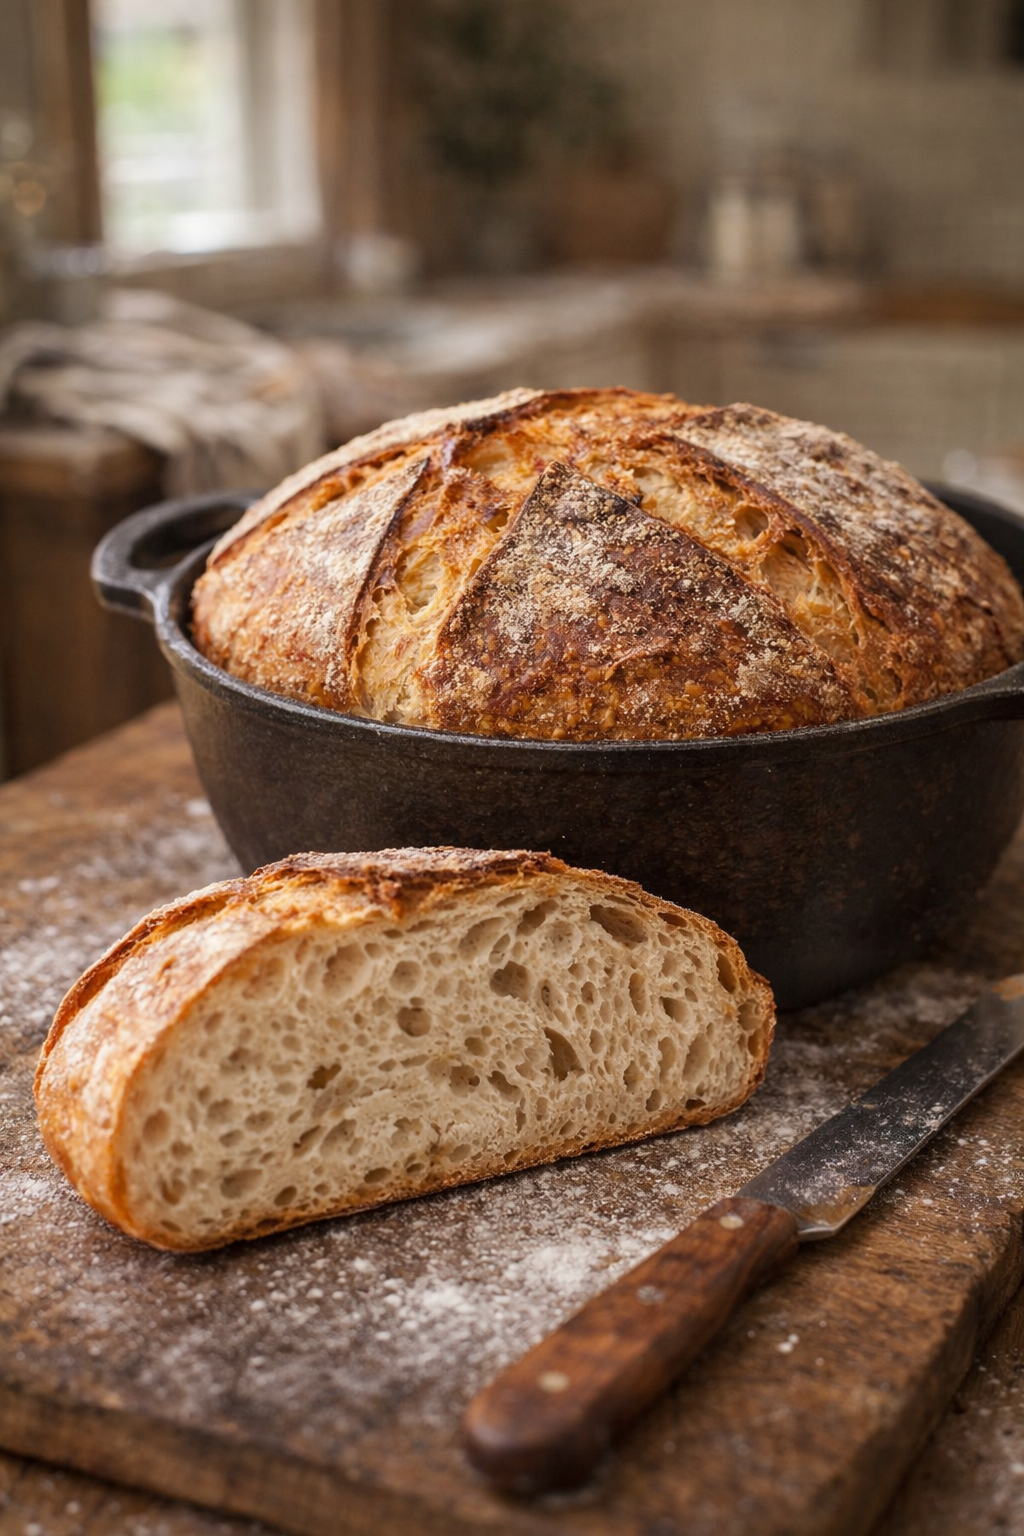
High heat plus steam allows maximum oven spring, crust development, and interior expansion.
The Master Sourdough Method (Baseline Process)
This is the foundational rhythm that all other timetables are based on.
Step 1: Bring Starter Out (Morning)
Take your starter from the refrigerator and allow it to warm slightly.
Step 2: Feed at Room Temperature
Feed your starter with equal parts starter, flour, and water. Cover loosely and leave at room temperature.
It will typically be ready in 3–5 hours, depending on temperature.
Signs of readiness:
- Doubled in volume
- Bubbly surface
- Passes float test (optional)
Step 3: Mix Dough (Late Afternoon)
Combine:
- Flour
- Water
- Active starter
- Salt
Mix until no dry flour remains. Rest briefly if desired.
Step 4: First Stretch & Fold (60–90 Minutes Later)
Perform your first set of stretch and folds.
Step 5: Additional Stretch & Folds (Evening)
Perform about 4 more sets between mixing and bedtime.
They do not need to be precisely timed. Simply fold when you walk past the bowl.
Step 6: Overnight Bulk at Room Temperature
Cover the bowl and leave on the counter overnight.
This works reliably up to about 20°C / 68–70°F.
Step 7: Morning Shape & Cold Proof
In the morning:
- Pull dough together gently
- Shape
- Place into banneton
- Refrigerate
Step 8: Bake Direct From Fridge
After a minimum of 6 hours, preferably closer to 10 hours, bake straight from cold.
Why This Method Works So Well
- Long fermentation = flavor
- Gentle handling = open crumb
- Cold proof = flexibility
- No rigid clock watching
You respond to the dough, not a timer.
When Temperatures Are Higher or Humidity Is High
Warm kitchens accelerate fermentation. In these conditions, we shorten room-temperature exposure and rely more on refrigeration.
Adjusted Warm-Weather Process
- Take starter from fridge around lunchtime
- Feed once it reaches room temperature
- Starter ready in 1–2 hours
- Mix dough
- First stretch & fold after 1 hour
- Perform 3 more folds over next 2 hours
- Leave dough at room temperature 2–3 hours
- Shape and refrigerate overnight
- Bake next day from fridge
Why This Adjustment Works
- Prevents over-fermentation
- Maintains structure
- Avoids sticky, slack dough
- Preserves flavor balance
Workday-Friendly Schedule
If you work outside the home, sourdough can still fit your life.
Morning
- Feed starter straight from fridge
- Leave somewhere cool
Feeding cold slows activity, which is helpful.
After Work
- Use starter directly (no second feeding)
- Mix dough
- First stretch & fold after ~1 hour
- 3 more folds over next 2 hours
Overnight
- Leave dough at room temperature
Next Morning
- Shape dough
- Place in banneton
- Refrigerate
After Work That Evening
- Bake
This spreads labor into small, manageable pieces.
Feeding the Starter the Night Before
Another flexible option.
Night
- Feed starter
- Leave out overnight (below 18°C / 65°F ideally)
It may deflate slightly but should still show bubbles.
Morning
- Mix dough
Daytime
- First fold after 1 hour
- 3 more folds over next 2–3 hours
Evening
- Shape
- Refrigerate
Next Day
- Bake from fridge
This approach is excellent for weekend baking.
How to Tell Bulk Fermentation Is Complete
Rather than relying only on time, look for:
- Dough increased 30–50% in volume
- Surface slightly domed
- Bubbles visible along sides
- Dough feels airy and lighter
Over-fermented dough:
- Very slack
- Tears easily
- Strong acidic smell
Under-fermented dough:
- Dense
- Tight
- Poor rise
Learning these visual cues is the biggest leap in sourdough mastery.
Stretch & Fold Technique
- Wet your hand
- Lift one edge of dough
- Stretch upward gently
- Fold over center
- Rotate bowl and repeat
One set usually involves 4 folds.
Each set takes less than 30 seconds.
Shaping Basics
- Lightly flour surface
- Turn dough out
- Gently pre-shape into round
- Rest 15 minutes
- Final shape with surface tension
Place seam-side up into banneton.
The Poke Test
Press lightly into dough:
- Springs back slowly → ready
- Springs back immediately → under-proofed
- Doesn’t spring back → over-proofed
Use this mainly before refrigeration or if baking without cold proof.
Baking Temperatures
Typical range:
- Preheat oven: 450°F / 230°C
- Bake: 400–450°F
- Time: 20–35 minutes
Use steam or a covered Dutch oven for first half of bake.
Why Cold Proofing Is So Valuable
- Improves flavor complexity
- Strengthens structure
- Makes scoring easier
- Fits baking into your schedule
Cold fermentation is one of sourdough’s greatest advantages.
Flour Choices
- Bread flour: strong structure
- All-purpose: softer crumb
- Whole wheat: more flavor, faster fermentation
Blends work well.
Common Troubleshooting
Dough Spreads
- Needs more folds
- Shorten bulk
- Stronger flour
Dense Crumb
- Longer fermentation
- Warmer environment
- More starter strength
Sour Flavor Too Strong
- Shorten bulk
- Reduce fridge time
- Use younger starter
Pale Crust
- Higher baking temperature
- Longer bake
- More steam
Final Thoughts
Sourdough is not about rigid schedules—it’s about understanding process and adaptation.
Once you understand:
Feed → Bulk → Strengthen → Shape → Cold Proof → Bake
You can move these steps around to suit:
- Your job
- Your climate
- Your energy level
- Your lifestyle
That freedom is what turns sourdough from a stressful project into a sustainable habit.
If you ever need clarification, help reading your dough, or adjusting for your environment, don’t hesitate to reach out.
Happy baking.