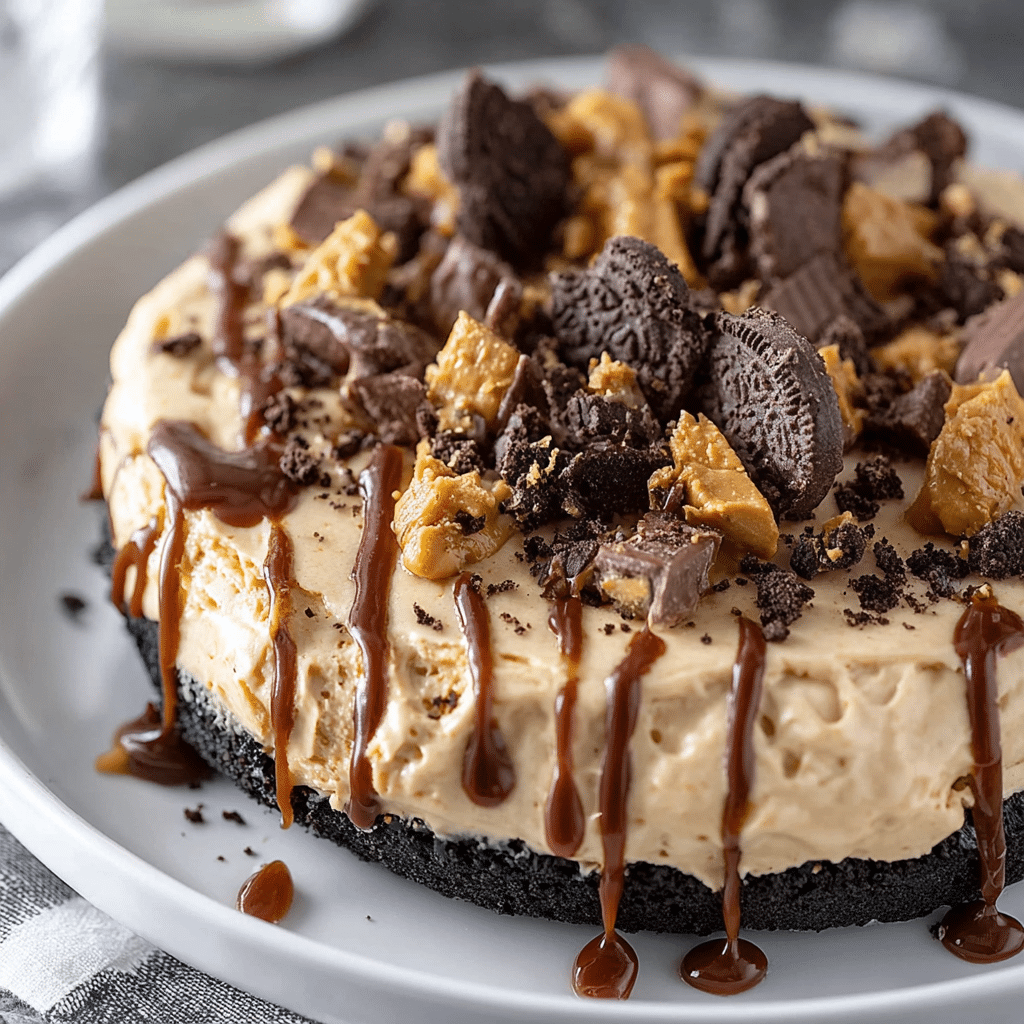
There’s something deeply nostalgic about peanut butter desserts—the creamy richness, the salty-sweet balance, the way each bite feels both indulgent and comforting. Now imagine all of that wrapped in a velvety, no-bake pie filling, nestled inside a crunchy, chocolatey Oreo cookie crust. That’s exactly what this Peanut Butter Pie with Easy Oreo Crust delivers.
It’s the kind of dessert that looks impressive on the table yet is made with simple ingredients and straightforward steps. No fussy techniques, no complicated baking process—just a few bowls, a mixer, and some chilling time. The result is a dreamy pie with a silky peanut butter filling that melts in your mouth, contrasted by the slight crunch of the Oreo crust.
This pie is perfect for almost any occasion:
- A casual family dinner when you want something special but low-effort
- A potluck or party where you need a dessert that travels well
- A holiday spread where you want a “wow” dessert that’s not the usual cake or tart
- Or simply a treat for yourself, portioned into slices and tucked into the fridge or freezer for whenever the craving hits
What makes this Peanut Butter Pie especially wonderful is how flexible it is. You can top it with whipped cream, peanut butter cups, chocolate drizzle, chopped peanuts, or keep it simple and elegant with just a clean swirl of cream. It’s a dessert that feels both playful and sophisticated at the same time.
In the following guide, you’ll find everything you need: from the base ingredients and step-by-step instructions to serving ideas, variations, tips, storage guidelines, and a helpful FAQ section.
Core Ingredients for Peanut Butter Pie with Easy Oreo Crust
To create this creamy, decadent pie, you’ll use everyday ingredients that are easy to find in most supermarkets. The recipe is broken into three simple parts: the crust, the filling, and the optional toppings.
For the Oreo Crust
- 24 Oreo cookies (regular, with cream filling)
- 5 tablespoons unsalted butter, melted
This creates a classic, buttery crumb crust with just enough firmness to hold the filling while still being tender when sliced.
For the Peanut Butter Filling
- 8 ounces cream cheese, softened
- 1 cup creamy peanut butter (not natural or oily types)
- 1 cup powdered sugar, sifted if lumpy
- 1 teaspoon vanilla extract (optional but recommended for depth of flavor)
- Pinch of salt (to balance sweetness and enhance the peanut butter)
- 1 1/2 cups cold heavy whipping cream
- or 2 cups whipped topping (like Cool Whip), thawed
Using freshly whipped cream gives the filling a light, airy texture, while whipped topping keeps things very convenient and stable. Either works beautifully.
Optional Toppings
You can customize the top of your pie depending on the occasion and what you like:
- Extra whipped cream or whipped topping
- Chocolate shavings or curls
- Mini chocolate chips
- Chopped roasted peanuts
- Crushed Oreos
- Peanut butter cups, chopped
- Chocolate or peanut butter drizzle (melted chocolate chips or warmed peanut butter)
These toppings add visual appeal, texture, and extra flavor, making your pie look bakery-worthy with minimal effort.
Step-by-Step

This recipe is designed to be approachable even if you don’t bake often. The crust comes together quickly, and the filling is simply mixed and whipped—no baking of the filling required.
Step 1: Prepare the Oreo Crust
- Crush the Oreos
- Place the Oreo cookies in a food processor and pulse until they form fine crumbs.
- If you don’t have a food processor, place the cookies in a zip-top bag and crush them with a rolling pin until very fine. A few tiny chunks are okay, but aim for mostly crumbs; this helps the crust hold together.
- Combine with Melted Butter
- Transfer the Oreo crumbs to a mixing bowl.
- Pour in the melted butter and mix with a fork or spatula until the crumbs are evenly coated and resemble wet sand.
- When you press the mixture between your fingers, it should hold together slightly.
- Press into the Pie Dish
- Pour the crumb mixture into a 9-inch pie dish.
- Use the bottom of a measuring cup or a glass to press the mixture firmly and evenly across the bottom and up the sides.
- Take your time here: a well-pressed crust helps the pie slice neatly later.
- Set the Crust
You have two options here:- No-bake method:
- Place the crust in the refrigerator for at least 30 minutes while you prepare the filling. This allows the butter to firm up and helps the crust hold together.
- Optional baked crust (for extra structure):
- Preheat your oven to 350°F (175°C).
- Bake the crust for 8–10 minutes.
- Let it cool completely before adding the filling.
- No-bake method:
Step 2: Make the Peanut Butter Filling
- Beat the Cream Cheese and Peanut Butter
- In a large mixing bowl, add the softened cream cheese and creamy peanut butter.
- Using a hand mixer or stand mixer fitted with the paddle attachment, beat on medium speed until smooth, thick, and fully combined.
- Scrape down the sides of the bowl to ensure there are no lumps of cream cheese.
- Add Powdered Sugar, Vanilla, and Salt
- Add the powdered sugar to the bowl, along with the vanilla extract and a small pinch of salt.
- Start mixing on low speed to avoid the powdered sugar puffing up, then increase to medium speed.
- Beat until the mixture is smooth, creamy, and slightly thickened.
- At this stage, the filling should look like a rich peanut butter frosting.
- Whip the Cream (If Using Heavy Cream)
- In a separate chilled bowl, pour in the cold heavy whipping cream.
- Beat with clean beaters on medium-high speed until stiff peaks form.
- Be careful not to overbeat; you want the cream to be firm but still smooth and silky, not grainy.
- Skip the whipping step. Simply ensure your whipped topping is fully thawed and gently cold before folding it in.
- Fold the Whipped Cream into the Peanut Butter Mixture
- Add about one-third of the whipped cream (or whipped topping) to the peanut butter mixture.
- Gently fold it in using a spatula. This first addition helps loosen the texture.
- Add the remaining whipped cream in two more additions, folding carefully each time.
- Avoid stirring vigorously—folding preserves the airiness and ensures a light, mousse-like filling.
- Check the Texture
- The finished filling should be thick but fluffy, able to hold soft peaks.
- If it seems too loose, you can chill it for 15–20 minutes to firm up slightly before pouring it into the crust.
Step 3: Assemble the Pie
- Fill the Crust
- Ensure your Oreo crust is fully cooled and set.
- Spoon the peanut butter filling into the crust, then gently spread it into an even layer with a spatula.
- Smooth the top or create soft swirls for a decorative look.
- Chill the Pie
- Cover the pie loosely with plastic wrap or place it in a cake carrier.
- Refrigerate for at least 4 hours, or ideally overnight.
- This chilling time allows the filling to firm up sufficiently to slice cleanly and gives the flavors time to meld.
Step 4: Add Toppings and Serve
- Top the Pie (Optional but Recommended)
Just before serving, you can dress up the pie:- Pipe or spoon dollops of whipped cream around the edges or across the center.
- Sprinkle with chopped peanuts, mini chocolate chips, or crushed Oreos.
- Add chopped peanut butter cups for a dramatic, candy-shop appearance.
- Drizzle with melted chocolate or slightly warmed peanut butter for a glossy finish.
- Slice and Serve
- Use a sharp knife to cut the pie into slices.
- For clean slices, run the knife under hot water, wipe it dry, then cut; repeat between slices.
- Serve the pie chilled, ideally on small dessert plates with a fork or spoon.
This pie is rich, so modest slices go a long way—but people often come back for seconds.
Flavor Variations and Creative Twists
One of the joys of this Peanut Butter Pie is how easily you can customize it to suit different tastes or occasions. Here are some fun variations to try:
1. Chocolate Swirl Peanut Butter Pie
- Melt a small amount of semi-sweet or dark chocolate chips.
- Once the filling is spread in the crust, drizzle the melted chocolate over the top and use a toothpick or knife to swirl it through the top layer.
- This creates a beautiful marbled pattern and adds a deeper chocolate note.
2. Nutty Crunch Pie
- Stir 1/2 cup of chopped roasted peanuts into the peanut butter filling before folding in the whipped cream.
- You’ll get little pops of crunch inside the creamy filling, which contrast beautifully with the smooth texture.
3. Double Oreo Pie
- Mix 1/2 cup of crushed Oreos directly into the filling.
- This gives you Oreo in the crust and Oreo specks throughout the creamy center—perfect for Oreo lovers.
4. Salted Caramel Peanut Butter Pie
- Drizzle salted caramel sauce over the top of the pie after chilling.
- Sprinkle with a few flakes of sea salt and some chopped peanuts.
- This adds a sweet–salty contrast and a glossy, decadent finish.
5. Chocolate Peanut Butter Cup Explosion
- Fold chopped mini peanut butter cups into the filling.
- Top the pie with more chopped cups and a drizzle of chocolate.
- This version is especially impressive for parties and birthdays.
6. Lighter-Version Adjustments
If you want to lighten up the pie slightly:
- Use reduced-fat cream cheese.
- Opt for a lighter whipped topping.
- Reduce the powdered sugar slightly (for example, to 3/4 cup) if you prefer a less sweet dessert.
The texture will change a bit, but you’ll still have a creamy and satisfying pie.
How to Serve Peanut Butter Pie with Easy Oreo Crust
This pie is a natural showstopper, and how you serve it can make the experience even more enjoyable.
Temperature
- Best served chilled.
The filling is designed to be firm yet silky when cold. If it sits out at room temperature too long, it may soften a bit, so keep it refrigerated until just before serving.
Serving Ideas
- Simple and Classic
Serve plain slices right from the fridge, with the Oreo crust and peanut butter filling as the stars. - With Ice Cream
For an ultra-indulgent dessert, add a small scoop of vanilla or chocolate ice cream next to each slice. The cold creaminess of the ice cream layers beautifully with the pie’s textures. - With Coffee or Tea
A hot drink cuts through the richness and balances the sweetness. Coffee, espresso, black tea, or even a mild herbal tea all work well. - Special-Occasion Plating
- Drizzle chocolate or caramel sauce on the plate before setting down the slice.
- Sprinkle a few chopped peanuts or chocolate chips around it.
- Add a small dollop of whipped cream for height and flair.
Even tiny details like these turn a simple slice into a restaurant-style dessert experience.
Tips & Helpful Tricks for Perfect Peanut Butter Pie
A few small details can make a big difference in the final result. Here are some practical tips to ensure your pie turns out beautifully every time:
1. Use Room-Temperature Cream Cheese
- Cold cream cheese tends to stay lumpy and doesn’t blend as smoothly with peanut butter and sugar.
- Let it sit at room temperature for about 30–45 minutes before starting. When pressed lightly, it should feel soft but not melted.
2. Choose the Right Peanut Butter
- Use regular, creamy peanut butter (like Jif or Skippy).
- Avoid natural peanut butter with separated oil. It can make the filling grainy or cause it not to set properly.
3. Don’t Skip the Chill Time
- The pie needs several hours in the fridge to firm up. If you cut it too soon, the slices may be messy and the filling too soft.
- If you’re planning to serve the pie at a specific time, make it the day before or at least early in the day.
4. Press the Crust Firmly
- An uneven or loosely packed crust can crumble when you slice the pie.
- Use a flat-bottomed glass or measuring cup to press firmly, especially along the edges and corners.
5. Taste as You Go
- Before folding in the whipped cream, taste the peanut butter mixture.
- If you prefer it slightly sweeter, add an extra tablespoon or two of powdered sugar.
- Keep in mind that the whipped cream will soften the sweetness a bit, and the Oreo crust also adds sweetness.
6. Get Clean Slices
- For clean, sharp slices:
- Dip your knife in hot water.
- Dry it with a towel.
- Slice straight down without dragging too much.
- Clean and rewarm the knife between cuts.
7. Make It Ahead
- This pie is an excellent make-ahead dessert.
- The flavor and texture often improve after a night in the fridge as everything sets and melds together.
Storage, Make-Ahead, and Freezing
One of the practical advantages of this Peanut Butter Pie is how well it stores. You can prepare it in advance and enjoy it over several days.
Storing in the Refrigerator
- Cover the pie tightly with plastic wrap or an inverted cake dome.
- Store in the refrigerator for up to 4 days.
- The crust may soften slightly over time, but the pie remains delicious.
Freezing the Pie
You can absolutely freeze this pie for longer storage:
- Freeze the Whole Pie
- Once the pie is fully chilled and set, wrap the entire pie (in its dish) tightly with plastic wrap.
- Then add a layer of aluminum foil to prevent freezer odors.
- Label with the date.
- Freeze for up to 2–3 months.
- Freeze Individual Slices
- Cut the fully chilled pie into slices.
- Place slices on a parchment-lined baking sheet and freeze until solid.
- Wrap each slice in plastic wrap, then place them in a freezer-safe bag or container.
- This is convenient if you want single servings on demand.
- Thawing
- Transfer the whole pie or individual slices to the refrigerator.
- Allow to thaw for several hours or overnight before serving.
- For a slightly firmer, ice-cream-like treat, you can enjoy slices partially frozen.
Final Thoughts
This Peanut Butter Pie with Easy Oreo Crust is proof that an impressive dessert doesn’t have to be complicated. With a simple crushed-cookie crust and a fluffy, no-bake peanut butter filling, you get a dessert that feels luxurious yet approachable.
It brings together beloved flavors—chocolate, peanut butter, cream, and cookies—into a single slice that’s hard to resist. Whether you’re serving it at a family gathering, bringing it to a potluck, or making it just because you’re in the mood for something special, this pie delivers every time.
It’s also a wonderfully forgiving recipe. You can play with toppings, adjust the sweetness a little, or add fun extras like peanut butter cups or caramel without worrying about ruining the structure. Once you’ve made it once, it’s the kind of dessert that quickly becomes a “signature” recipe—something people ask you to bring again and again.
FAQ – Peanut Butter Pie with Easy Oreo Crust
Can I use natural peanut butter in this recipe?
It’s not recommended. Natural peanut butter tends to separate and has more oil, which can make the filling too loose or cause it to set unevenly. For the best texture and stability, use regular creamy peanut butter (the kind that doesn’t separate).
Can I make this pie without cream cheese?
Cream cheese gives the filling body and a slight tang that balances the sweetness. Omitting it will change both flavor and texture. If you really need a cream-cheese-free version, you could:
- Increase the peanut butter slightly
- Use more whipped cream or whipped topping
- Add a bit of vanilla pudding mix for structure
However, the classic version with cream cheese is recommended for the best results.
Can I reduce the sugar in this recipe?
Yes, you can reduce the powdered sugar in the filling if you prefer a less sweet dessert. You might try using 3/4 cup instead of 1 cup. Keep in mind:
- The Oreo crust is already sweet.
- Any toppings (like chocolate, caramel, or candy) add sweetness too.
You can also skip very sweet toppings and keep the pie more minimal if you’re aiming for balance.
Can I make the crust with a different cookie?
Absolutely. While Oreos are classic and pair beautifully with peanut butter, you can experiment with:
- Chocolate wafer cookies
- Digestive biscuits or graham crackers (for a more neutral, toasty flavor)
- Peanut butter sandwich cookies (for an extra peanut butter punch)
Just keep the ratio similar: enough crumbs plus melted butter so the mixture holds when pressed.
How far in advance can I make this pie?
You can make the pie 1–2 days in advance and store it in the refrigerator. In fact, many people find the flavor and texture even better the next day as it fully sets. If you plan to serve the pie later than 2 days, consider freezing it and thawing it before serving.
Do I have to bake the crust?
No. The crust can be fully no-bake if you prefer. Simply press the crumb mixture into the pie dish and chill it in the refrigerator for at least 30 minutes before adding the filling. Baking the crust for a short time is optional and gives it a slightly firmer, toastier finish, but it’s not required.
What if I don’t have heavy cream?
You can replace the whipped cream with whipped topping (such as Cool Whip). Use about 2 cups of whipped topping and fold it into the peanut butter mixture just as you would with whipped cream. Whipped topping is very stable and gives a smooth, fluffy texture.
Can I turn this into mini pies or dessert cups?
Yes! This recipe works wonderfully as individual desserts:
- Divide the Oreo crust mixture into small jars, glasses, or mini tart pans.
- Press gently to form a small base.
- Top with the peanut butter filling and chill.
- Add toppings before serving.
Mini pies are great for parties and make serving very easy.