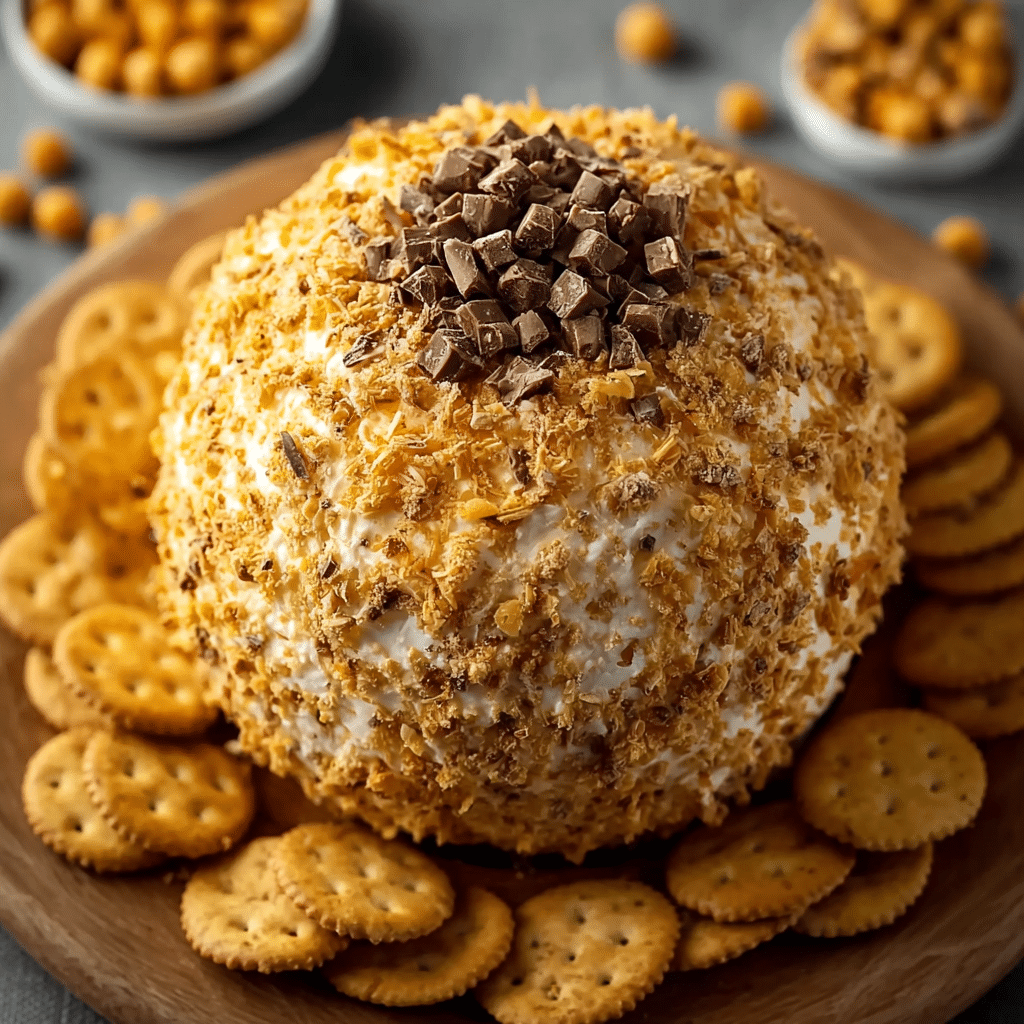
Some desserts are elegant. Others are nostalgic. And then there are desserts that instantly bring people together—the kind that disappears within minutes of hitting the table. Reese’s Cheese Ball belongs proudly in that last category. Creamy, sweet, rich, and packed with chocolate-peanut butter flavor, this no-bake dessert is pure crowd-pleasing comfort shaped into one irresistible centerpiece.
At its heart, Reese’s Cheese Ball captures everything we love about classic peanut butter desserts: smooth cream cheese, rich peanut butter, sweet chocolate, and just enough crunch to keep every bite exciting. Rolled into a generous ball and coated in chopped Reese’s cups, crushed cookies, or chocolate chips, it’s designed for sharing—scooped, spread, and enjoyed with crackers, pretzels, or cookies.
What makes this recipe especially appealing is its simplicity. There’s no oven, no complicated techniques, and no special equipment required. Yet the final result looks festive, indulgent, and impressive enough for holidays, game days, birthdays, and parties of all kinds. It’s the kind of dessert that makes people hover around the table, asking, “Who made this?”
Reese’s Cheese Ball isn’t just a dessert—it’s an experience. From the moment it’s placed at the center of the table, surrounded by dippers, it invites conversation, laughter, and second helpings.
Why This Recipe Is So Loved
There’s a reason Reese’s Cheese Ball has become a party classic. It checks every box at once—flavor, texture, nostalgia, and ease.
What makes it special:
- No-bake simplicity, perfect for busy schedules
- Classic peanut butter and chocolate flavor everyone loves
- Ultra-creamy texture with a crunchy outer coating
- Highly customizable with endless mix-ins and coatings
- Perfect make-ahead dessert
- Fun, shareable presentation
Unlike sliced cakes or plated desserts, this cheese ball encourages interaction. Guests gather, scoop, spread, and snack—making it feel more like a celebration than a formal dessert.
Core Ingredients for Making the Recipe
The magic of Reese’s Cheese Ball comes from familiar ingredients treated the right way. Each one plays an important role in flavor and texture.
For the Cheese Ball Base
- 16 oz (450 g) cream cheese, softened
- ¾ cup creamy peanut butter
- ½ cup powdered sugar
- ¼ cup brown sugar, packed
- 1 teaspoon vanilla extract
- ½ cup mini chocolate chips
For the Coating
- 1½ cups chopped Reese’s Peanut Butter Cups
(You may substitute or mix with chocolate chips, crushed Oreos, or peanut butter chips.)
For Serving (Optional)
- Graham crackers
- Pretzels (mini or rods)
- Vanilla wafers
- Chocolate cookies
- Apple slices
Step-by-Step

This recipe is beginner-friendly and very forgiving. Follow the steps below for a smooth, perfectly scoopable cheese ball every time.
Step 1: Soften the Cream Cheese
Remove the cream cheese from the refrigerator and let it sit at room temperature for 30–45 minutes. Softened cream cheese is essential for a smooth, lump-free mixture.
Step 2: Mix the Base Ingredients
In a large mixing bowl, combine:
- Softened cream cheese
- Peanut butter
- Powdered sugar
- Brown sugar
- Vanilla extract
Using a hand mixer or sturdy spatula, mix until completely smooth and creamy. The mixture should be thick, fluffy, and evenly blended with no visible streaks.
Step 3: Fold in the Chocolate Chips
Add the mini chocolate chips to the bowl. Gently fold them in with a spatula until evenly distributed. Avoid overmixing to keep the texture light.
Step 4: Chill the Mixture
Cover the bowl and refrigerate for 30–45 minutes. This step firms up the mixture, making it much easier to shape.
Step 5: Shape the Cheese Ball
Remove the chilled mixture from the refrigerator. Using clean hands or a spatula, shape it into a round ball. It doesn’t need to be perfect—the coating will hide small imperfections.
Step 6: Coat the Cheese Ball
Spread the chopped Reese’s Peanut Butter Cups on a large plate. Roll the cheese ball gently in the coating, pressing lightly so the pieces adhere evenly to the surface.
Step 7: Final Chill
Place the coated cheese ball on a serving plate. Cover loosely and refrigerate for at least 1 hour before serving. This helps it firm up and allows the flavors to fully develop.
Flavor Variations and Creative Twists
One of the best things about Reese’s Cheese Ball is how customizable it is.
- Chocolate Lover’s Version: Add cocoa powder to the base and coat with chocolate chips
- Crunchy Peanut Version: Mix in chopped peanuts or coat with crushed peanuts
- Cookie Dough Style: Add mini cookie dough bites to the filling
- Nutella Twist: Replace part of the peanut butter with Nutella
- Salted Sweet: Sprinkle flaky sea salt over the finished cheese ball
How to Serve
Reese’s Cheese Ball is best served chilled but soft enough to spread easily.
Arrange it on a platter surrounded by dippers such as graham crackers, pretzels, vanilla wafers, or apple slices. For parties, place small spoons or spreaders nearby for easy serving.
It’s perfect for:
- Holiday dessert tables
- Game day spreads
- Birthday parties
- Potlucks
- Family gatherings
Tips for Perfect Results
- Always use fully softened cream cheese
- Chill before shaping to prevent sticking
- Use mini chocolate chips for better texture
- Press coating gently so it sticks without flattening the ball
- Serve slightly chilled, not frozen
Storage & Make-Ahead Tips
Refrigerator:
Store covered in the refrigerator for up to 4 days.
Make-Ahead:
You can prepare the cheese ball up to 2 days in advance. Add the coating the day of serving for best texture.
Freezer:
Freeze without coating for up to 1 month. Thaw overnight in the refrigerator, then coat before serving.
Final Thoughts
Reese’s Cheese Ball proves that desserts don’t need to be complicated to be unforgettable. Creamy, sweet, and packed with nostalgic peanut butter-chocolate flavor, it’s a dessert that brings people together and disappears fast.
Whether you’re hosting a party, contributing to a potluck, or simply craving a no-bake treat, this recipe delivers maximum flavor with minimal effort. It’s fun, indulgent, and guaranteed to impress—every single time.
FAQ
Can I make this ahead of time?
Yes. It’s an excellent make-ahead dessert and actually tastes better after chilling.
Can I use crunchy peanut butter?
Yes, but the texture will be chunkier.
Why is my cheese ball too soft?
It likely needs more chilling time or the cream cheese was too warm.
Can I make it sweeter or less sweet?
Absolutely. Adjust the powdered sugar to taste.
Reese’s Cheese Ball
Ingredients
For the Cheese Ball Base
-
- 16 oz (450 g) cream cheese, softened
-
- ¾ cup creamy peanut butter
-
- ½ cup powdered sugar
-
- ¼ cup brown sugar, packed
-
- 1 teaspoon vanilla extract
-
- ½ cup mini chocolate chips
For the Coating
-
- 1½ cups chopped Reese’s Peanut Butter Cups
(You may substitute or mix with chocolate chips, crushed Oreos, or peanut butter chips.)
- 1½ cups chopped Reese’s Peanut Butter Cups
For Serving (Optional)
-
- Graham crackers
-
- Pretzels (mini or rods)
-
- Vanilla wafers
-
- Chocolate cookies
-
- Apple slices
Instructions
tep 1: Soften the Cream Cheese
Remove the cream cheese from the refrigerator and let it sit at room temperature for 30–45 minutes. Softened cream cheese is essential for a smooth, lump-free mixture.
Step 2: Mix the Base Ingredients
In a large mixing bowl, combine:
- Softened cream cheese
- Peanut butter
- Powdered sugar
- Brown sugar
- Vanilla extract
Using a hand mixer or sturdy spatula, mix until completely smooth and creamy. The mixture should be thick, fluffy, and evenly blended with no visible streaks.
Step 3: Fold in the Chocolate Chips
Add the mini chocolate chips to the bowl. Gently fold them in with a spatula until evenly distributed. Avoid overmixing to keep the texture light.
Step 4: Chill the Mixture
Cover the bowl and refrigerate for 30–45 minutes. This step firms up the mixture, making it much easier to shape.
Step 5: Shape the Cheese Ball
Remove the chilled mixture from the refrigerator. Using clean hands or a spatula, shape it into a round ball. It doesn’t need to be perfect—the coating will hide small imperfections.
Step 6: Coat the Cheese Ball
Spread the chopped Reese’s Peanut Butter Cups on a large plate. Roll the cheese ball gently in the coating, pressing lightly so the pieces adhere evenly to the surface.
Step 7: Final Chill
Place the coated cheese ball on a serving plate. Cover loosely and refrigerate for at least 1 hour before serving. This helps it firm up and allows the flavors to fully develop.