There’s something undeniably comforting about homemade bread—especially when it’s softly sweet, beautifully golden, and makes your kitchen smell like a cozy bakery. Sweetened condensed milk bread has that magical balance of richness and tenderness, with a delicate sweetness that feels like a treat but still works for everyday slicing, toasting, and snacking.
This loaf is the kind you’ll want to make when you’re craving a little extra softness in your life. It’s fluffy, easy to love, and perfect for everything from buttered breakfast slices to afternoon tea moments. If you’ve ever wanted a bread that feels plush and special without being complicated, this is it.
Why You Will Love This Recipe
- Soft, tender crumb that stays fluffy
- Gentle sweetness that’s not overpowering
- Bakes up golden and bakery-pretty
- Simple ingredients, big cozy payoff
- Great for slicing, toasting, and sharing
- Beginner-friendly with clear rise cues
- Smells absolutely incredible while baking
Ingredients (Lightly Detailed)
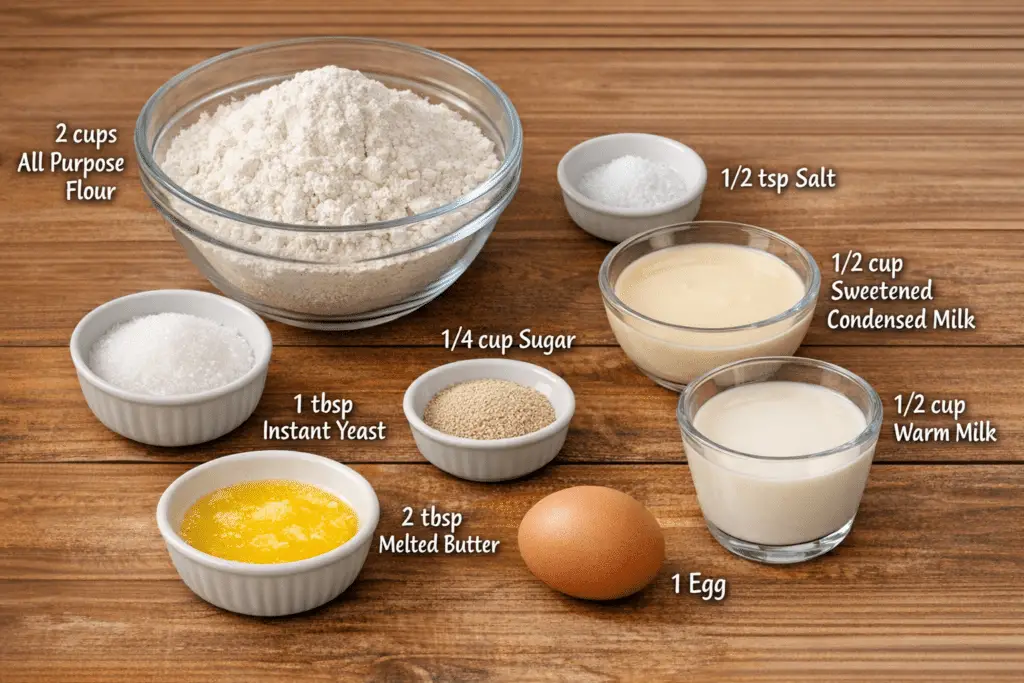
• 2 cups all purpose flour – Builds the structure so the loaf holds its shape while staying soft.
• 1/4 cup sugar – Adds sweetness and helps the crust brown beautifully.
• 1/2 tsp salt – Balances the sweetness and strengthens the dough’s texture.
• 1 tbsp instant yeast – Helps the dough rise and creates that airy, fluffy crumb.
• 1/2 cup sweetened condensed milk – Adds richness and signature sweetness for a tender bite.
• 1/2 cup warm milk – Hydrates the dough and supports yeast activity for a good rise.
• 2 tbsp melted butter – Adds flavor and keeps the crumb soft and supple.
• 1 egg – Enriches the dough for a smoother texture and a more tender slice.
Instructions (Detailed)
- Prep your mixing setup
Set out a large mixing bowl for the dry ingredients and a second bowl for the wet ingredients. Lightly flour a clean surface for kneading later. This small bit of organization makes the dough process feel smooth and stress-free. - Combine the dry ingredients
In a mixing bowl, whisk together the all purpose flour, sugar, salt, and instant yeast. Whisking evenly is important here—especially to distribute the yeast and salt throughout the flour so the dough rises consistently and tastes balanced. - Mix the wet ingredients until smooth
In another bowl, combine the sweetened condensed milk, warm milk, melted butter, and egg. Whisk until the mixture looks glossy and unified with no streaks of egg.- What to look for: a smooth, creamy mixture that pours easily.
- Why it matters: evenly mixed wet ingredients help the dough form more uniformly, which leads to a softer, more consistent crumb.
- Form the dough slowly and gently
Gradually pour the wet mixture into the dry bowl while stirring. Start by mixing with a spoon or spatula until it becomes shaggy and thick. Once it starts clumping, switch to your hands to bring it together.- What to look for: a soft dough that’s slightly tacky but not soupy.
- Tip: If it feels sticky, resist the urge to dump in lots of flour—use light dusting during kneading instead to keep the loaf tender.
- Knead until smooth and elastic (10–15 minutes)
Turn the dough onto a lightly floured surface and knead for 10–15 minutes. Use the heel of your hand to push the dough away, fold it back, rotate, and repeat.- What to look for: the dough should become smoother, more elastic, and easier to handle as you knead.
- Why it matters: kneading develops gluten, which helps the bread rise well and gives it that airy, pull-apart softness.
- Check your dough’s readiness
Near the end of kneading, the dough should feel springy and hold together nicely. If you press it gently, it should bounce back a little rather than staying indented. This is a good sign the structure is developing. - First rise: let it double
Place the dough in a greased bowl and turn it once so the surface is lightly coated (this helps prevent drying). Cover with a kitchen towel and let it rise in a warm spot for about 1 hour, or until doubled in size.- What to look for: noticeably puffed dough that has expanded to about twice its original volume.
- Why it matters: this rise builds flavor and creates the gas bubbles that become a light crumb.
- Punch down and shape with intention
Once doubled, gently punch down the dough to release excess air. Turn it out onto your surface and shape it into a loaf. A simple approach: pat it into a rough rectangle, then roll it up tightly from one end to the other, pinching the seam to seal.- What to look for: a smooth log shape with a sealed seam so it rises evenly.
- Why it matters: shaping helps the loaf bake up tall, uniform, and sliceable.
- Second rise: proof in the pan (30 minutes)
Place the shaped dough into a greased loaf pan. Cover again with a towel and let it rise for about 30 minutes.- What to look for: the dough should look puffy and slightly domed. If you gently press it, the indentation should slowly spring back.
- Why it matters: a good second rise gives you a lighter texture and a more even crumb.
- Preheat your oven to 350°F (180°C)
Preheat while the dough is finishing its second rise so the oven is ready the moment the loaf is proofed. Baking in a properly heated oven supports a strong final rise and helps the crust set correctly. - Bake until golden and hollow-sounding (25–30 minutes)
Bake the loaf for 25–30 minutes. The top should be a warm golden color. Carefully remove it from the oven and tap the top—if it sounds hollow, it’s a strong sign it’s baked through.
- What to look for: a golden top and a loaf that feels light for its size.
- Why it matters: underbaked bread can collapse or feel gummy inside, so those visual and sound cues are your best friends.
- Cool properly for clean slices
Remove the bread from the pan and cool on a wire rack before slicing. This step is hard to wait for, but it’s worth it.
- What to look for: the loaf should feel warm, not hot, and the crust should set as it cools.
- Why it matters: slicing too early can compress the crumb and make it feel sticky instead of fluffy.
- Slice and enjoy
Once cooled, slice and serve. This bread is especially lovely plain, lightly toasted, or enjoyed as an anytime soft snack. The subtle sweetness makes it feel special even with something as simple as a warm slice.
Variations & Customizations
1) Make it mini loaves
Shape the dough into smaller loaves and bake in smaller pans. Keep an eye on bake time—smaller loaves often bake a bit faster, and you’ll still get that golden finish.
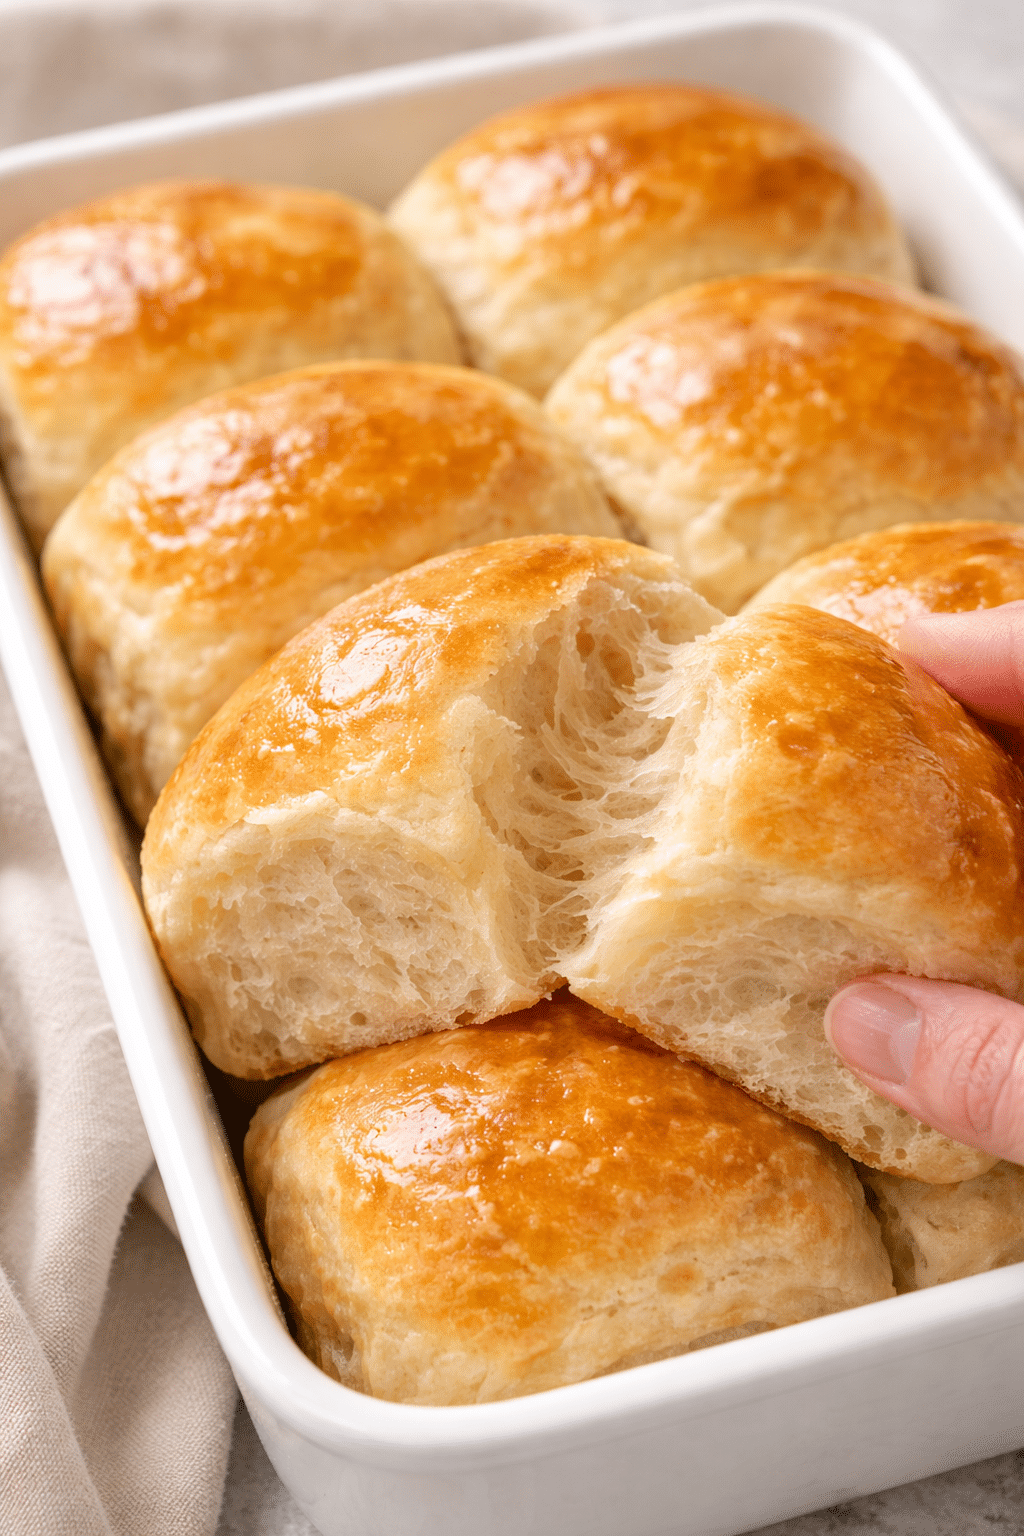
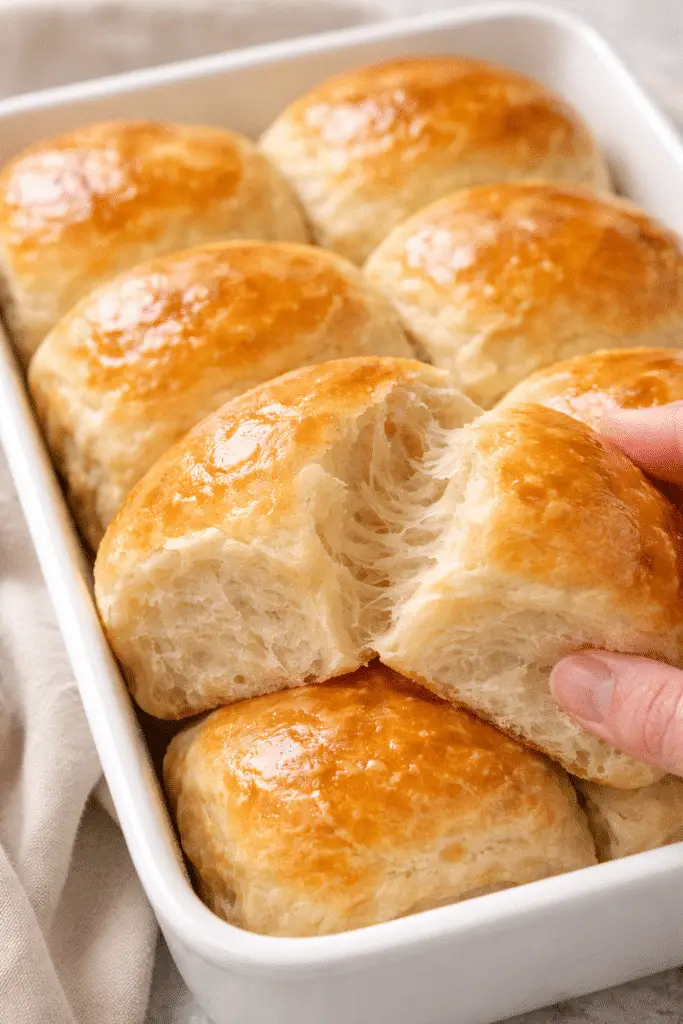
2) Turn it into dinner rolls
Instead of shaping into a loaf, portion the dough into equal pieces and shape into smooth balls. Proof them close together in a pan for soft, pull-apart rolls.
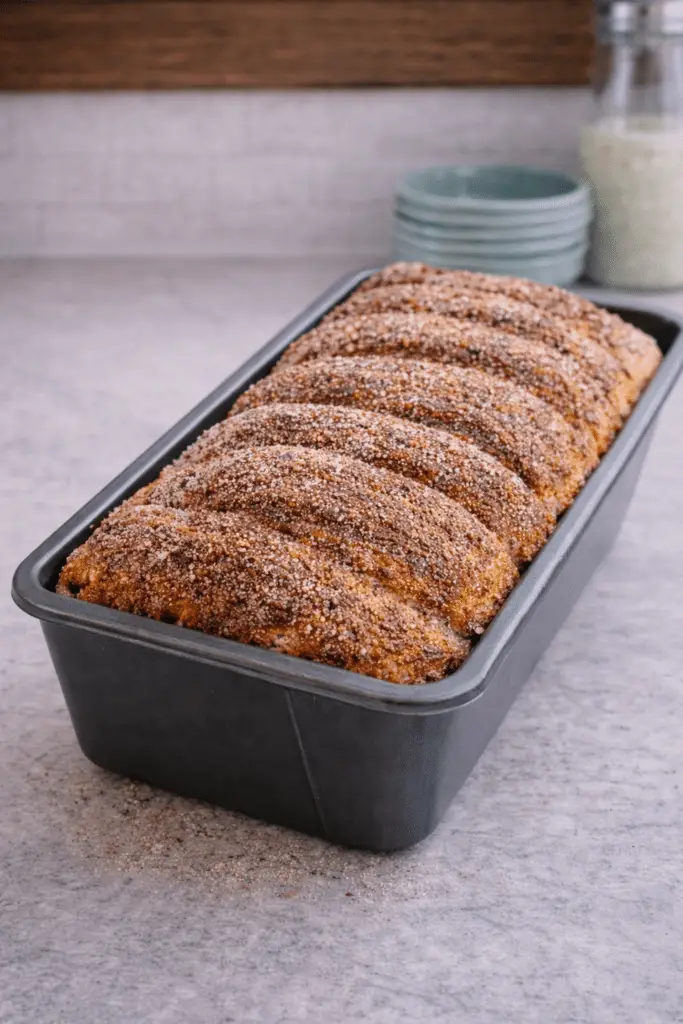
3) Create a taller, domed loaf
When shaping, roll the dough more tightly and seal the seam well. A tighter shape can encourage a more dramatic dome and a prettier slice.
4) Softer crust finish
For a softer bite, keep the loaf covered with a clean towel while it cools on the rack. Trapping a little steam helps the crust stay tender.
5) Extra glossy top
Bake as directed, and if you love a shiny bakery-style look, let the bread cool fully before slicing so the crust sets smooth and neat.
FAQ
1) My dough feels sticky—did I do something wrong?
A slightly tacky dough is normal for soft, enriched bread. Use light flour dusting while kneading rather than adding a lot at once. As you knead, the dough should become smoother and easier to handle.
2) How do I know the dough has doubled during the first rise?
Look for a clear increase in volume—about twice its original size—and a puffy surface. If you gently press a finger in, the indentation should remain or slowly rise back.
3) Why didn’t my bread rise much?
The most common reasons are a cooler rising environment or not giving it enough time. Aim for a warm spot and watch the dough’s size rather than the clock.
4) Can I bake it longer if the top browns too quickly?
If the top gets golden before it seems done, continue baking while keeping an eye on color. The “hollow tap” test is a helpful cue that the loaf is baked through.
5) When is the best time to slice the bread?
Wait until it cools on a wire rack so the crumb finishes setting. Cutting too early can squash the loaf and make the inside feel gummy rather than fluffy.
Nutrition & Time Table
| Category | Amount |
|---|---|
| Prep Time | 15 minutes |
| Cooking Time | 30 minutes |
| Total Time | 45 minutes |
| Calories (estimate) | 200 kcal per serving |
| Protein | ~5 g |
| Carbohydrates | ~34 g |
| Fat | ~5 g |
RELATED RECIPES
Print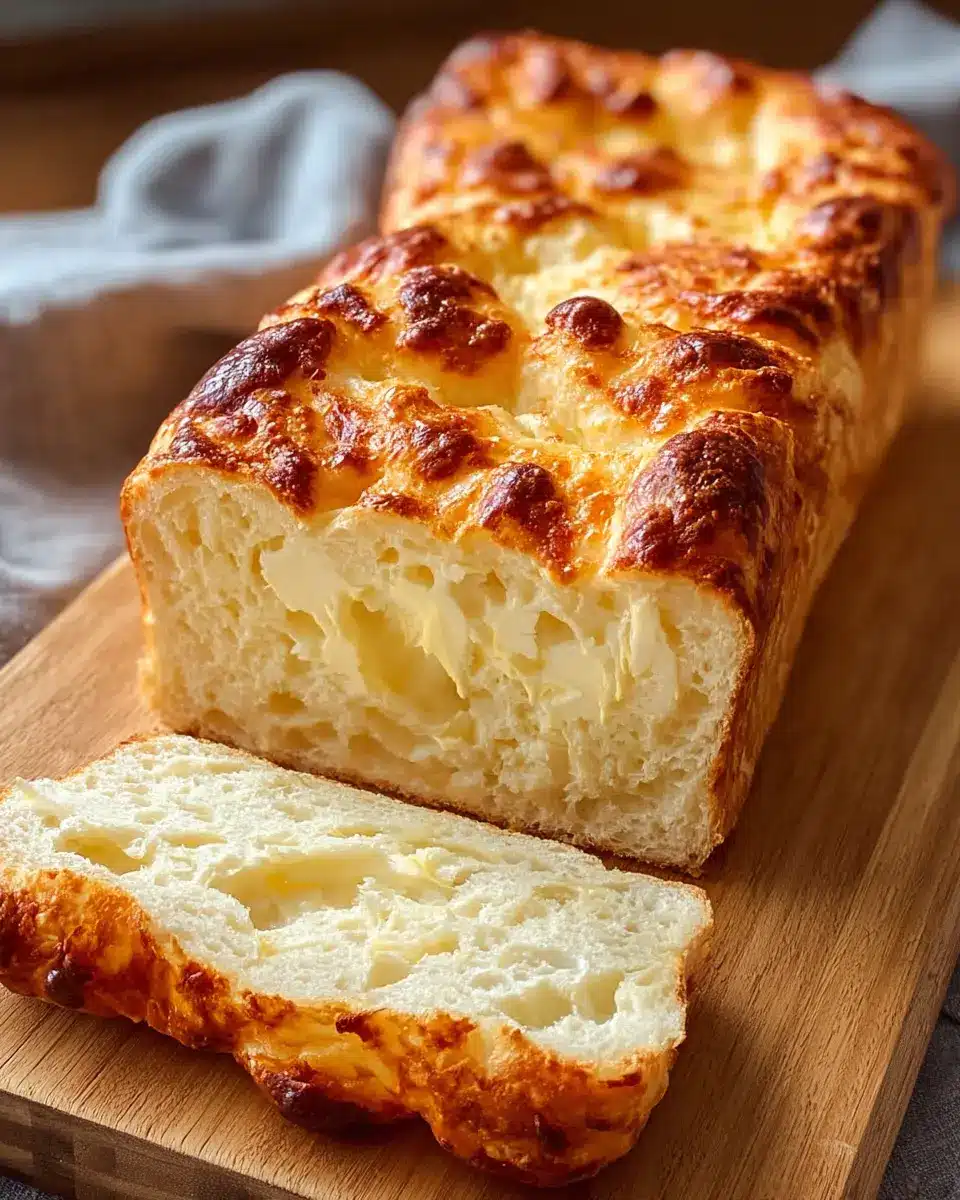


Sweetened Condensed Milk Bread
Description
Soft, lightly sweet bread made rich with sweetened condensed milk.
Perfect for slicing, toasting, and sharing any day of the week.
Ingredients
• 2 cups all purpose flour
• 1/4 cup sugar
• 1/2 tsp salt
• 1 tbsp instant yeast
• 1/2 cup sweetened condensed milk
• 1/2 cup warm milk
• 2 tbsp melted butter
• 1 egg
Instructions
1. In a mixing bowl, whisk together the flour, sugar, salt, and instant yeast.
2. In another bowl, whisk together the sweetened condensed milk, warm milk, melted butter, and egg until smooth.
3. Gradually add the wet mixture to the dry ingredients, stirring until a soft dough forms. Knead on a lightly floured surface for 10–15 minutes until smooth and elastic.
4. Place the dough in a greased bowl, cover with a kitchen towel, and let rise in a warm spot for about 1 hour or until doubled in size.
5. Punch down the dough, shape into a loaf, and place in a greased loaf pan. Cover and let rise for 30 minutes.
6. Preheat the oven to 350°F (180°C). Bake for 25–30 minutes until golden and the loaf sounds hollow when tapped.
7. Remove from the pan and cool on a wire rack before slicing.