There’s something magical about the combination of buttery graham crackers, silky caramel, and fluffy marshmallow.
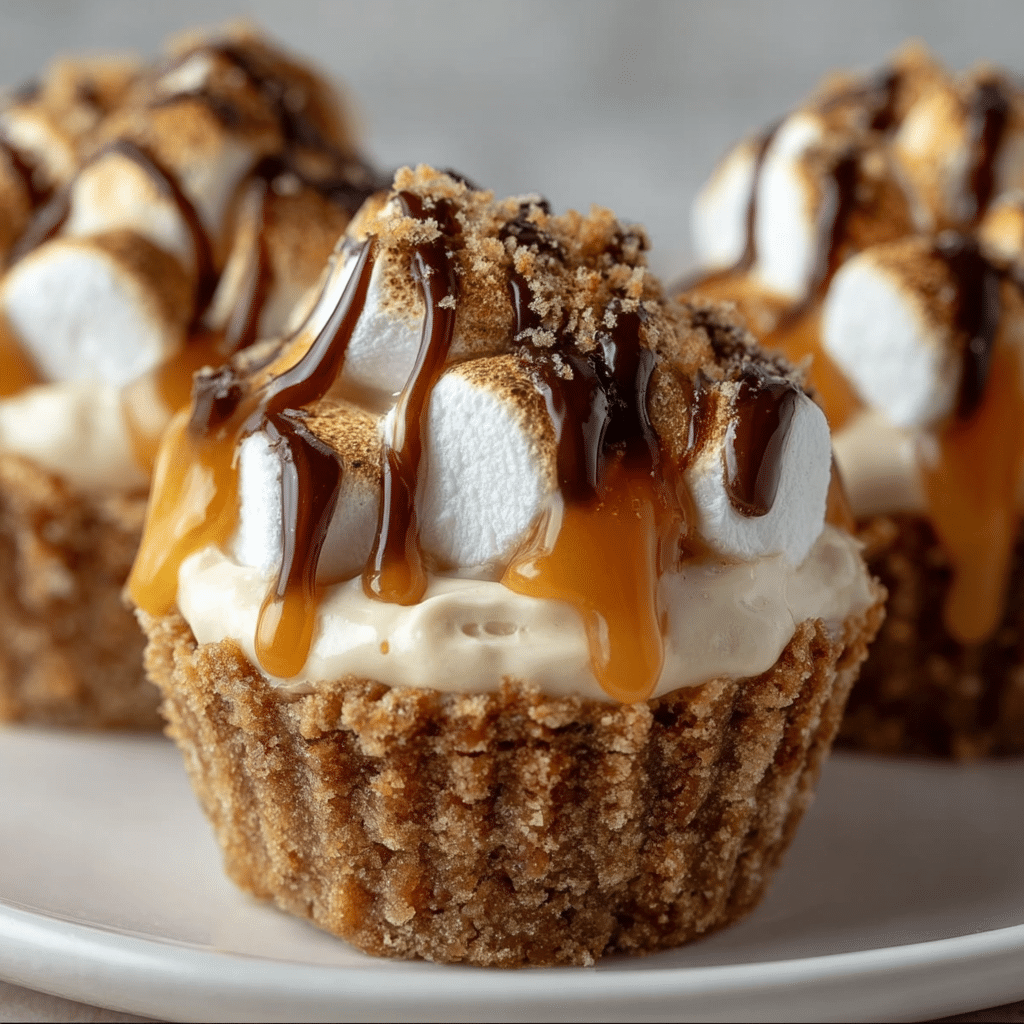
These Creamy Caramel Marshmallow Cups take that magic and tuck it neatly into little handheld treats—perfect for parties, dessert tables, lunchboxes, or those nights when you just need “a little something sweet.”
Instead of a full pie or layered cake, these cups give you bite-sized indulgence with all the satisfaction of a rich, gooey dessert. Each cup starts with a crisp graham cracker crust, followed by a creamy, golden caramel layer, and is finished with a soft, pillowy marshmallow topping that turns lightly toasty and irresistible. Every bite brings a mix of crunchy, creamy, and fluffy textures that feel decadent but are surprisingly easy to make.
These treats are ideal when you want a dessert that looks special but doesn’t require fancy decorating skills.
You press, pour, spoon, and let the oven and cooling time do the magic. Whether you’re making them for a family movie night, a holiday party, or as a homemade gift, Creamy Caramel Marshmallow Cups are the kind of dessert that makes people close their eyes on the first bite.
Core Ingredients for Making the Recipe
To make these cozy, caramel-filled treats, you only need a handful of simple ingredients. Most are pantry staples you might already have on hand.
Here’s what you’ll need:
Graham Cracker Crust
- 1 ½ cups graham cracker crumbs
- ¼ cup granulated sugar
- ¼ cup melted butter
These three ingredients form the base: buttery, slightly sweet, and perfectly crisp once baked. It’s the foundation that holds all the gooey goodness on top.
For the Creamy Caramel Layer
- 30–32 soft caramel candies, unwrapped (or about 1 ½ cups caramel bits)
- ¼ cup heavy cream
- 1 teaspoon vanilla extract
- Pinch of salt (optional, but amazing if you like salted caramel)
This layer is lush, smooth, and rich. The cream softens the caramels and gives them a velvety texture that melts beautifully into the crust.
For the Marshmallow Topping
- 2 cups mini marshmallows
Or, if you want an even more indulgent topping, you can use:
- 1 ½ cups mini marshmallows
- ½ cup marshmallow crème or fluff
The marshmallows puff up and turn lightly golden in the oven, giving each cup a soft, gooey top that contrasts beautifully with the chewy caramel and crisp crust.
Optional Chocolate Finish (but highly recommended!)
- ½ cup semi-sweet chocolate chips or chopped chocolate
- 1 teaspoon vegetable oil or melted butter (to help the drizzle set smoothly)
A thin drizzle of chocolate across the top of the toasted marshmallow adds another layer of flavor and makes the cups look bakery-worthy with almost no effort.
Step-by-Step

These Creamy Caramel Marshmallow Cups may look fancy, but the process is very straightforward.
Follow this step-by-step guide for a smooth, stress-free baking experience.
1. Prepare Your Pan and Oven
Preheat your oven to 350°F (175°C).
Grease a standard 12-cup muffin tin lightly with butter or nonstick spray. You can also line each cavity with paper liners if you want easy removal and a more polished presentation. If you’re not using liners, be sure to grease well so the crust releases cleanly.
2. Make the Graham Cracker Crust
In a medium bowl, combine:
- 1 ½ cups graham cracker crumbs
- ¼ cup granulated sugar
- ¼ cup melted butter
Stir until the mixture looks like damp sand and everything is evenly coated. The crumbs should hold together when pressed between your fingers.
Spoon about 1–1½ tablespoons of the crust mixture into each muffin cup. Press it down firmly using:
- The back of a spoon
- Your fingertips
- Or the bottom of a small glass or measuring cup
You want a compact, even crust that forms a base for the caramel layer. Don’t rush this step—good pressing leads to a sturdy crust that doesn’t crumble apart.
3. Pre-Bake the Crust
Place the muffin tin in the preheated oven and bake the crusts for 7–9 minutes, or until they’re just set and lightly fragrant. They don’t need to be deeply browned; a light golden edge is perfect.
Remove the pan from the oven and set it aside while you prepare the caramel layer. Leave the oven on—you’ll need it again.
4. Prepare the Creamy Caramel Layer
In a small saucepan over low to medium-low heat, add:
- 30–32 soft caramel candies (unwrapped)
- ¼ cup heavy cream
Stir constantly as the caramels begin to melt. They may cling to the bottom at first, but keep the heat gentle and stir patiently until the mixture becomes smooth and glossy. This can take several minutes.
Once completely melted and silky, remove the pan from the heat and stir in:
- 1 teaspoon vanilla extract
- A pinch of salt (if you enjoy salted caramel flavor)
You should now have a thick, pourable caramel sauce that smells absolutely incredible.
5. Fill Each Crust with Caramel
Using a spoon or small ladle, carefully pour or scoop caramel over each pre-baked graham cracker crust. Aim for about 1 to 1½ tablespoons of caramel per cup, depending on how full you want them.
Try not to overfill them to the very top—you’ll need room for marshmallows later. A nice, generous caramel pool that sits on top of the crust is what you’re aiming for.
If the caramel thickens while you’re working, simply return the saucepan to low heat and stir again to loosen it.
6. Add the Marshmallow Topping
Once all the crusts are filled with caramel, sprinkle mini marshmallows on top of each cup. A small handful—about 2–3 tablespoons per cup—usually does the trick.
If you’re using a combo of mini marshmallows and marshmallow crème, you can:
- Spoon a small amount of marshmallow crème directly onto the caramel layer, then
- Press a few mini marshmallows on top for extra fluff and texture.
The marshmallows should mound slightly above the rim of each muffin cavity; they’ll puff, melt a bit, and toast beautifully in the oven.
7. Bake Until Toasty and Gooey
Return the muffin tin to the 350°F (175°C) oven.
Bake for 5–8 minutes, just until the marshmallows are puffed and turning a light golden brown on top. Keep an eye on them—marshmallows can go from perfectly toasted to too dark fairly quickly.
If you want a deeply toasted, campfire-style look, you can:
- Turn on the broiler for 30–60 seconds at the end, watching very closely.
- Once they hit your ideal level of toastiness, remove them immediately.
8. Cool Before Removing from the Pan
When the marshmallows are toasted to your liking, remove the muffin tin from the oven and place it on a cooling rack.
This step is important: allow the cups to cool in the pan for at least 20–30 minutes. The caramel and crust need time to firm up so the cups hold their shape.
Once cooled to room temperature (or just slightly warm), carefully loosen each cup by running a thin knife or offset spatula around the edges if you didn’t use liners. Gently lift them out and place them on a tray or serving plate.
9. Optional Chocolate Drizzle
For an extra flavor boost and a pretty finish, melt:
- ½ cup semi-sweet chocolate chips
- With 1 teaspoon vegetable oil or melted butter
Use a microwave in 20–30 second bursts, stirring between each until smooth. Then drizzle the melted chocolate over the marshmallow tops using a spoon or a small piping bag.
Let the chocolate set at room temperature or pop the cups into the fridge briefly to speed things up.
Now you have Creamy Caramel Marshmallow Cups that look like they came straight from a bakery display case.
Flavor Variations and Creative Twists
The beauty of these cups is their flexibility. Once you master the base recipe, you can easily customize the flavors to suit different seasons, occasions, or cravings.
1. Salted Caramel Marshmallow Cups
If you love the sweet-salty combo, turn these into salted caramel treats by:
- Adding a generous pinch of flaky sea salt on top of the caramel layer before adding the marshmallows
- Or sprinkling a little sea salt directly over the toasted marshmallows and chocolate drizzle
The salt cuts through the sweetness and gives each bite a sophisticated twist.
2. Chocolate Caramel Marshmallow Cups (S’mores-Inspired)
To channel classic s’mores energy, you can:
- Replace part of the graham cracker crumbs with crushed chocolate wafers or chocolate graham crackers
- Add a layer of chocolate chips on top of the warm crust before pouring the caramel
- Finish with an extra drizzle of chocolate on top of the toasted marshmallows
You’ll end up with a s’mores-meets-caramel hybrid that’s unbelievably good.
3. Nutty Caramel Cups
For added crunch and depth of flavor, stir:
- ½ cup chopped toasted pecans, walnuts, or almonds
into the caramel mixture before spooning it onto the crust. The nuts bring richness and texture that contrasts wonderfully with the soft marshmallow.
4. Espresso Caramel Cups
To give these cups a grown-up twist, dissolve:
- 1 teaspoon instant espresso or instant coffee granules
into the warm caramel mixture. The coffee accentuates the caramel flavor and adds a subtle bitterness that balances the sweetness.
5. Holiday Spice Version
For a festive version, stir into the caramel:
- ¼ teaspoon cinnamon
- A pinch of nutmeg or ginger
These warm spices give the cups a cozy, holiday vibe that pairs beautifully with hot chocolate or coffee during the colder months.
How to Serve
These Creamy Caramel Marshmallow Cups are as versatile in serving as they are in flavor.
Fresh and Slightly Warm
Served slightly warm, they’re at peak gooeyness. The caramel is soft and creamy, the marshmallows are tender, and the crust still has a pleasant crunch. Pair them with:
- A cup of coffee
- Hot chocolate
- Tea
- Or a glass of cold milk
for a comforting dessert or afternoon treat.
Room Temperature for Easy Handling
At room temperature, the cups are firmer and easier to handle—perfect for:
- Dessert platters
- Party trays
- Potlucks
- School or work snacks
The caramel sets just enough to hold together when you bite, but still feels luxuriously soft.
Chilled for a Firmer, Candy-Like Texture
If you prefer a slightly chewier bite, you can refrigerate the cups. Once chilled:
- The caramel firms up more, giving a candy-bar style texture.
- The marshmallow top remains soft but less sticky.
Chilled cups are ideal for warm weather or for packing in lunchboxes, as they’re a bit less messy.
Serving Presentation Ideas
For a polished look, you can:
- Place the cups in colorful paper liners
- Arrange them on a tiered stand
- Drizzle extra caramel or chocolate just before serving
- Dust lightly with crushed graham cracker crumbs or a sprinkle of cocoa powder
They’re small, elegant, and eye-catching—perfect for buffets and dessert tables.
Tips & Variations
A few thoughtful choices can take your Creamy Caramel Marshmallow Cups from good to unforgettable.
Choose the Right Crust Texture
- If your graham mixture is too dry and crumbly, add 1–2 extra teaspoons of melted butter.
- If it’s too wet and greasy, sprinkle in another tablespoon of graham crumbs.
The ideal texture is like moist sand that holds together when pressed firmly.
Press the Crust Evenly
An uneven crust can lead to thin spots and cracks. Take a moment to:
- Level the crust in each muffin cup
- Press it firmly, especially around the center, so it doesn’t crumble when you remove the cups
A tightly packed base gives structure and support to the caramel layer.
Melt Caramel Gently
Caramel can scorch quickly if overheated. Keep your burner on low to medium-low and stir patiently. If you’re worried, you can melt the caramels in a heatproof bowl over a saucepan of simmering water (double boiler style) for gentler heat.
Don’t Overbake the Marshmallows
Once the marshmallows puff and turn lightly golden, they’re done. Overbaking can cause them to dry out or become too dark. The goal is a soft, toasty finish—not burned tops.
Let Them Cool Before Removing
It can be tempting to pull them from the pan right away, but hot caramel is very soft and can spill or cause the crust to crumble. Letting the cups cool significantly helps:
- The caramel set
- The crust firm up
- The marshmallow topping stabilize
Patience at this stage pays off in neat, gorgeous cups.
Make Them Mini
If you’d like bite-sized treats, use a mini muffin pan. Reduce the amount of crust, caramel, and marshmallows per cavity and slightly shorten the baking time. These mini versions are perfect for large gatherings or dessert buffets.
Final Thoughts
Creamy Caramel Marshmallow Cups are a celebration of texture and flavor in a small, charming package.
They bring together:
- The familiar comfort of graham cracker crust
- The rich decadence of smooth, buttery caramel
- The playful, nostalgic sweetness of toasted marshmallow
All wrapped into a dessert that’s easy to make, easy to share, and impossible to resist.
What makes this recipe truly special is that it feels both nostalgic and new. It echoes favorite flavors from childhood—s’mores, caramel candies, marshmallows—while presenting them in a format that’s grown-up enough for parties, holidays, and special occasions.
With just a handful of simple ingredients, you can create a dessert that looks impressive, tastes luxurious, and doesn’t require complicated techniques. Whether you serve them warm and gooey, room temperature and tidy, or chilled and chewy, these cups are sure to become one of those recipes you find yourself making “just one more time.”
They’re proof that small desserts can carry big flavor—and that sometimes, the best treats come in cup form.
FAQ
Can I make Creamy Caramel Marshmallow Cups ahead of time?
Yes, absolutely. These cups hold up very well. You can:
- Prepare and bake them completely, then let them cool.
- Store them in an airtight container at room temperature for up to 2 days.
- For longer storage, refrigerate them for up to 5 days.
If you prefer a softer caramel and marshmallow texture, allow chilled cups to sit at room temperature for 10–15 minutes before serving.
Can I freeze these cups?
Yes, you can freeze them, though the marshmallow texture may change slightly.
To freeze:
- Let the cups cool completely.
- Arrange them on a baking sheet and freeze until firm.
- Transfer them to a freezer-safe container or zip-top bag, separating layers with parchment paper.
They can be frozen for up to 2–3 months. Thaw in the refrigerator or at room temperature. The caramel and crust freeze well; the marshmallow may become a bit chewier, but the flavor remains delicious.
Can I use homemade caramel instead of store-bought candies?
Definitely. If you have a favorite homemade caramel sauce, you can use it in place of the melted candies and cream. You’ll want a thick, spoonable caramel, not a very runny one, so it sets nicely on the crust.
Simply spoon your homemade caramel over the baked crusts, then proceed with the marshmallow topping and baking as directed.
Can I reduce the sweetness in this recipe?
These cups are rich and sweet by nature, but you do have options:
- Use slightly less sugar in the graham cracker crust.
- Choose a less sweet caramel (or use a homemade version where you control the sugar).
- Reduce or skip the chocolate drizzle.
- Add a pinch of salt to the caramel or sprinkle flaky salt on top to balance the sweetness.
These tweaks keep the spirit of the dessert while making it more tailored to your taste.
Can I substitute the graham crackers with something else?
Yes. If you want to switch things up, you can use:
- Crushed digestive biscuits
- Crushed vanilla wafers
- Crushed chocolate cookies
Just keep the overall ratio of crumbs to butter and sugar similar, and you’ll get a sturdy, flavorful crust that works beautifully with the caramel and marshmallow topping.