1️⃣ Introduction
There’s something undeniably nostalgic about a jar of vibrant, jewel-toned pickled eggs sitting in the refrigerator. Whether you remember them from delis, roadside diners, or family gatherings, pickled eggs carry a charm that feels both rustic and timeless. Their bold tang, subtle sweetness, and aromatic spice infusion transform simple hard-boiled eggs into something truly special.
This homemade version strikes the perfect balance between sharp vinegar bite and gentle sweetness, with layers of garlic, mustard seed, peppercorn, and fresh dill weaving through every bite. After just a few days in the brine, the eggs become beautifully seasoned, tender, and irresistibly snackable — perfect for meal prep, entertaining, or simply elevating your everyday fridge staples.
2️⃣ Why You Will Love This Recipe
- ✔️ Incredibly easy to prepare with minimal cooking
- ✔️ Perfect make-ahead snack for busy weeks
- ✔️ Packed with bold, tangy, savory flavor
- ✔️ Naturally high in protein and low in carbs
- ✔️ Great for entertaining or charcuterie boards
- ✔️ Customizable spice level with chili peppers
- ✔️ Keeps well in the refrigerator for days
3️⃣ Ingredients (With Exact Amounts)
• 10–12 hard-boiled eggs, peeled – The protein-rich base that absorbs all the flavorful brine.
• 1 1/2 cups white vinegar – Provides the signature tang and preserves the eggs.
• 1 cup water – Balances the acidity for a smoother flavor.
• 1/4 cup sugar – Adds subtle sweetness to round out the vinegar’s sharpness.
• 1 tablespoon salt – Enhances flavor and helps season the eggs evenly.
• 1 teaspoon black peppercorns – Infuses mild heat and earthy spice.
• 1 teaspoon mustard seeds – Adds gentle warmth and classic pickling aroma.
• 2 cloves garlic, smashed – Brings bold, savory depth to the brine.
• 1/2 small red onion, thinly sliced – Adds sweetness and beautiful color.
• 1–2 red chili peppers, sliced – Introduces optional heat and visual appeal.
• Fresh dill sprigs – Provides fresh, herbaceous brightness.

4️⃣ Step-By-Step Instructions (Detailed)
Step 1: Prepare the Brine
In a medium saucepan, combine the white vinegar, water, sugar, salt, black peppercorns, mustard seeds, and smashed garlic cloves. Place the saucepan over medium heat and stir gently as it warms.
As the mixture heats, continue stirring until the sugar and salt are fully dissolved. You’ll know it’s ready when the liquid looks completely clear and no granules remain at the bottom. Bring the mixture to a gentle boil — not a rolling boil — just enough to activate the flavors and meld everything together.
Step 2: Prepare the Jar
While the brine heats, take a clean glass jar large enough to comfortably hold the eggs. Make sure it has a tight-fitting lid.
Carefully place the peeled hard-boiled eggs into the jar. Tuck the thinly sliced red onion between the eggs so they’re evenly distributed. Add the sliced red chili peppers and fresh dill sprigs, spreading them throughout the jar for balanced flavor infusion.
Step 3: Pour the Hot Brine
Once the brine has reached a gentle boil and the sugar and salt are dissolved, carefully pour the hot liquid over the eggs inside the jar.
Make sure the eggs are completely submerged. This is important for even pickling and proper preservation. If needed, gently tap the jar to release any trapped air bubbles.
Step 4: Cool and Seal
Allow the jar to sit uncovered at room temperature until it cools completely. Cooling gradually prevents condensation buildup inside the sealed jar.
Once fully cooled, secure the lid tightly.
Step 5: Refrigerate and Rest
Place the sealed jar in the refrigerator for at least 48 hours. While you can technically enjoy them after two days, the flavor becomes noticeably deeper and more balanced after 3–5 days.
During this time, the eggs will slowly absorb the tangy, sweet, and spicy notes of the brine. The longer they sit (within reason), the more pronounced the flavor becomes.
5️⃣ Variations & Customizations
Extra Spicy Version
Use the higher end of the 1–2 red chili peppers for a noticeable kick. You can also leave some seeds in for more heat intensity.
Sweeter Profile
If you prefer a slightly sweeter pickled egg, allow the eggs to rest closer to the 5-day mark. The sugar flavor becomes more integrated and rounded over time.
Mild and Classic
Use just 1 red chili pepper and remove most of the seeds for a subtle warmth rather than bold spice.
Deep Dill Flavor
Add a few extra fresh dill sprigs (optional) for a stronger herbal note. The dill flavor intensifies as the eggs sit in the brine.
Onion-Forward Twist
Let the eggs pickle for a full 5 days to allow the red onion to fully infuse its subtle sweetness
into the brine.

6️⃣ FAQ
How long do pickled eggs last in the refrigerator?
When stored properly in a sealed jar and kept refrigerated, pickled eggs can last up to one week. Always ensure the eggs remain fully submerged in brine for safety and best flavor.
Can I eat them before 48 hours?
Technically yes, but they won’t have fully absorbed the flavors. Waiting at least 48 hours allows the brine to penetrate beyond the surface for a more balanced taste.
Why are my eggs rubbery?
Overcooked hard-boiled eggs can become slightly rubbery after pickling. Make sure your eggs are cooked just until set and cooled properly before peeling.
Do the eggs change color?
Yes, especially near the outer layer. The red onion and chili peppers may give the egg whites a light pink or golden tint, which is completely normal and visually appealing.
Should the brine cover the eggs completely?
Absolutely. Full submersion ensures even pickling and helps maintain freshness. If any egg is exposed, it may not pickle properly.
7️⃣ Nutrition & Time Table
| Category | Amount |
|---|---|
| Prep Time | 10 minutes |
| Cooking Time | 5 minutes |
| Total Time | 15 minutes + resting |
| Calories | 70 kcal |
| Protein | 6 g |
| Carbohydrates | 2 g |
| Fat | 5 g |
Related Recipes
Print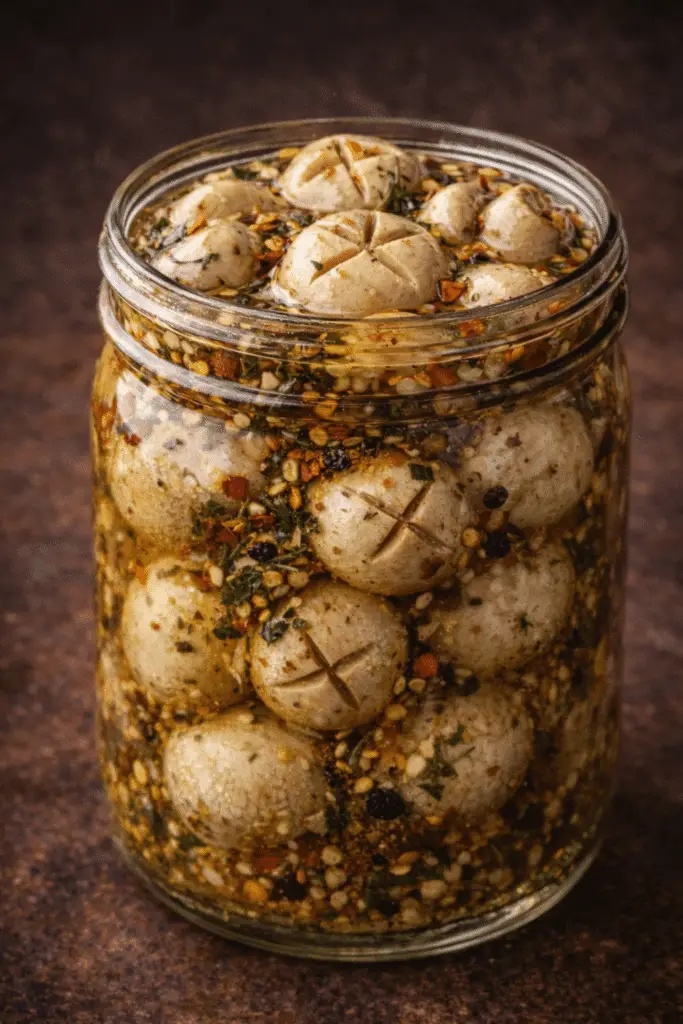


Pickled Eggs
- Total Time: 15 minutes + resting
Description
Tangy, slightly sweet, and perfectly spiced, these homemade pickled eggs are a protein-packed snack that gets better with time. Easy to prepare and ideal for meal prep or entertaining.
Ingredients
• 10–12 hard-boiled eggs, peeled
• 1 1/2 cups white vinegar
• 1 cup water
• 1/4 cup sugar
• 1 tablespoon salt
• 1 teaspoon black peppercorns
• 1 teaspoon mustard seeds
• 2 cloves garlic, smashed
• 1/2 small red onion, thinly sliced
• 1–2 red chili peppers, sliced
• Fresh dill sprigs
Instructions
1. In a saucepan, combine vinegar, water, sugar, salt, peppercorns, mustard seeds, and garlic.
2. Bring to a gentle boil, stirring until sugar and salt are fully dissolved.
3. Place the eggs, onion slices, chili peppers, and dill into a clean glass jar.
4. Pour the hot brine over the eggs until they are completely submerged.
5. Allow to cool to room temperature, then seal the jar.
6. Refrigerate for at least 48 hours before consuming (they are best after 3–5 days).
- Prep Time: 10 minutes
- Cook Time: 5 minutes