Strawberry desserts have a special way of feeling both nostalgic and exciting at the same time.
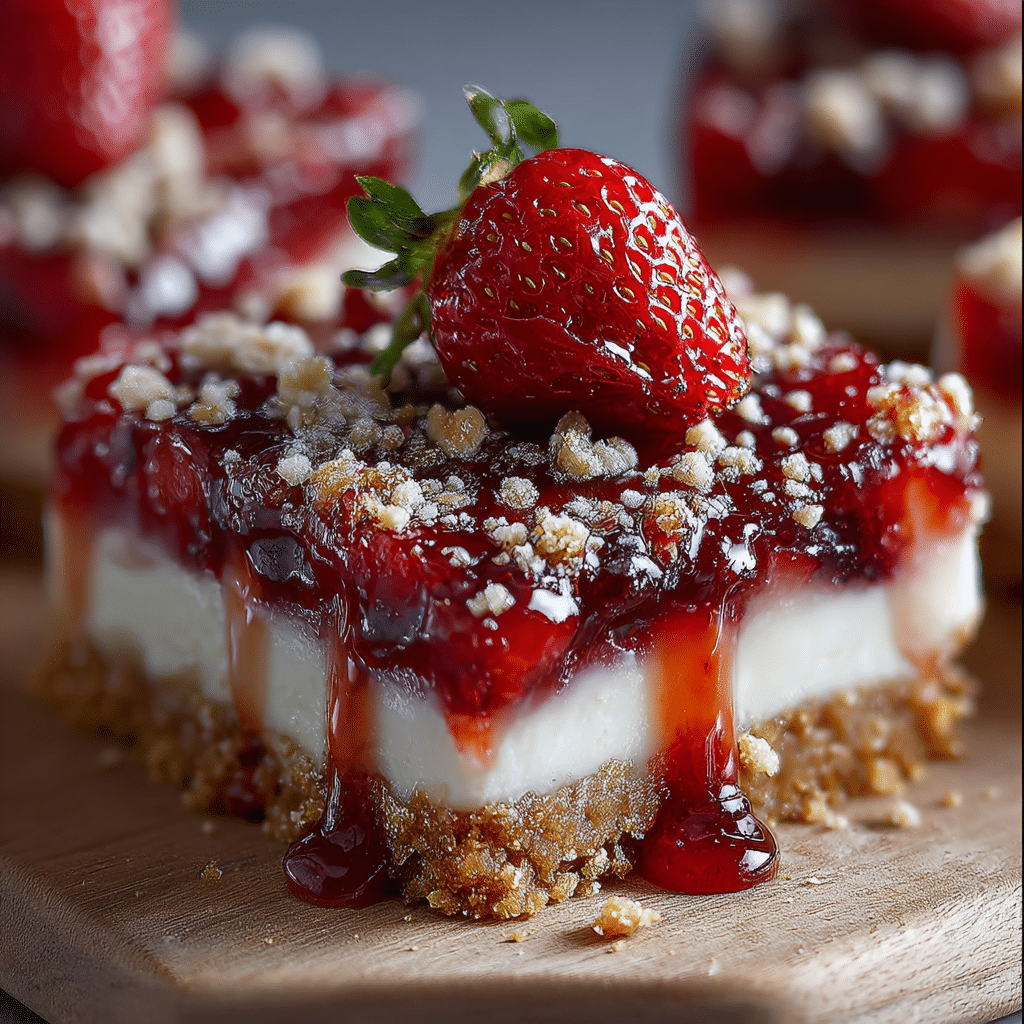
Strawberry Crunch Bars capture that feeling perfectly—layers of buttery graham cracker crust, creamy filling, sweet strawberry topping, and a crispy, candy-like crunch on top. Every bite combines smooth, crunchy, fruity, and buttery textures in one irresistible square.
If you grew up loving strawberry ice cream bars with the crunchy coating, these Strawberry Crunch Bars will feel like a bakery-style version of that childhood favorite. They’re pretty enough for parties, simple enough for weeknights, and sturdy enough to pack for potlucks, lunchboxes, or picnics.
Unlike more complicated layered cakes or cheesecakes, these bars are built on a straightforward press-in crust and an easy creamy filling. The strawberry layer and crunchy topping do the rest of the work—adding bright flavor, stunning color, and a fun texture that makes the bars look and taste like something from a dessert shop.
Whether you’re baking for a birthday, a family gathering, a summer barbecue, or just to satisfy a sweet craving, Strawberry Crunch Bars are the kind of dessert everyone reaches for first—and then comes back for seconds.
Core Ingredients for Making the Recipe
To prepare these cheerful, crunchy Strawberry Crunch Bars, you’ll start with a simple graham cracker crust, then build layers of creaminess, fruit, and crunch.
Here’s what you’ll need:
For the Crust
Use the ingredients you provided as the base:
- 2 cups graham cracker crumbs
- ½ cup unsalted butter, melted
- ¼ cup granulated sugar
This trio creates a buttery, slightly sweet crust that holds everything together and adds a rich, toasty flavor.
For the Creamy Filling
Think of this layer as a light cheesecake-style base that supports the strawberry topping and crunch:
- 450 g (16 oz) cream cheese, softened
- ¾ cup granulated sugar
- 2 large eggs, at room temperature
- ½ cup sour cream or plain Greek yogurt
- 2 teaspoons vanilla extract
- 1 tablespoon cornstarch (helps the bars slice neatly)
The filling bakes up smooth and creamy, with just enough structure to support clean slices.
For the Strawberry Layer
You want a bright, fruity topping that tastes like fresh strawberries but holds together instead of running:
- 2 cups fresh strawberries, hulled and diced (or frozen, thawed and well-drained)
- ¼ cup granulated sugar
- 2 tablespoons lemon juice
- 2 tablespoons cornstarch
- 2 tablespoons water
This quick stovetop strawberry mixture thickens into a glossy, spoonable layer that sits beautifully on top of the filling.
For the Crunch Topping
The “crunch” is what makes these bars extra fun. It’s inspired by the classic strawberry shortcake ice cream bar coating:
- 1 cup vanilla sandwich cookies (like Golden Oreos), roughly crushed
- ½ cup freeze-dried strawberries, lightly crushed
- 3 tablespoons unsalted butter, melted
- 2 tablespoons granulated sugar (optional, for extra sweetness)
The combination of cookies and freeze-dried strawberries gives the topping both crunch and intense strawberry flavor.
Optional Strawberry Drizzle or Glaze
For a bakery-style finish:
- ½ cup powdered sugar
- 1–2 tablespoons milk or cream
- 1–2 tablespoons strawberry puree or strawberry syrup (optional, for color and flavor)
- ½ teaspoon vanilla extract
This drizzle is optional, but it makes the bars look polished and adds a final touch of sweetness.
Step-by-Step

Follow these steps to bring all the layers together into one gorgeous pan of bars.
Step 1: Prepare Your Pan and Oven
- Preheat your oven to 350°F (175°C).
- Line a 9×13-inch baking pan with parchment paper, leaving an overhang on the sides to help lift the bars out later.
- Lightly grease the parchment and sides of the pan with butter or nonstick spray to prevent sticking.
Step 2: Make the Graham Cracker Crust
- In a medium bowl, combine the 2 cups graham cracker crumbs, ¼ cup granulated sugar, and ½ cup melted unsalted butter.
- Mix until the crumbs are evenly coated and the texture resembles wet sand.
- Pour the crumb mixture into the prepared pan.
- Use the back of a spoon, a flat measuring cup, or your fingers to press the crumbs firmly and evenly into the bottom of the pan.
- Focus especially on the corners and edges so the crust is level and compact.
- Bake the crust for 8–10 minutes, until lightly golden and fragrant.
- Remove the pan from the oven and let the crust cool slightly while you prepare the filling.
Step 3: Prepare the Creamy Filling
- In a large mixing bowl, beat the softened cream cheese with an electric mixer on medium speed until smooth and creamy, with no lumps.
- Add the ¾ cup granulated sugar and beat again until fully combined and fluffy.
- Add the eggs, one at a time, mixing on low speed after each addition just until incorporated. Avoid over-mixing to keep the filling smooth.
- Mix in the sour cream (or Greek yogurt) and vanilla extract.
- Sprinkle in the 1 tablespoon cornstarch and mix on low speed until just combined, scraping down the sides of the bowl as needed.
- Pour the cream cheese mixture evenly over the slightly cooled graham cracker crust.
- Gently tap the pan on the counter a few times to release any air bubbles and smooth the top with a spatula.
Step 4: Pre-Bake the Filling
- Place the pan in the preheated oven and bake for 15–18 minutes, just until the filling is slightly set around the edges but still a bit wobbly in the center.
- Remove the pan from the oven. The filling will continue to cook later when you add the topping, so don’t over-bake at this stage.
- Let the pan sit at room temperature while you make the strawberry layer.
Step 5: Cook the Strawberry Layer
- In a medium saucepan, combine the diced strawberries, ¼ cup granulated sugar, and 2 tablespoons lemon juice.
- Set the pan over medium heat and cook, stirring occasionally, until the strawberries begin to release their juices and soften, about 5–7 minutes.
- In a small bowl, whisk together the 2 tablespoons cornstarch and 2 tablespoons water to make a smooth slurry.
- Pour the slurry into the strawberry mixture while stirring constantly.
- Continue cooking for another 2–3 minutes, stirring, until the mixture thickens and becomes glossy. It should resemble a chunky strawberry sauce or pie filling.
- Remove from heat and let the strawberry mixture cool for about 5–10 minutes, stirring occasionally to release steam. You want it warm but not piping hot when you spread it over the filling.
Step 6: Make the Crunch Topping
- Place the vanilla sandwich cookies in a zip-top bag and crush them with a rolling pin or the bottom of a heavy glass until they’re in small pieces (not powder—some larger crumbs are good for texture).
- Add the freeze-dried strawberries to the bag or a bowl and lightly crush them as well. You want a mix of red strawberry dust and small pieces.
- Pour the crushed cookies and strawberries into a medium bowl.
- Stir in the melted butter and granulated sugar (if using) until all the crumbs are lightly coated and starting to clump together.
- Set aside while you assemble the bars.
Step 7: Assemble the Layers
- Carefully spoon the warm strawberry mixture over the partially baked cream cheese filling, spreading it in an even layer with a spatula.
- Sprinkle the crunch topping evenly over the strawberry layer.
- Try to cover as much of the surface as possible so every bite gets some crunch.
- Gently press the topping down with your hands or a spatula to help it adhere without smashing the layers underneath.
Step 8: Bake the Bars
- Return the pan to the oven and bake for an additional 15–20 minutes.
- The edges should be slightly puffed and set, and the center should look mostly firm with a slight jiggle when you gently move the pan.
- The topping may look lightly toasted and fragrant—this is perfect.
- Remove the pan from the oven and let the bars cool to room temperature on a wire rack.
Step 9: Chill, Slice, and (Optionally) Glaze
- Once the bars have cooled to room temperature, transfer the pan to the refrigerator.
- Chill for at least 3–4 hours, or until fully set. Overnight chilling gives the best texture and cleanest slices.
- Before slicing, prepare the optional glaze:
- Whisk together the powdered sugar, milk or cream, vanilla, and strawberry puree or syrup (if using) until smooth and drizzle-able.
- Lift the bars out of the pan using the parchment paper overhang.
- Drizzle the glaze over the top in thin lines or a zigzag pattern.
- Use a sharp knife, wiping it clean between cuts, to slice the bars into squares or rectangles.
- Serve chilled or slightly cool and enjoy the layers of creamy filling, juicy strawberries, and crunchy topping in every bite.
Flavor Variations and Creative Twists
One of the best things about Strawberry Crunch Bars is how easily you can customize them. Once you master the basic version, the possibilities are wide open.
1. Mixed Berry Crunch Bars
Instead of using only strawberries, swap part of the strawberry layer with other berries:
- Replace half of the strawberries with blueberries, raspberries, or blackberries.
- Keep the sugar, lemon juice, and cornstarch amounts the same.
The result is a jewel-toned berry layer with a more complex flavor.
2. Strawberry Lemonade Bars
For a bright, tangy twist:
- Add extra lemon zest (about 1–2 teaspoons) to the filling.
- Use a bit more lemon juice in the strawberry layer for added tartness.
- Finish with a lemon-infused glaze by replacing some of the milk with lemon juice.
These bars are perfect for spring and summer gatherings.
3. White Chocolate Strawberry Crunch Bars
Bring in a bit of creamy sweetness:
- Stir ½–¾ cup white chocolate chips into the cream cheese filling before baking.
- Or drizzle melted white chocolate over the cooled bars instead of (or in addition to) the glaze.
White chocolate pairs beautifully with strawberries and makes the bars even more dessert-like.
4. Oreo Strawberry Crunch Bars
For a more intense cookie flavor:
- Replace half of the graham crackers in the crust with vanilla sandwich cookies.
- Use only vanilla cookies (no grahams) in the topping for an ultra-cookie crunch.
This version tastes like a mash-up of strawberry cheesecake and cookie bars.
5. Lighter, Yogurt-Based Version
If you want a slightly lighter dessert:
- Replace half of the cream cheese with Greek yogurt.
- Use a bit less sugar in the filling and skip the glaze or use a very light drizzle.
You’ll still get creamy bars with strawberry flavor, but with a fresher, lighter feel.
How to Serve Strawberry Crunch Bars
These bars are incredibly versatile and fit almost any occasion.
Perfect for Parties and Potlucks
Slice the bars into neat squares and arrange them on a platter. The red strawberry layer and speckled pink-and-gold crunch topping make them eye-catching even before anyone takes a bite.
They travel well, so they’re excellent for potlucks, school events, work parties, or family celebrations.
As a Chilled Dessert
Serve the bars cold from the fridge for the best texture. The creamy filling firms up, the strawberry layer holds its shape, and the crunch topping stays crispy.
You can add:
- A dollop of whipped cream on the side
- A few fresh strawberry slices on each plate
- A mint leaf on top for a fresh color contrast
With Ice Cream
For an extra indulgent dessert, pair a square of Strawberry Crunch Bar with:
- A scoop of vanilla ice cream
- Strawberry or cheesecake ice cream for even more flavor
The contrast between creamy ice cream and the crunchy topping is rich, cool, and satisfying.
As a Lunchbox Treat
If you cut the bars into smaller rectangles, they make great lunchbox or snack-box treats. Just keep them chilled in an insulated bag with an ice pack to maintain their texture and food safety.
Tips & Variations for Perfect Strawberry Crunch Bars
A few simple tips will make the difference between good bars and truly unforgettable ones.
Choose the Right Strawberries
- Fresh, ripe strawberries give the brightest flavor and color.
- If using frozen berries, thaw them completely and drain off excess liquid before cooking, or you may need a little extra cornstarch to thicken the mixture.
Don’t Over-Bake the Filling
- The filling should be just set around the edges and slightly jiggly in the center when you first bake it.
- Over-baking can make the filling dry or grainy instead of creamy.
Remember it will bake a bit more once the strawberry layer and topping are added.
Keep the Crunch Topping Crisp
To keep the topping from getting soggy:
- Use freeze-dried strawberries, not fresh, in the crunch topping. Fresh berries will soften the cookie crumbs.
- Make sure the strawberry layer has thickened properly on the stove before spreading it onto the filling.
- Let the bars cool completely and then chill them; this helps the topping set firmly.
Chill Before Slicing
Patience pays off here. Chilling gives the filling time to firm and the layers time to settle.
- If you try to slice while warm, the filling may ooze and the slices won’t be clean.
- A few hours in the fridge (or overnight) makes the bars easier to cut and serve.
Adjust the Sweetness to Taste
If you prefer a less sweet dessert:
- Reduce the sugar slightly in the filling and strawberry layer.
- Skip the optional glaze or use a very thin drizzle.
If you like sweeter bars, you can:
- Add a tablespoon or two of sugar to the strawberry layer.
- Use the full glaze and even a bit of white chocolate drizzle on top.
Final Thoughts
Strawberry Crunch Bars are a joyful, crowd-pleasing dessert that combine the best parts of several treats: the creamy richness of cheesecake, the fruity brightness of strawberry pie, and the playful crunch of your favorite childhood ice cream bar.
They prove that you don’t need complicated techniques or fancy equipment to create something special. With a simple press-in crust, a straightforward cream cheese filling, a quick stovetop strawberry layer, and a handful of crushed cookies and freeze-dried strawberries, you can build a dessert that looks bakery-worthy and tastes even better.
These bars are perfect for:
- Summer gatherings and barbecues
- Birthday celebrations
- Holiday dessert tables
- Baby showers, bridal showers, or afternoon tea
- Or simply as a treat for you and your family any day of the week
Once you’ve made them once, you’ll likely find yourself coming back to the recipe again and again—trying new variations, mixing in different berries, playing with citrus or chocolate, and customizing the sweetness to your taste.
Strawberry Crunch Bars are more than just a dessert; they’re a little slice of happiness in bar form, with every bite offering creamy, crunchy, fruity comfort.
FAQ
Can I use a different type of cookie for the crunch topping?
Yes. While vanilla sandwich cookies pair beautifully with strawberries, you can use:
- Shortbread cookies for a more buttery flavor
- Plain graham crackers for a slightly less sweet topping
- Sugar cookies for a softer, sweeter crunch
If you change the cookies, taste the mixture and adjust the added sugar as needed.
Can I make Strawberry Crunch Bars ahead of time?
Absolutely. These bars are an excellent make-ahead dessert.
- Bake, assemble, and chill the bars completely.
- Store them covered in the refrigerator for up to 3 days.
- The flavor often improves as the layers have time to meld, and the bars slice more cleanly after a long chill.
Can I freeze Strawberry Crunch Bars?
Yes, Strawberry Crunch Bars freeze well.
- Once completely cooled and chilled, cut the bars into squares.
- Place them on a baking sheet lined with parchment in a single layer and freeze until firm.
- Transfer the frozen bars to an airtight container or freezer bag, separating layers with parchment paper.
- Freeze for up to 2–3 months.
To serve, thaw the bars in the refrigerator. The topping may soften slightly but will still be delicious.
Can I use low-fat cream cheese or yogurt in the filling?
You can, but the texture and richness will change slightly.
- Full-fat cream cheese gives the smoothest, creamiest filling.
- Low-fat cream cheese and yogurt can be used, but the filling may be a bit softer and less rich.
If you decide to use lighter ingredients, be sure to chill the bars very well before slicing.
What if I don’t have freeze-dried strawberries for the topping?
Freeze-dried strawberries provide intense flavor and crunch, but if you don’t have them:
- You can use just crushed vanilla cookies and a little extra sugar for a simple cookie crumble.
- Add a bit of strawberry instant drink powder (like strawberry milk powder) to the crumbs for color and flavor if available.
The bars will still be delicious, just with a milder strawberry flavor in the topping.
How do I keep my crust from falling apart?
If your graham cracker crust is too crumbly:
- Make sure you’re using enough melted butter; the crumbs should look like wet sand.
- Press the crust firmly into the pan—really pack it down with the bottom of a cup.
- Pre-bake the crust before adding the filling so it sets properly.
Following these steps will give you a crust that holds together when you slice the bars.
Can I turn these into no-bake bars?
A fully no-bake version is possible with a few adjustments:
- Use a no-bake graham cracker crust (press and chill instead of pre-baking).
- Replace the baked cream cheese filling with a stabilized, whipped no-bake cheesecake mixture.
- Use a thick, cooled strawberry sauce or jam on top.
- Add the crunch topping and chill until firm.
The flavor will be similar, though the texture will be more like a chilled cheesecake with a crumb topping, and it won’t be as firm as the baked version.